Metafields
Metafields
Using Metafields in External User Manager for Onboarding process:
Metafields setting allows the user to use different types of Metafields such as Text, Datepicker, Dropdown or Checkbox for their onboarding process.
This section describes how the user will be able to make use of these 4 types of Metafields types (Text, Datepicker, Dropdown, Checkbox) in their onboarding process to make it more informative.
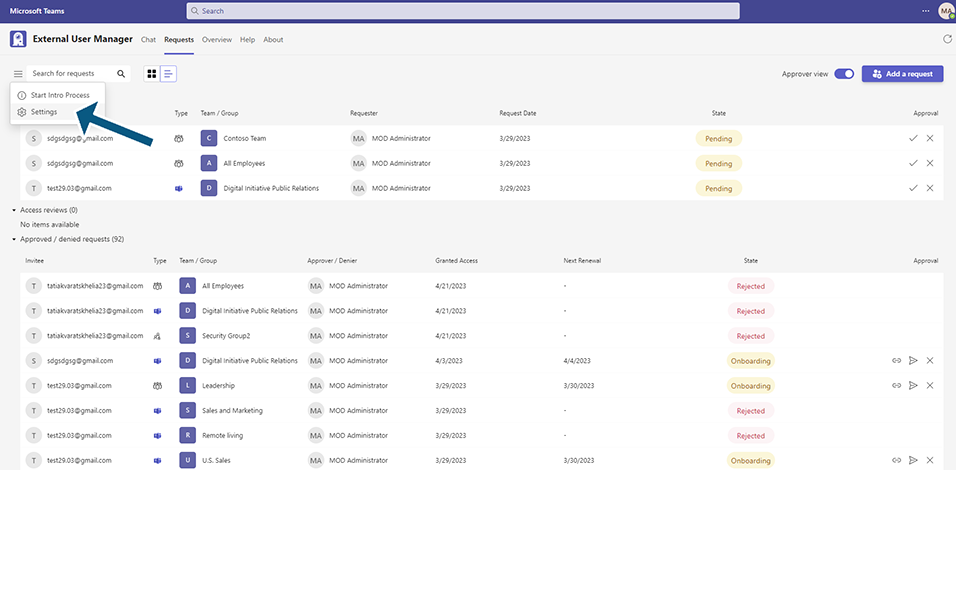
Go to External User Manager and navigate to the settings tab through Requests-hamburger menu.
Under “Onboarding” click on ‘Metafields’ and then ‘Add a Metafields’ button.
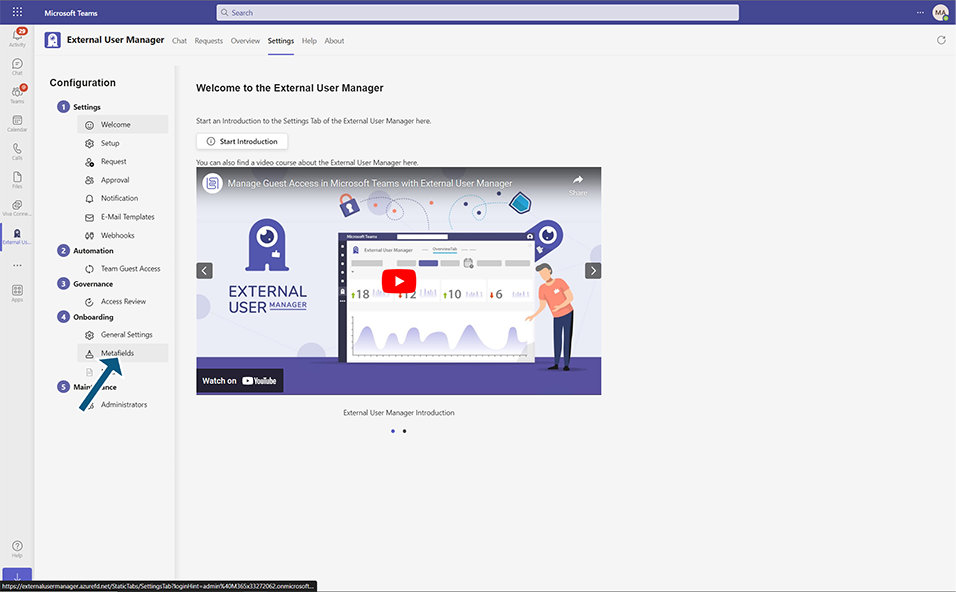
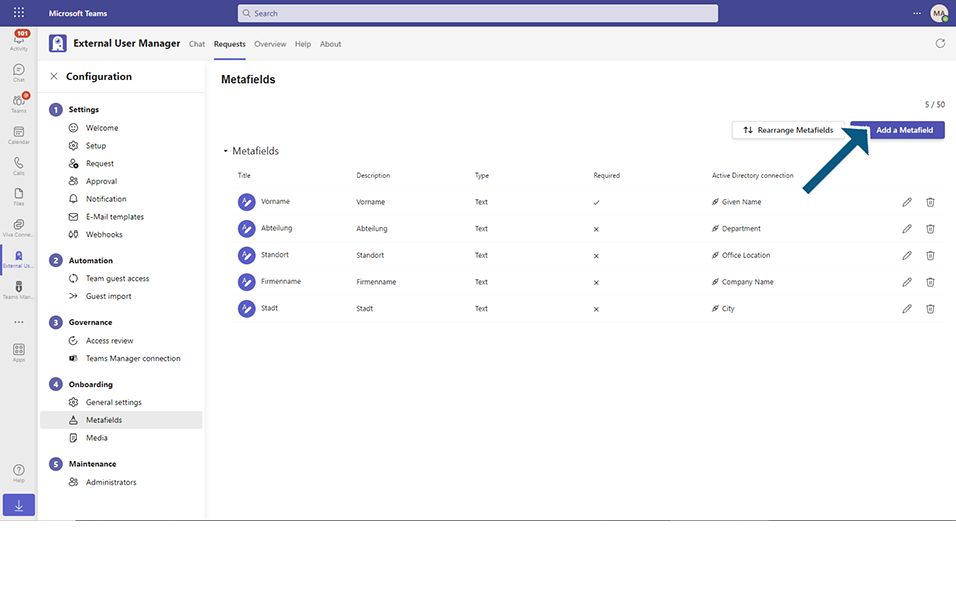
Screenshot
Text:
Choose Text under ‘Choose a field type’.
Give the chosen Metafields a title. For example, ‘e.g., Test1’.
Turn the toggle on if the field is required.
Metafields: Active Directory connection
This feature allows you to connect a metafield to Active Directory for automatic updates and consistent information.
NOTE: If user wants to use this feature open the Metafields section and press “+Add a Metafield” button or user can choose an existing metafield with a type of text.
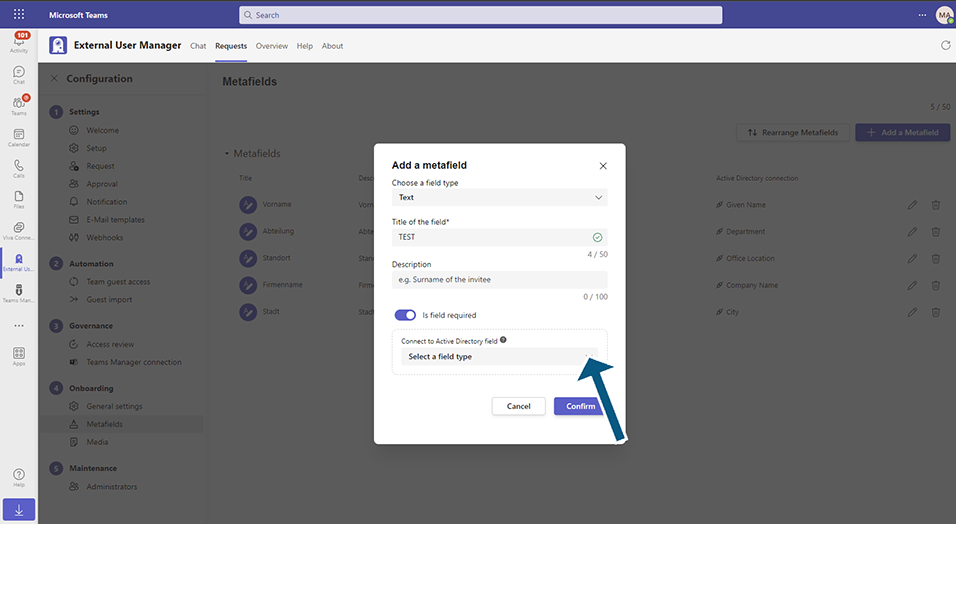
After that user will be able to select a field type from Active Directory fields and create a new metafield connected with it.
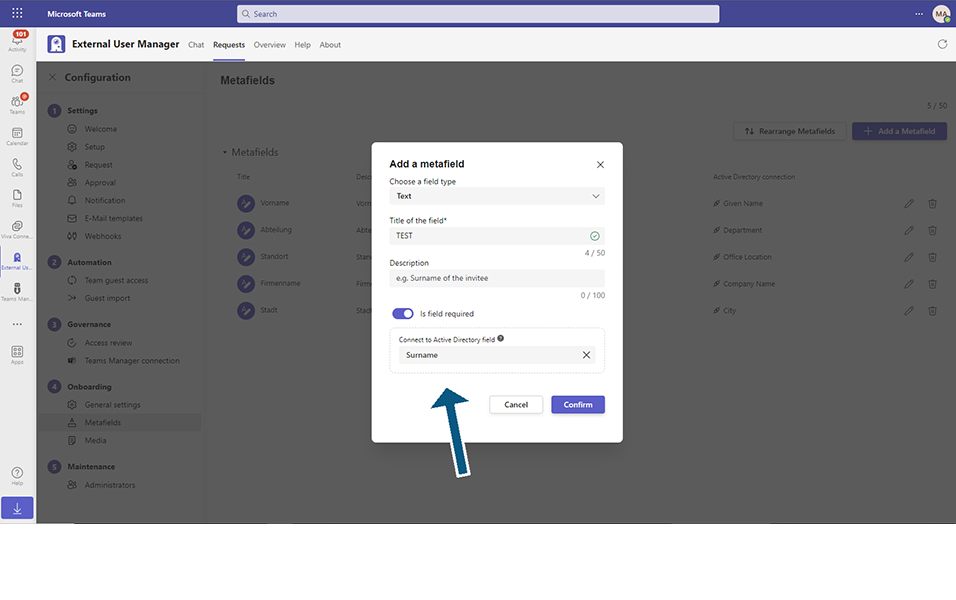
Please note that each Active Directory field can be used only for one metafield.
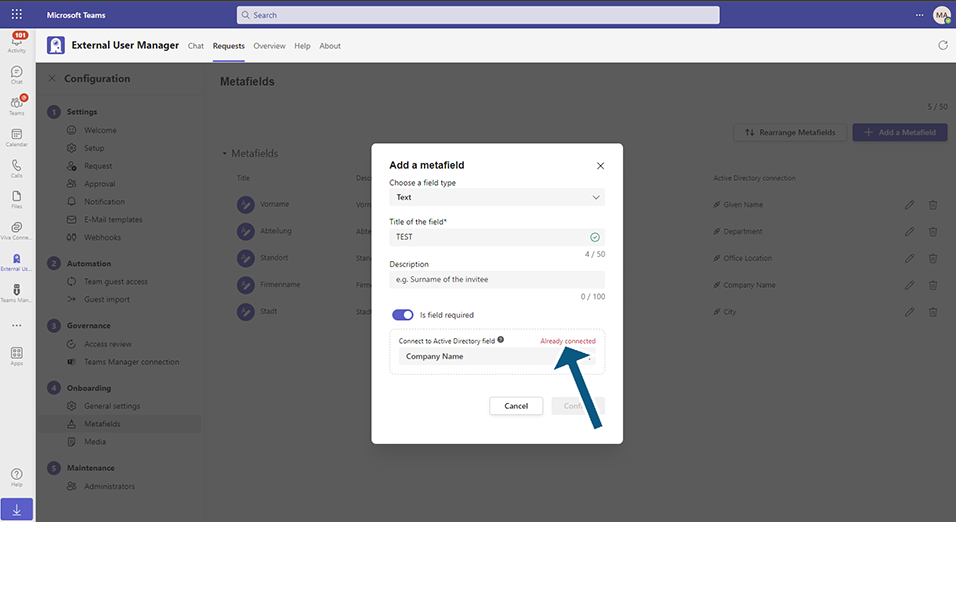
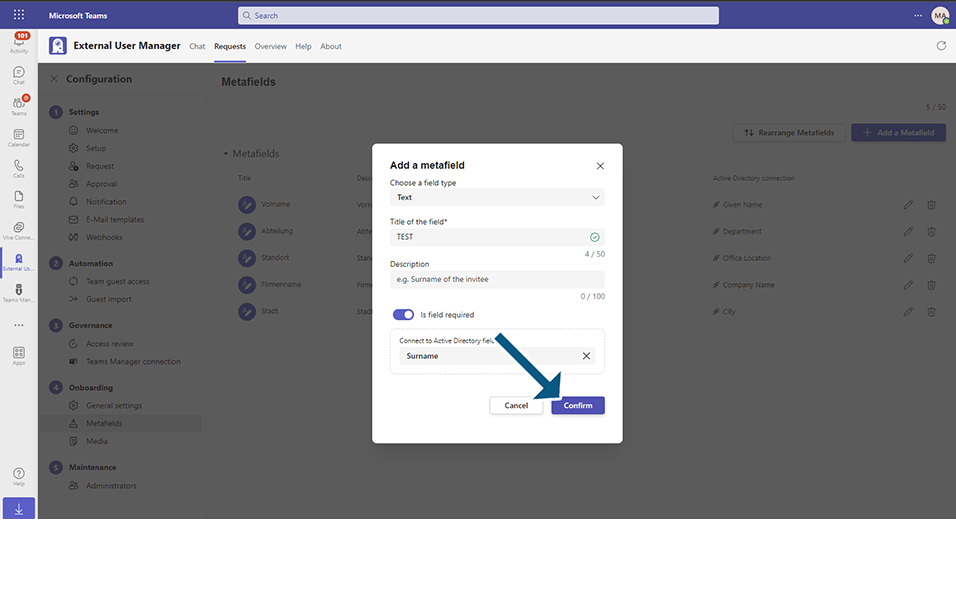
click the "Confirm" button, "Text type: Metafield" will be in the list.
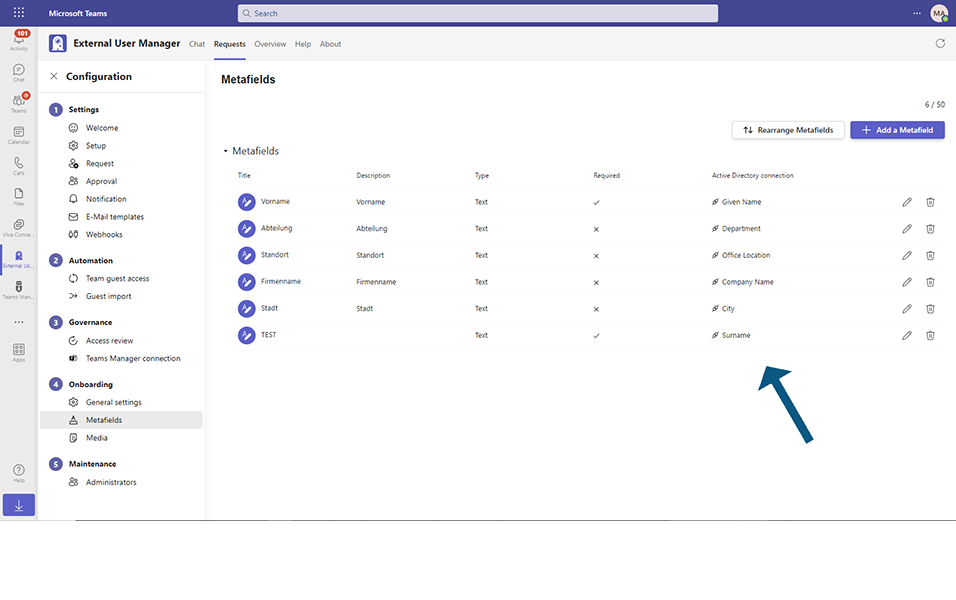
Active Directory connection column is displayed on Metafields section.
Mentioned column contains related icon and Active Directory field name.
Datepicker:
Choose Datepicker under ‘Choose a field type’.
Give the chosen Metafields a title. For example, ‘e.g., Test2.
Turn the toggle on if the field is required.
Click the "Confirm" button, "Datepicker type: Metafield" will be in the list.
Checkbox:
Choose Checkbox under ‘Choose a field type’.
Give the chosen Metafields a title. For example, ‘e.g., Test3.
Turn the toggle on if the field is required.
Click the "Confirm" button, "Checkbox type: Metafield" will be in the list.
Dropdown:
Choose Dropdown under ‘Choose a field type’.
Give the chosen Metafields a title. For example, ‘e.g., test4.
Give the value for options (Separated with ‘;’)
Turn the toggle on if the field is required.
Click the "Confirm" button, "Dropdown type: Metafield" will be in the list.
After uploading the necessary Metafields the admin has the possibility to rearrange these Metafields files based on which Metafields will appear first on end user’s screen during onboarding process.
Click on ‘Rearrange Metafields’ next to ‘Add new Metafields’ and a pop-up window will appear
The first Metafields, which is on the top, will appear first, below it will appear second and so on.
You may click and hold on the three lines next to the Metafields name and drag it to change its position.
You can also edit or remove Metafields.
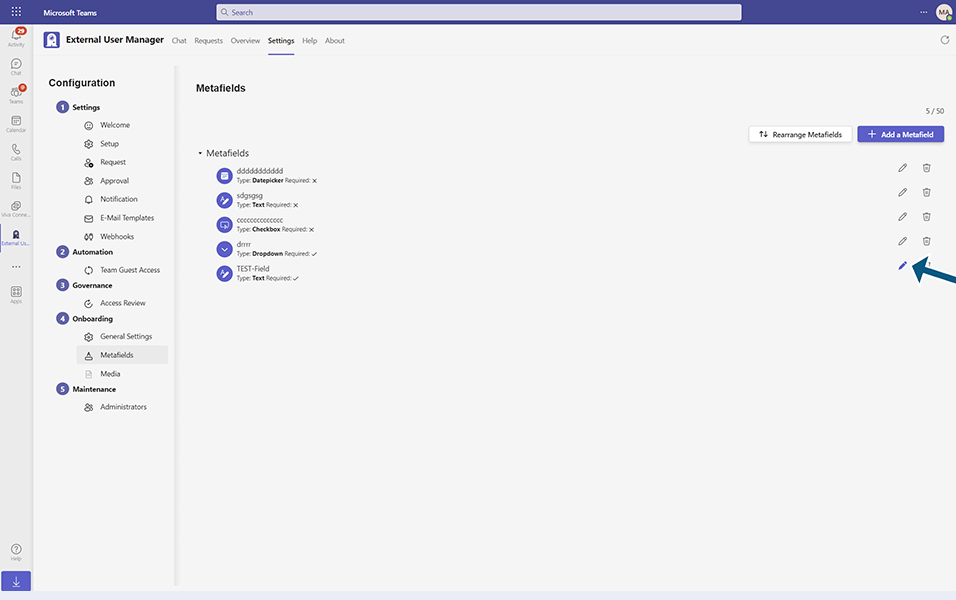
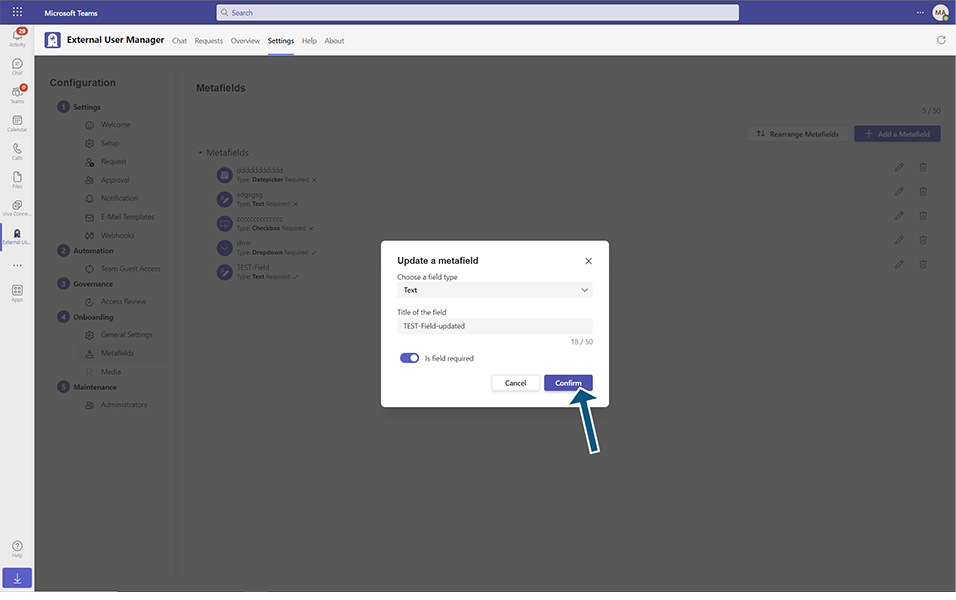
To edit, click the "Edit" icon and make the changes. After clicking the "Confirm" button, the edit will be applied.
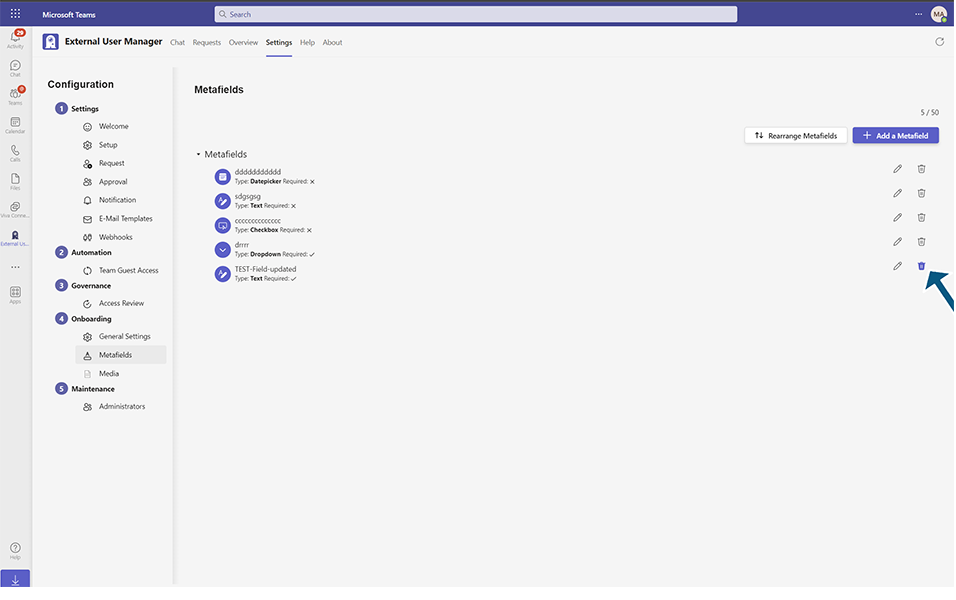
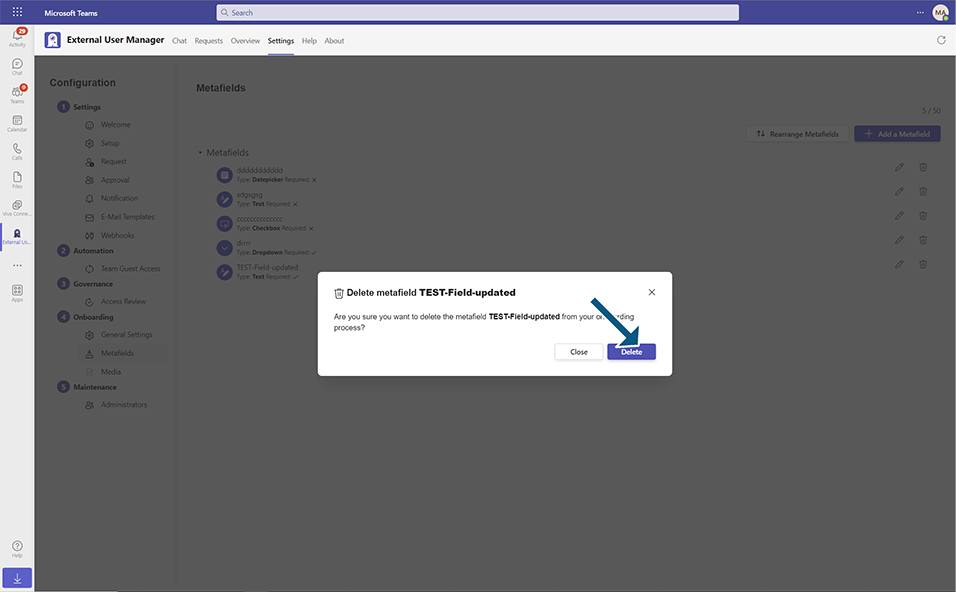
To delete Metafield, click the "Delete" icon and then click on the "Delete" button. The metafield will be deleted and it will no longer appear in the list under Settings / Metafields.
This completes the functionality on using Metafields for the External User Manager’s Onboarding process.