Media
Media
Using media in External User Manager for Onboarding process:
Media setting allows the user to use different types of media such as PDF, HTML or Video for their onboarding process.
This section describes how the user will be able to make use of these 3 types of media types(PDF, HTML, Video) in their onboarding process in order to make it more informative.
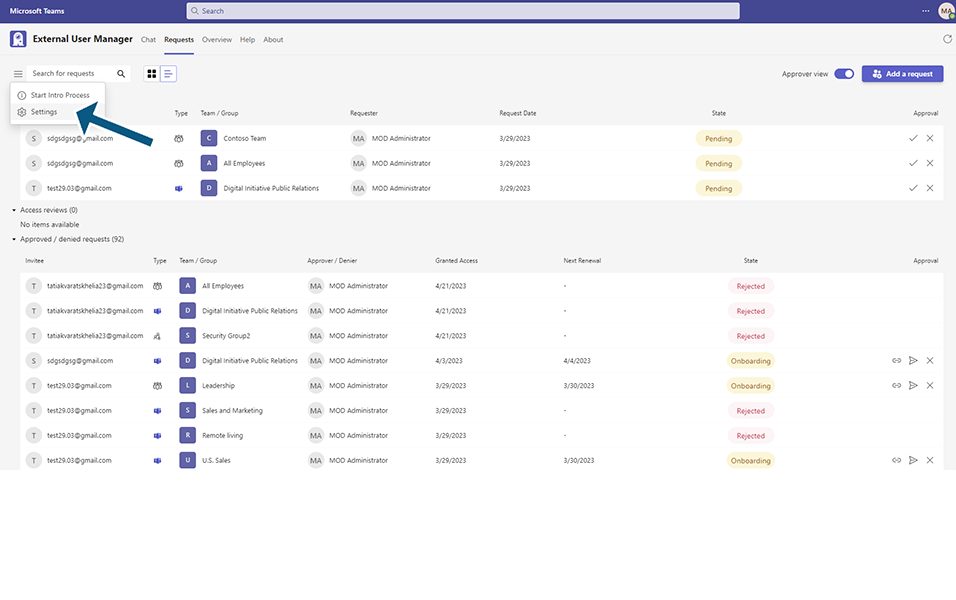
Go to External User Manager and navigate to the settings tab from Requests- hamburger menu.
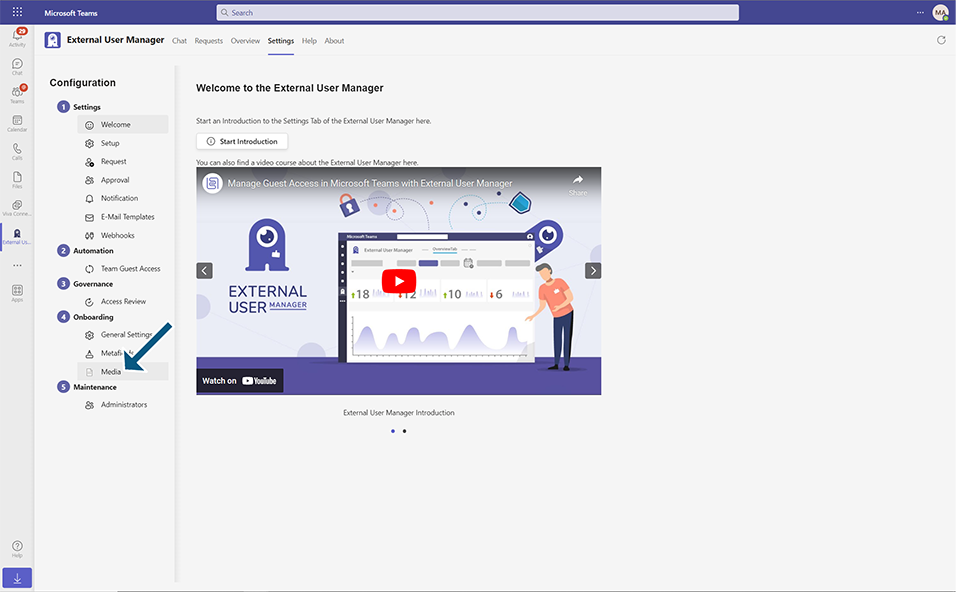
Under the Onboarding setting, click ‘Media’.
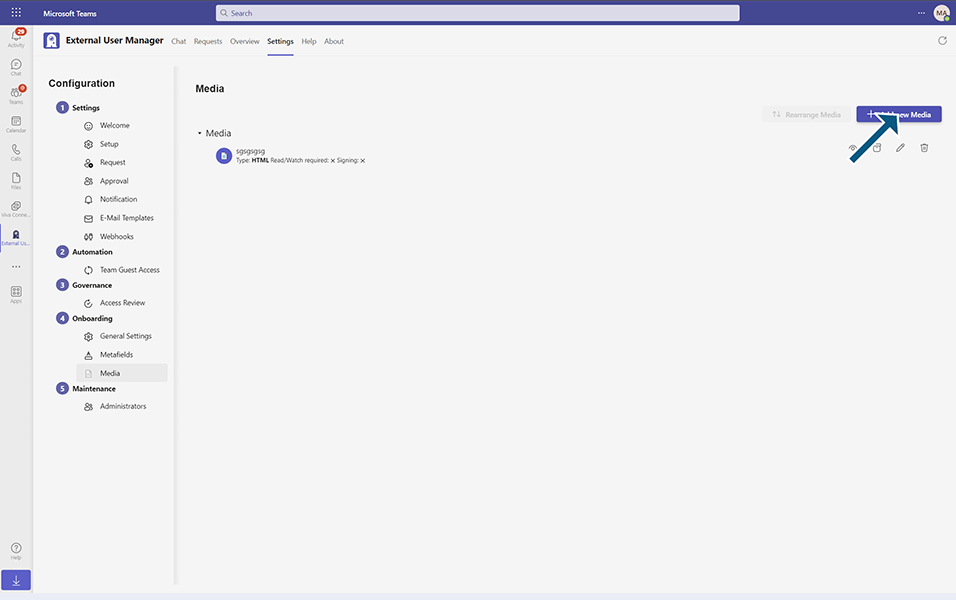
Click on ‘Add new Media’ button.
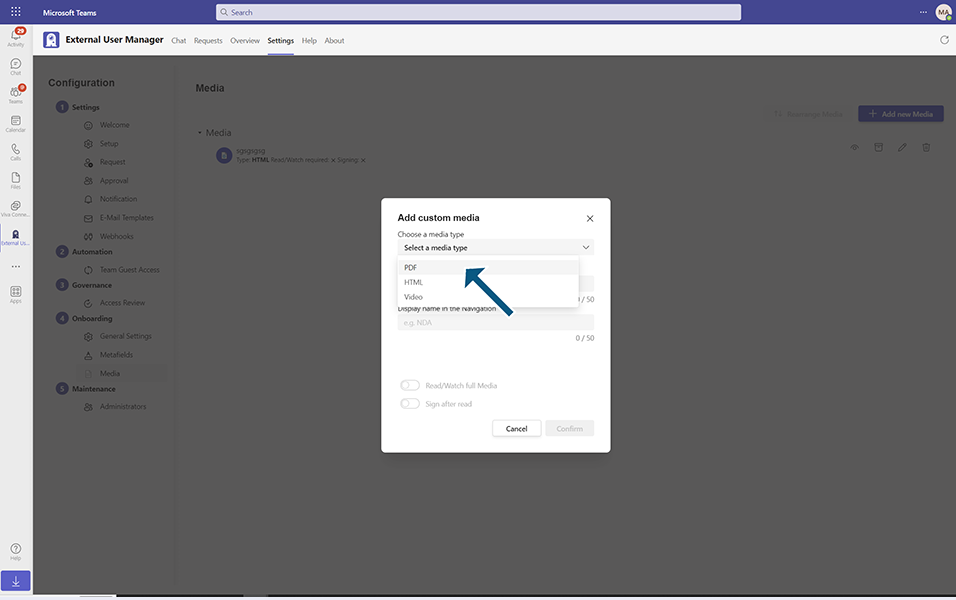
Here you can choose 1 out of three options.
PDF:
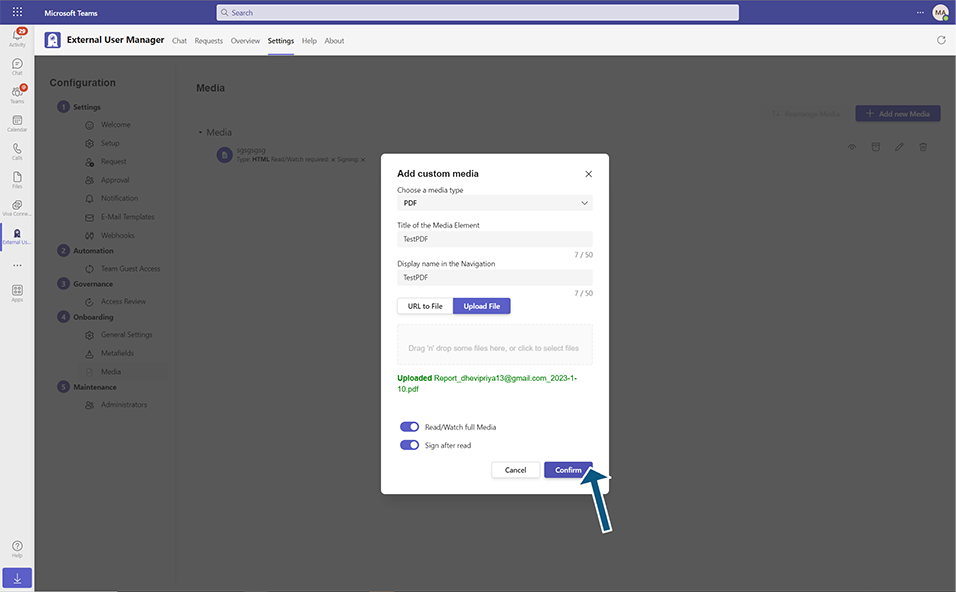
Choose PDF under ‘Choose a media type’.
Give the chosen media a title. For example ‘Our NDA’.
Give the chosen media a Display name. For example ‘NDA’.
There will be two options for linking the file, either via URL or by uploading it.
Upload the file which you’d like to use for the process.
If the ‘Read/Watch full Media’ is turned on, the invitee should read or watch the document fully before continuing.
If the ‘Sign after read’ is turned on, the invitee should sign the document before continuing.
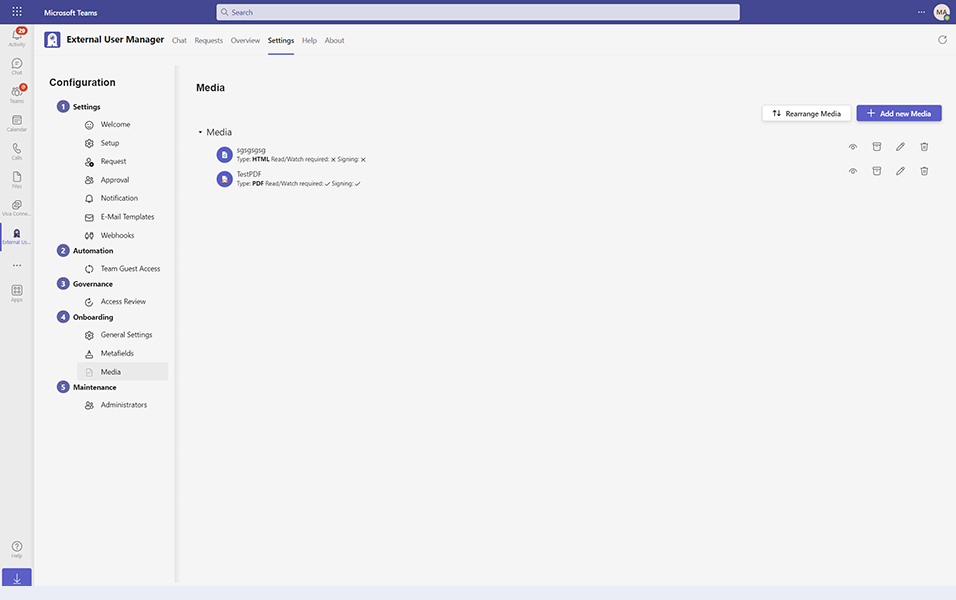
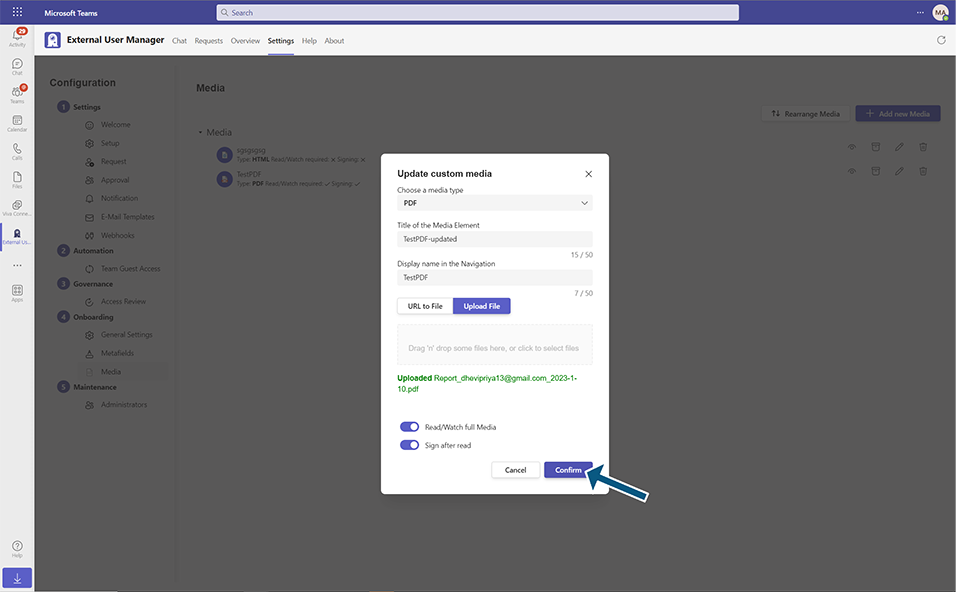
Click on ‘Confirm’ for the file to be uploaded successfully.
HTML:
Choose HTML under ‘Choose a media type’.
Give the chosen media a title. For example ‘Our NDA’.
Give the chosen media a Display name. For example ‘NDA’.
Type an HTML content you want the end user to see.
If the ‘Read/Watch full Media’ is turned on, the invitee should read or watch the document fully before continuing.
If the ‘Sign after read’ is turned on, the invitee should sign the document before continuing.
Click on ‘Confirm’ for the file to be uploaded successfully.
Video:
Choose HTML under ‘Choose a media type’.
Give the chosen media a title. For example ‘Our NDA’.
Give the chosen media a Display name. For example ‘NDA’.
Enter the link to the file.
If the ‘Read/Watch full Media’ is turned on, the invitee should read or watch the document fully before continuing.
If the ‘Sign after read’ is turned on, the invitee should sign the document before continuing.
Click on ‘Confirm’ for the file to be uploaded successfully.
After uploading the necessary media the admin user has the possibility to rearrange these media files based on which media will appear first on end user’s screen during onboarding process.
Click on ‘Rearrange Media’ next to ‘Add new Media’ and a pop-up window will appear
The first media which is on the top will appear first, below it will appear second and so on.
You may click and hold on the three lines next to the media name and drag it to change it’s position.
Preview/history/edit/delete Media.
Go to External User Manager settings, under Onboarding click on Media. Administrator will be able to do all the actions on the uploaded media, mentioned above.
Preview:
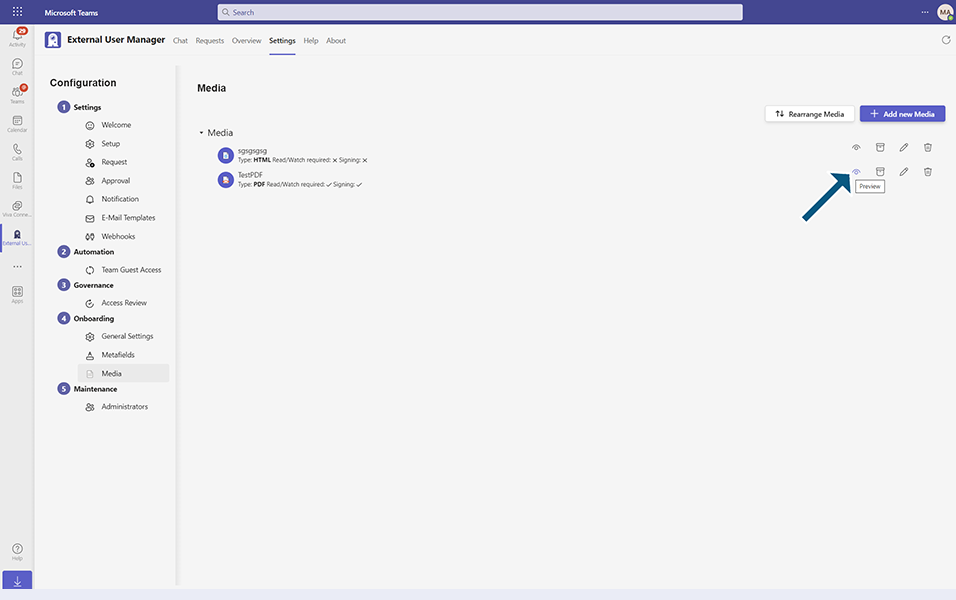
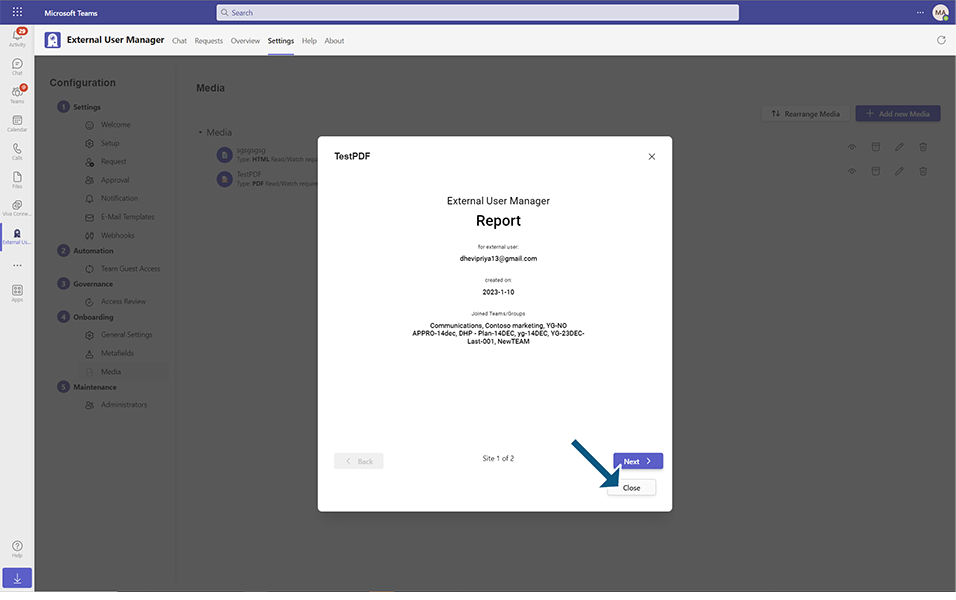
Administrator will be able to preview the media, how it will be shown to the end user, when clicking on the corresponding icon.
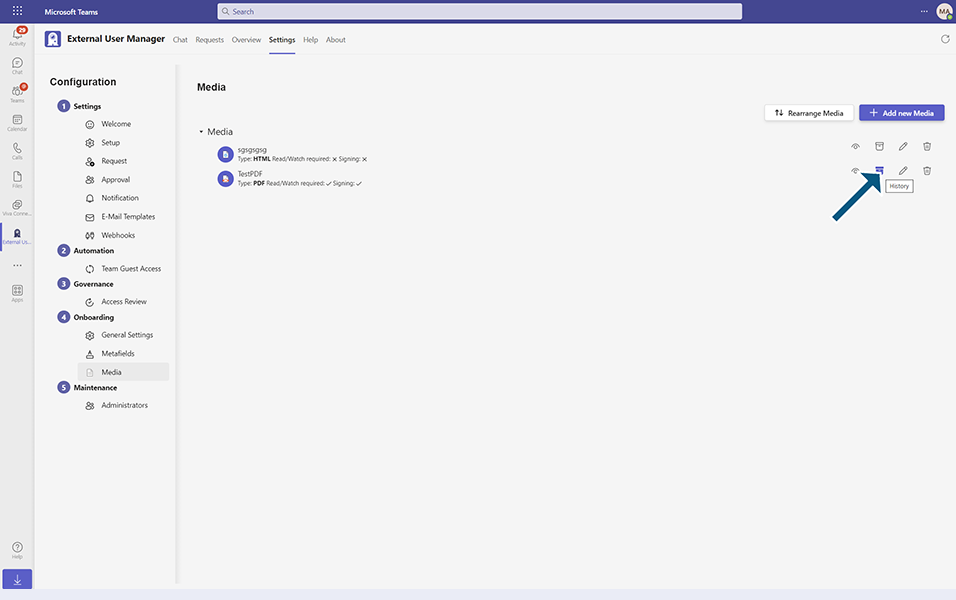
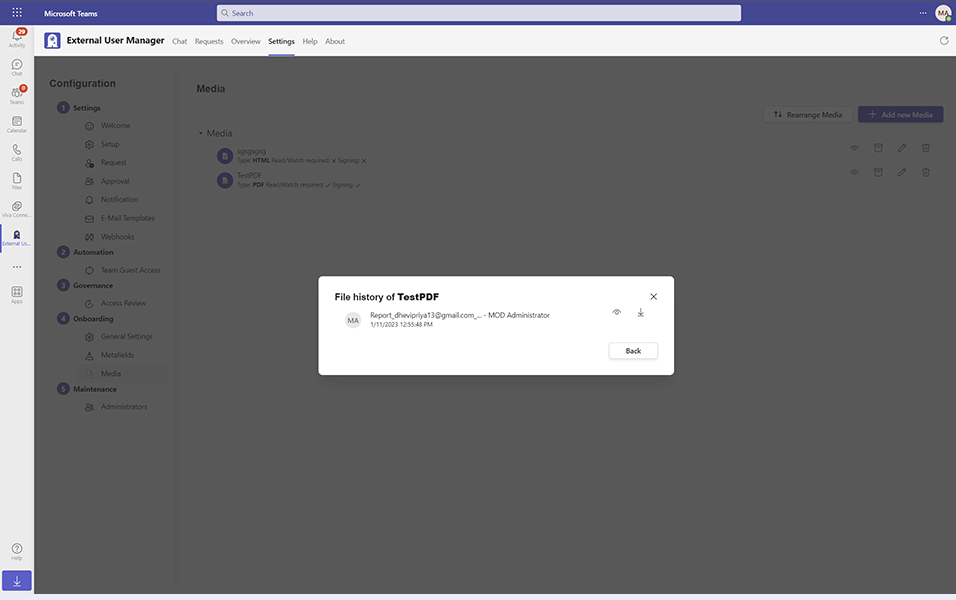
History:
Administrator will be able to see the history of the media, when clicking on the corresponding icon.
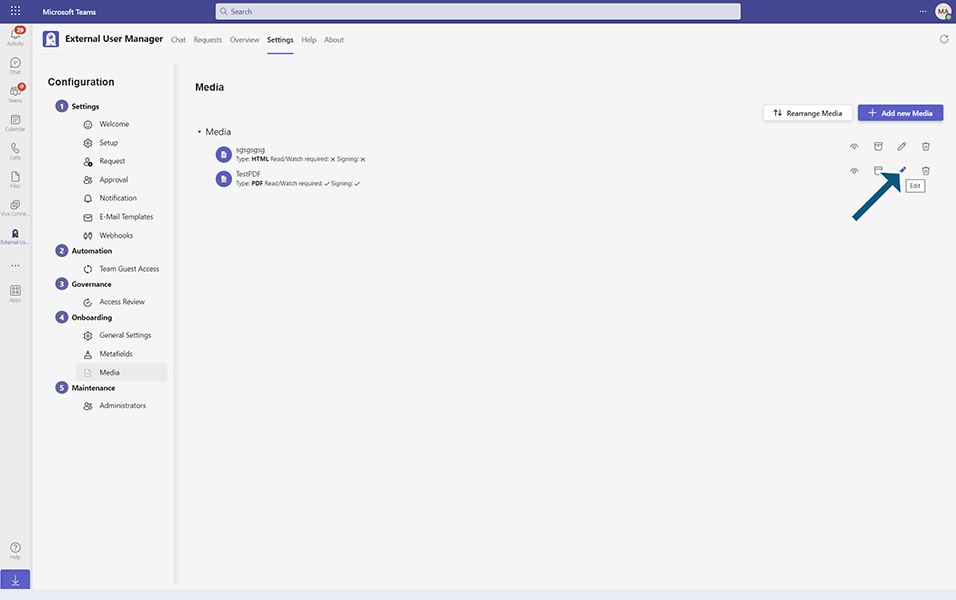
Edit:
Administrator will be able to edit the specific media, when clicking on the corresponding icon.
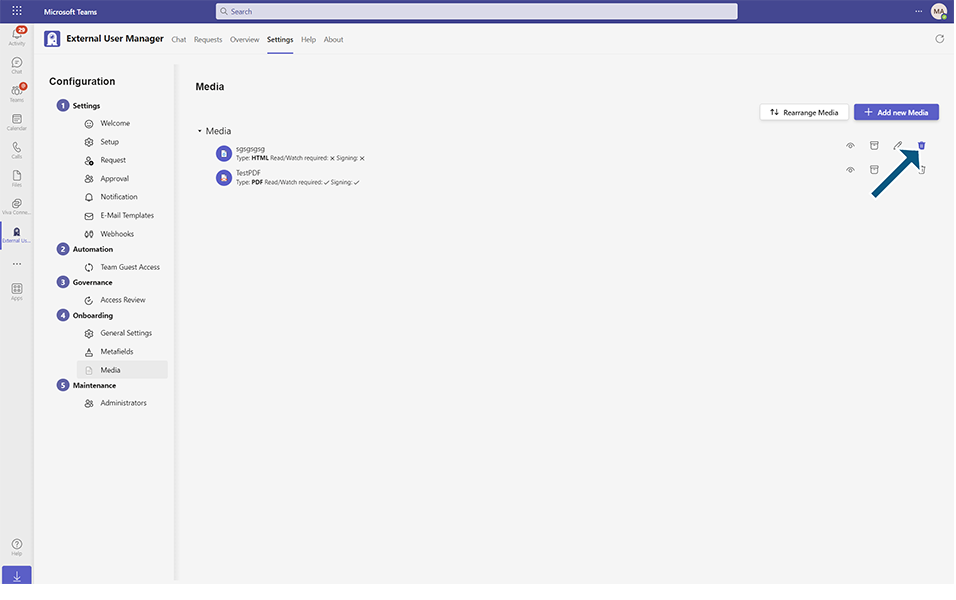
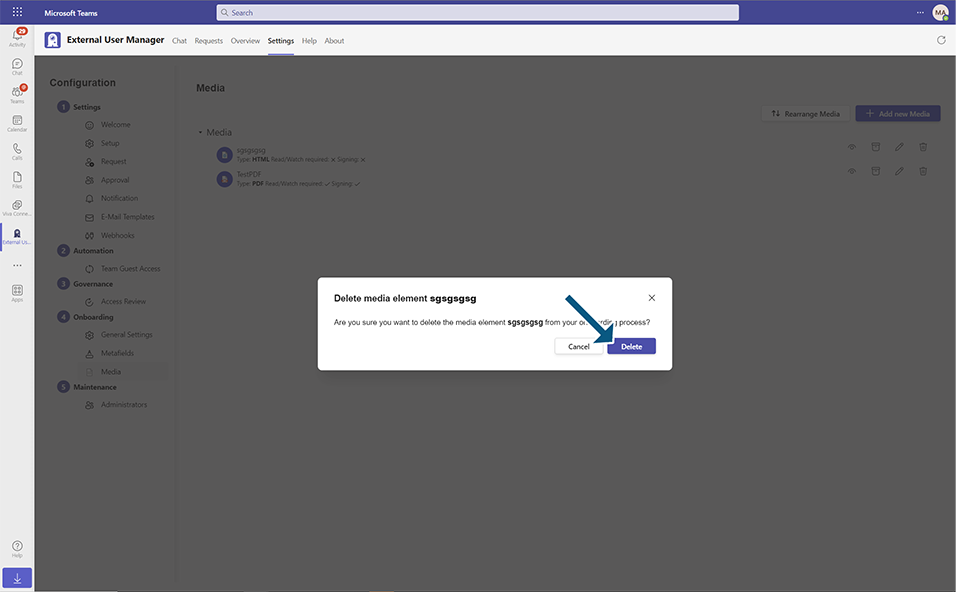
Delete:
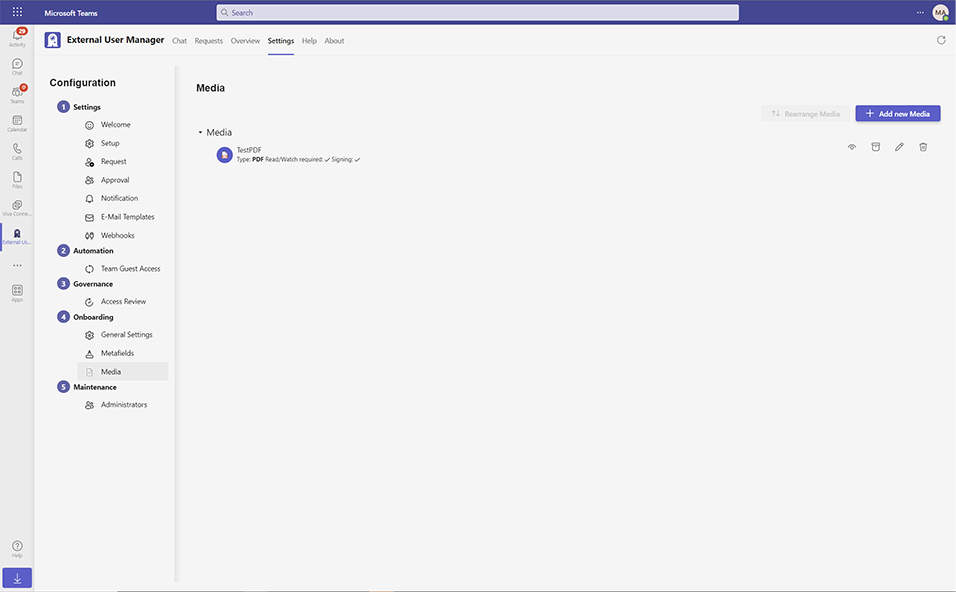
Administrator will be able to delete the specific media when clicking on the corresponding icon.
This completes the functionality on using Media for the External User Manager’s Onboarding process.