Trigger of Flow when new Workspace created
Trigger of Flow when new Workspace is created
This section describes the steps as in what happens when a new workspace is created in CM365 and the status is set as Approved by Flow.
1. Go to Workspace page of Collaboration Manager 365 and create a new Item of type "Item".
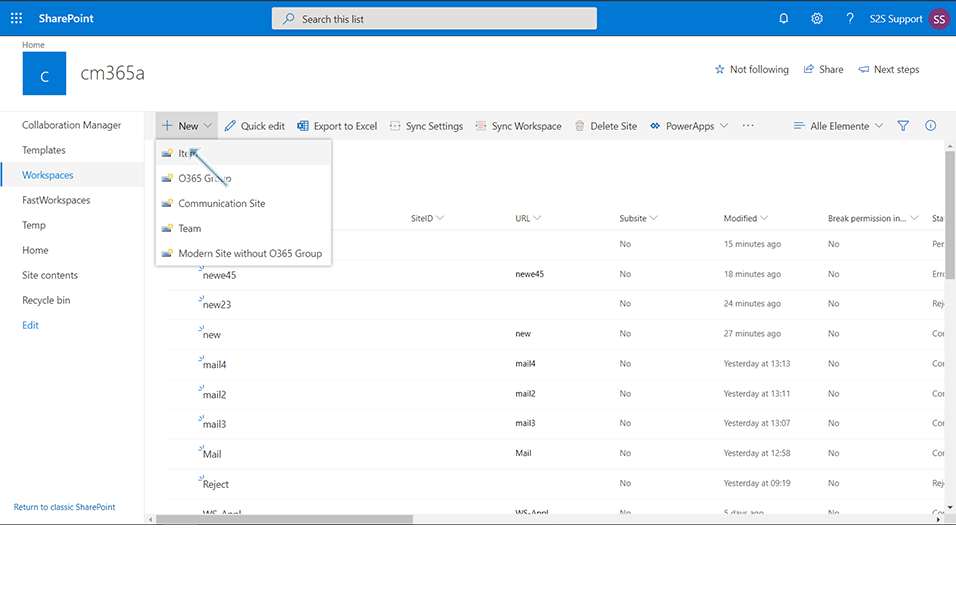
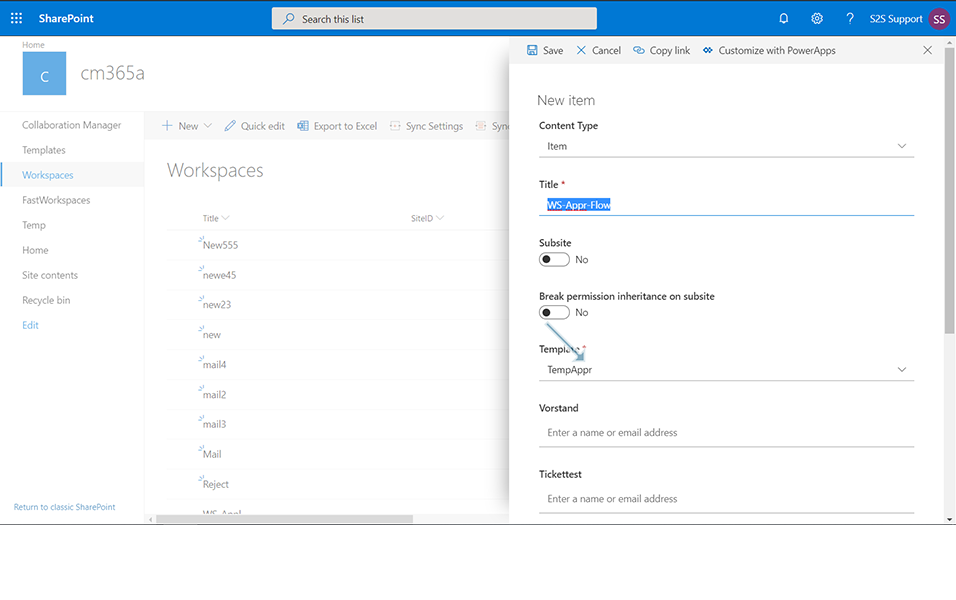
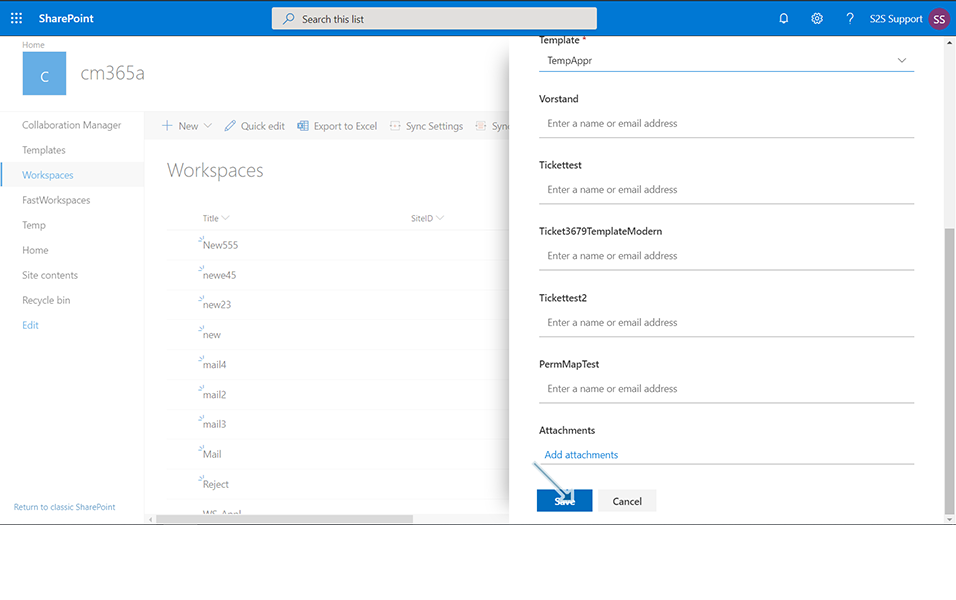
2. Enter the Title as "WS-Appr-Flow", select template as "Temp-Appr" and click on button "Save".
Note: Template "Temp-Appr" should be already available in CM365.
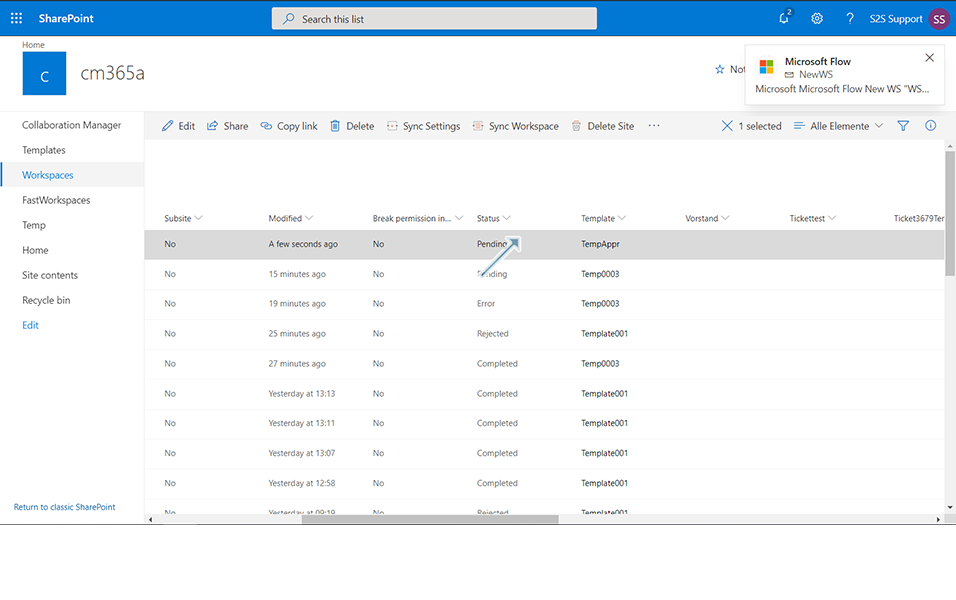
3. Click on Refresh "F5" and status of the workspace is in "Pending".
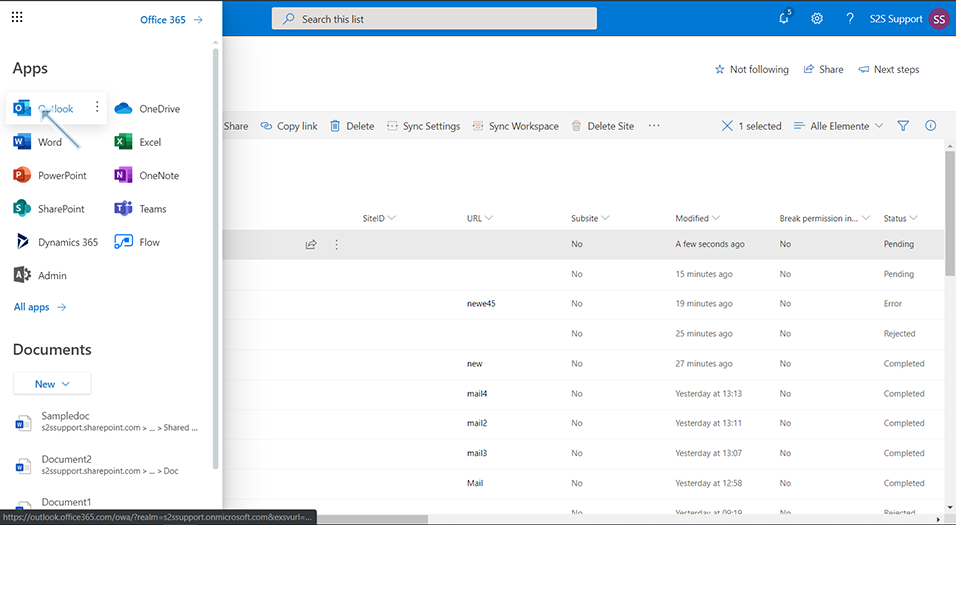
4. Click on App Launcher icon ![]() in the left top panel of the window and Click on Outlook.
in the left top panel of the window and Click on Outlook.
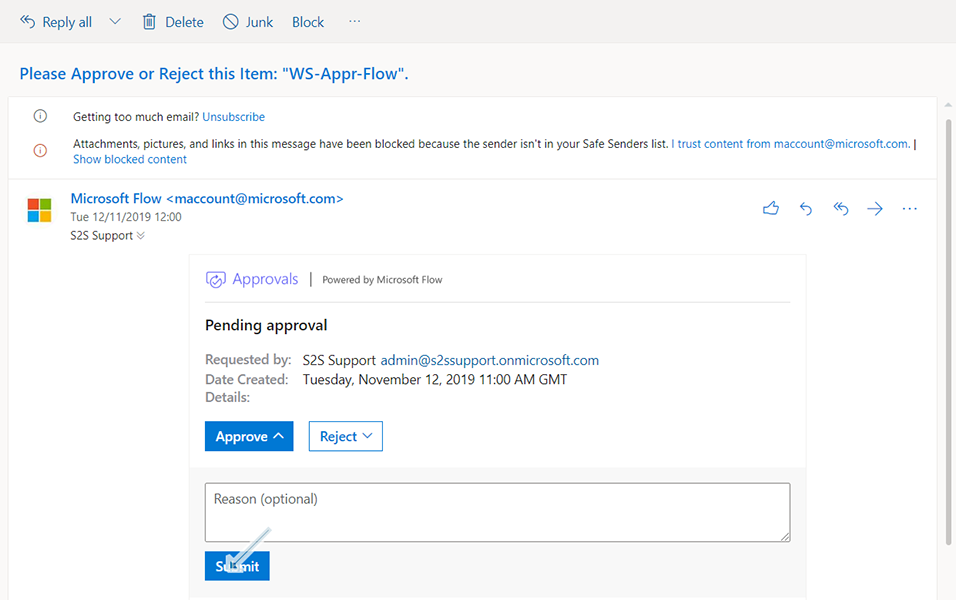
5. There is a new mail from the account which has been created by the Flow, with subject "Please Approve or Reject this Item: "WS-Appr-Flow" ".
6. Body of the new mail will be Pending Approval with Requested by, Date created and the option to Approve or Reject.
7. Click on button "Approve" and click on button "Submit".
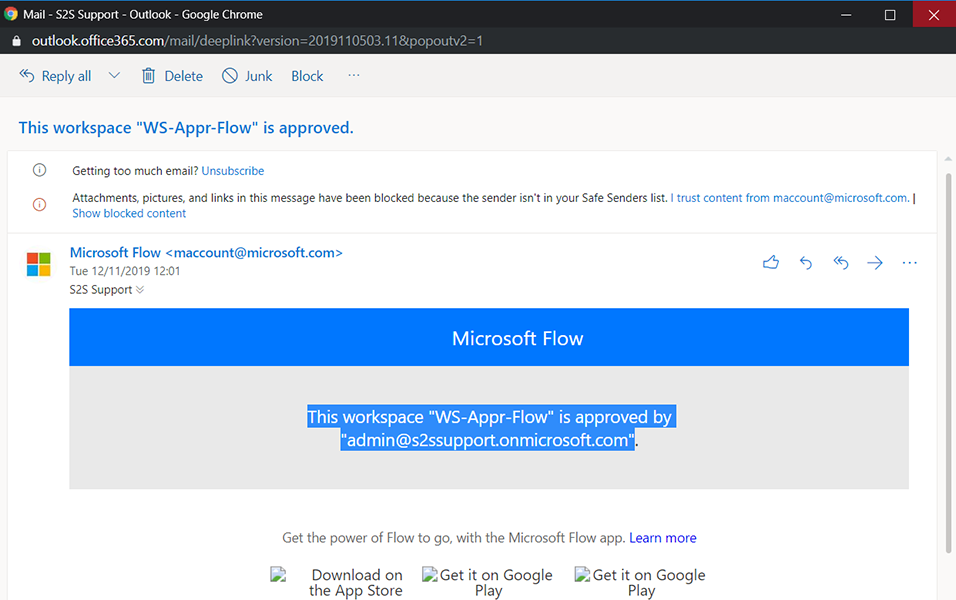
8. A new mail is sent to the user with title "Workspace "WS-Appr-Flow" is approved".
9. Body of the mail will be "Workspace "WS-Appr-Flow" is approved by (user name)".
10. Go to Workspace page of Collaboration Manager 365 and the status of workspace "WS-Appr-Flow" is set to "Approved".

11. Click on Refresh "F5" and status of the workspace is in "Creating".
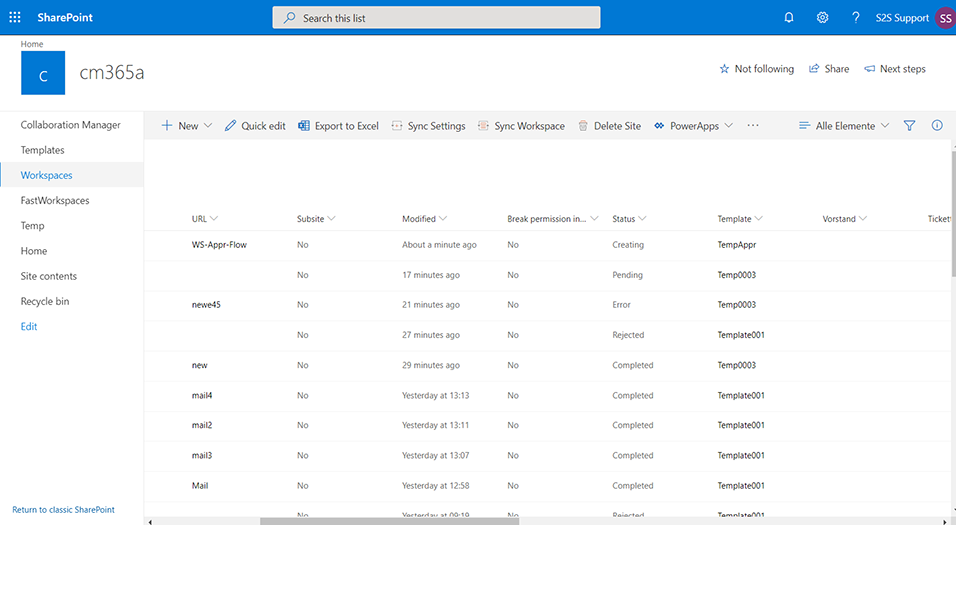
12. Click on Refresh "F5" after 2-3 mins and the status of the workspace is in "Completed".
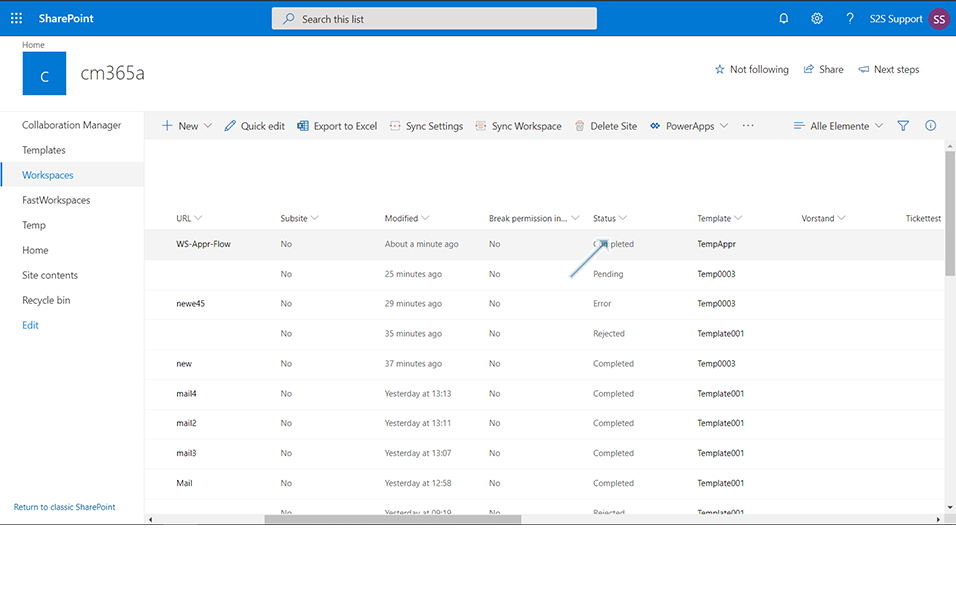
This section describes the steps as in what happens when a new workspace is created in CM365 and the status is set as Rejected by Flow.
1. Go to Workspace page of Collaboration Manager 365 and create a new Item of type "Item".
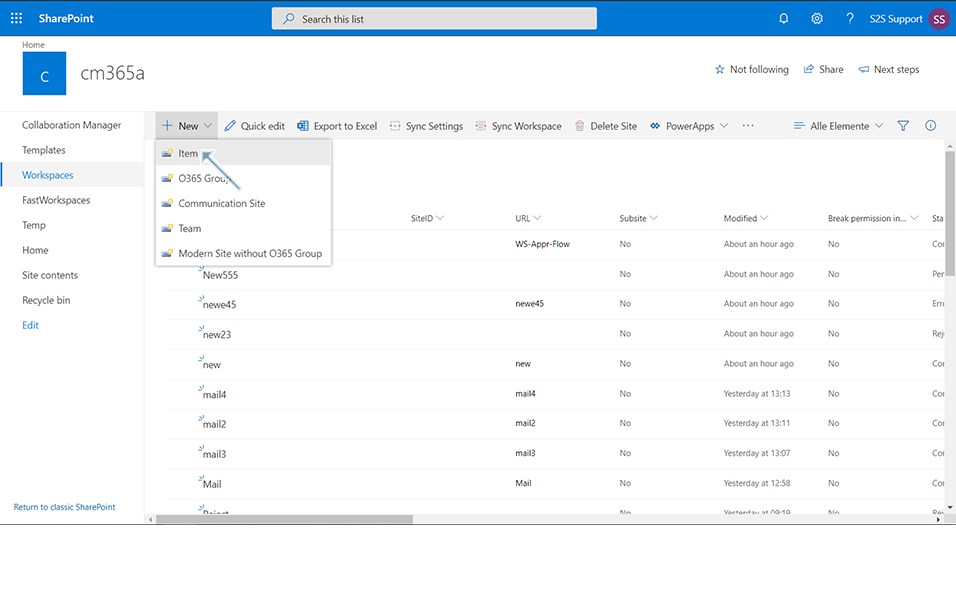
2. Enter the Title as "WS-Rej-Flow", select template as "Temp-Rej" and click on button "Save".
Note: Template "Temp-Rej" should be already available in CM365.
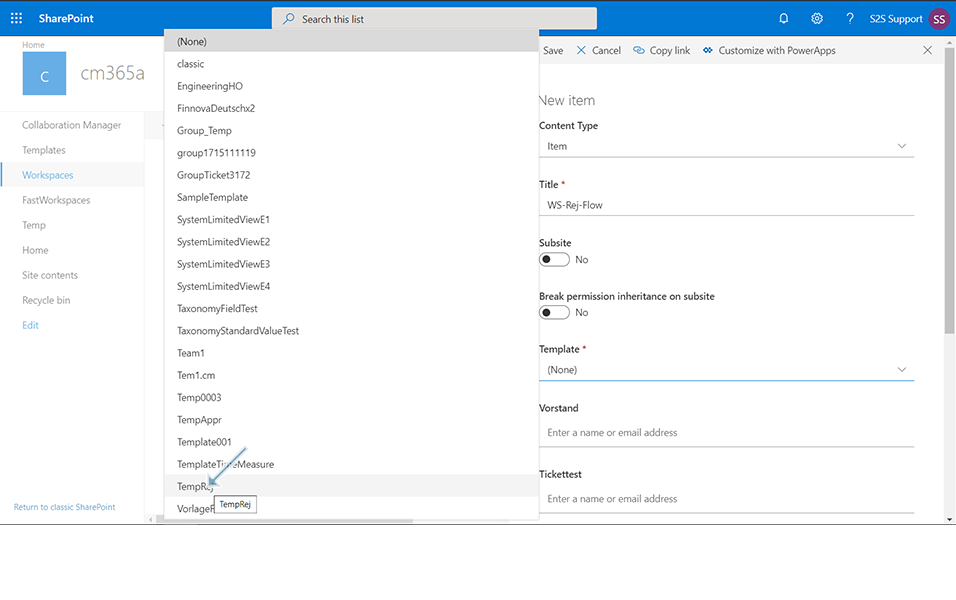
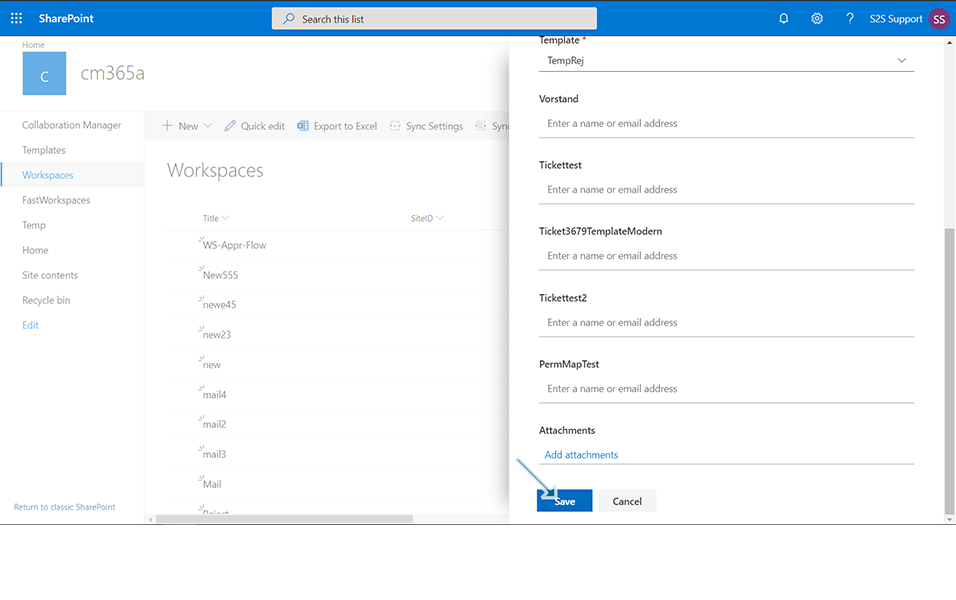
3. Click on Refresh "F5" and status of the workspace is in "Pending".
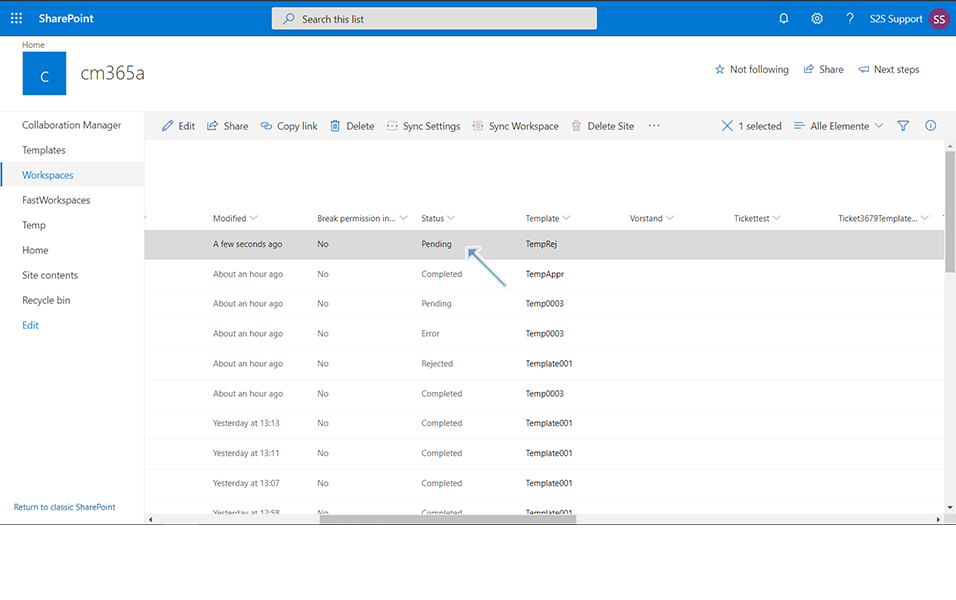
4. Click on App Launcher icon ![]() in the left top panel of the window and Click on Outlook.
in the left top panel of the window and Click on Outlook.
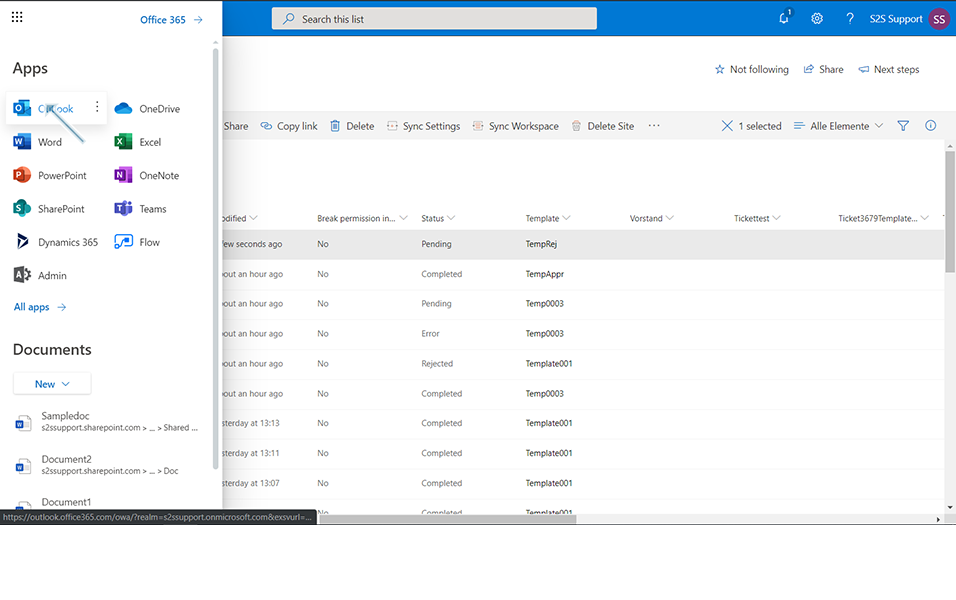
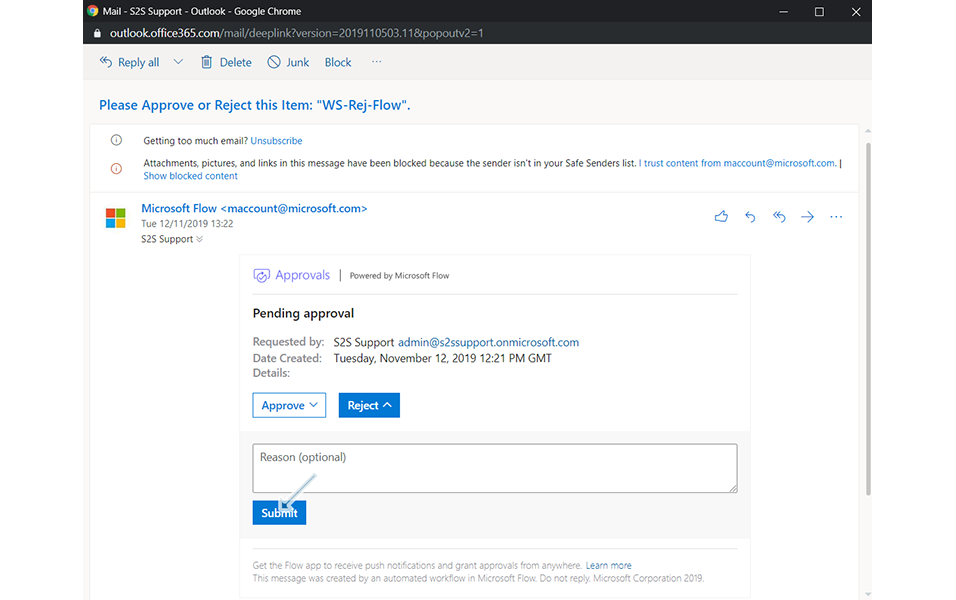
5. There is a new mail from the account which has been created by the Flow, with subject "Please Approve or Reject this Item".
6. Body of the new mail will be Pending Approval with Requested by, Date created and the option to Approve or Reject.
7. Click on button "Reject" and click on button "Submit".
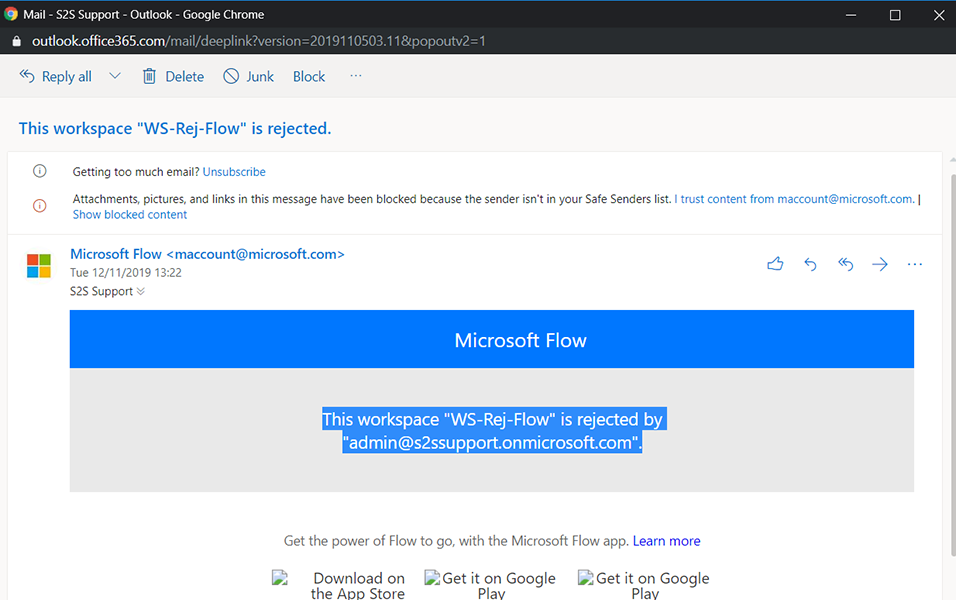
8. A new mail is sent to the user with title "Workspace "WS-Rej-Flow" is rejected".
9. Body of the mail will be "Workspace "WS-Rej-Flow" is rejected by (user name)".
10. Go to Workspace page of Collaboration Manager 365 and the status of workspace "WS-Rej-Flow" is set to "Rejected".
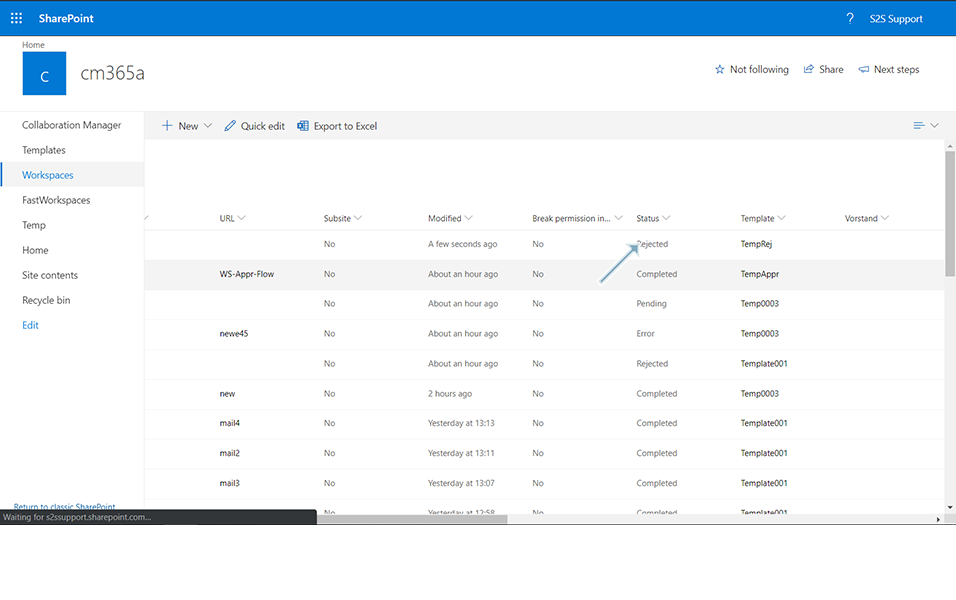
Once the status is set to Rejected, status of workspace remains in "Rejected" and does not go to "Creating" and "Completed".
This completes the triggering of flows when new workspace is created.