Creation Flow
Creation Flow
This section describes the steps for the Creation Flow. Flows are highly customizable by users and following steps explains the simple steps for Creation Flow which will be triggered when a new workspace is created in CM365.
When user in CM365 creates a new workspace of any type, an automated flow is created wherein it sends an email notification. In between, CM 365 updates the status of the Workspace as "Pending". An email is sent to the account holder who has configured the Flow whether the workspace should be approved or rejected.
An automated flow is triggered wherein the status of the workspace is updated to "Approved" or "Rejected" based on the decision made by the higher authorities.
When the workspace status is set as approved by the Flow, CM365 starts with processing of this workspace and sets the status to "Creating", "Error" or "Completed". An email is being sent when new workspace is created in CM365.
When the workspace status is set as rejected by the Flow, there is no action that is taken place from CM365 and the status of the workspace is set only as "Rejected".
Following steps are to be executed for the Creation and Approval Flow:
1. Login to CM365 using valid login credentials.
(e.g) https://example.sharepoint.com/sites/cm365
2. Click on App Launcher icon ![]() in the left top panel of the window and Click on Flow.
in the left top panel of the window and Click on Flow.

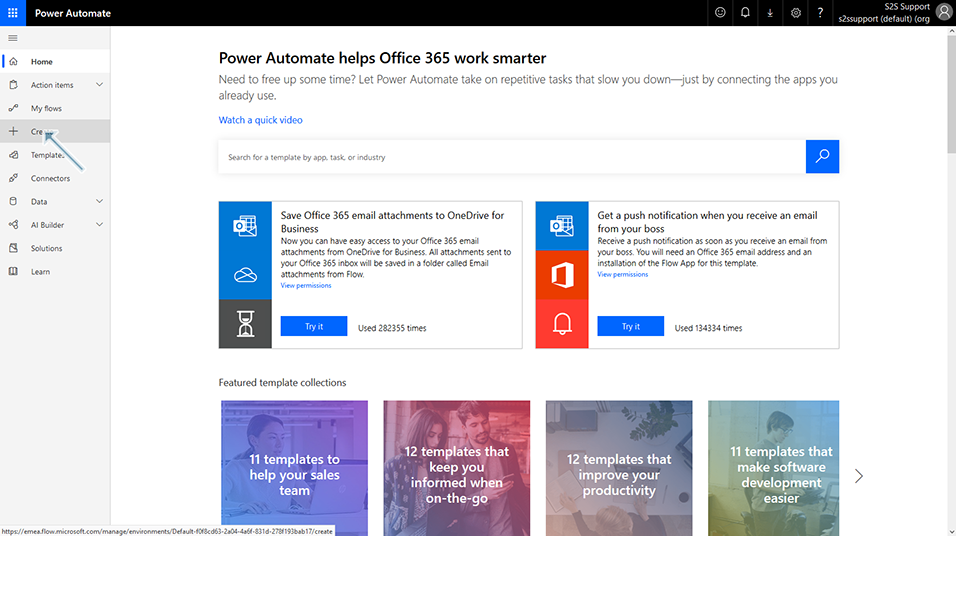
3. Click on "Create" link in the left panel.
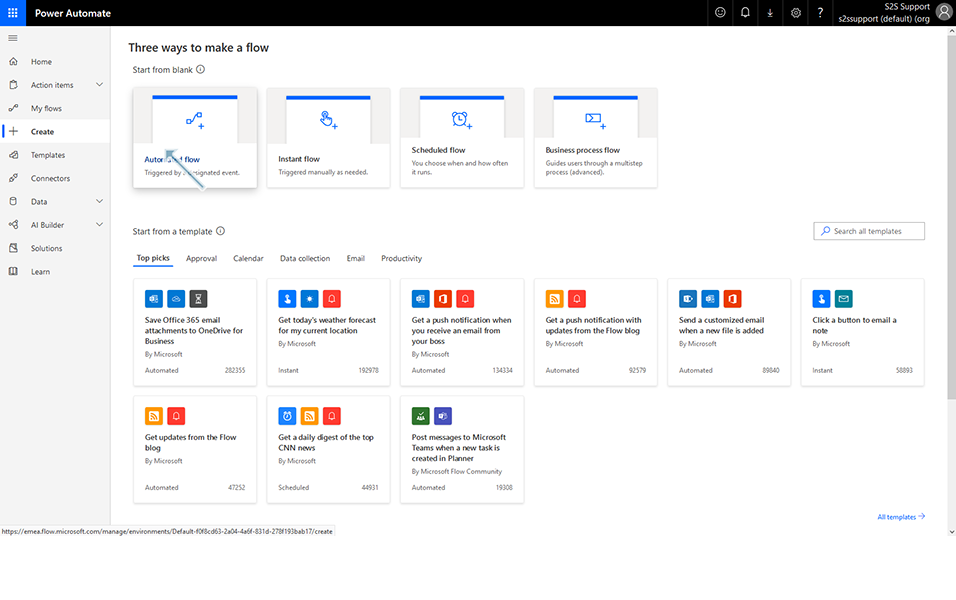
4. Click on "Automated Flow" link in the right panel of the window.
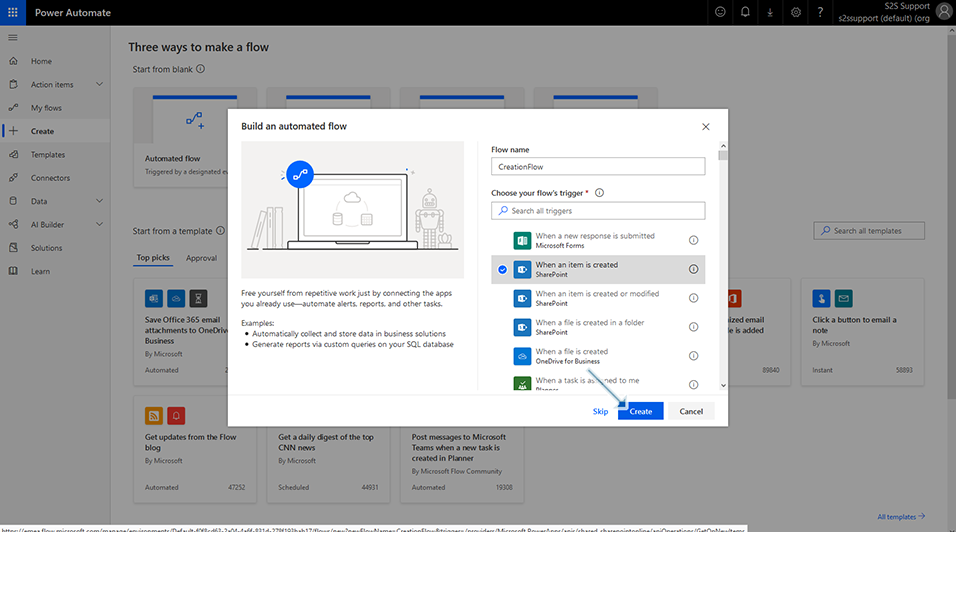
5. Enter the name of the Flow as "CreationFlow" and select "When an item is created" radio button and click on button "Create".
6. Enter the site address of the CM365 in "Site Address" field, select "Workspace" from List Name drop down.
(e.g) https://example.sharepoint.com/sites/cm365
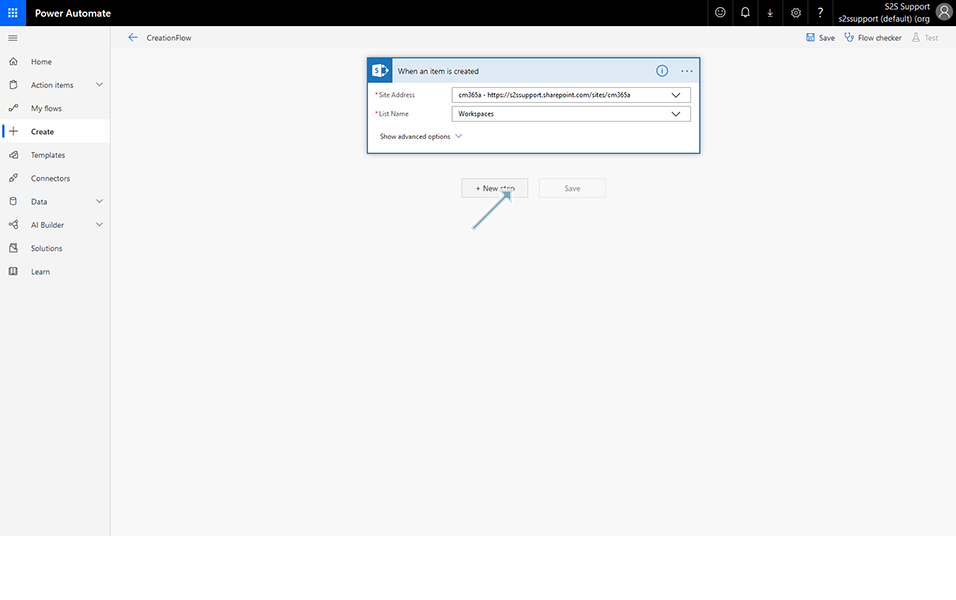
7. Click on New step and search for "Approvals".
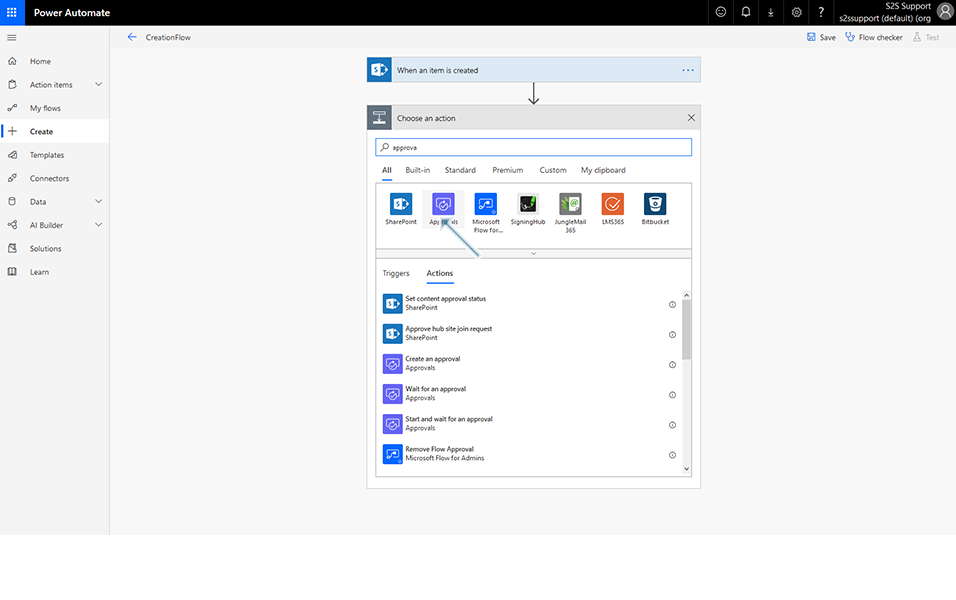
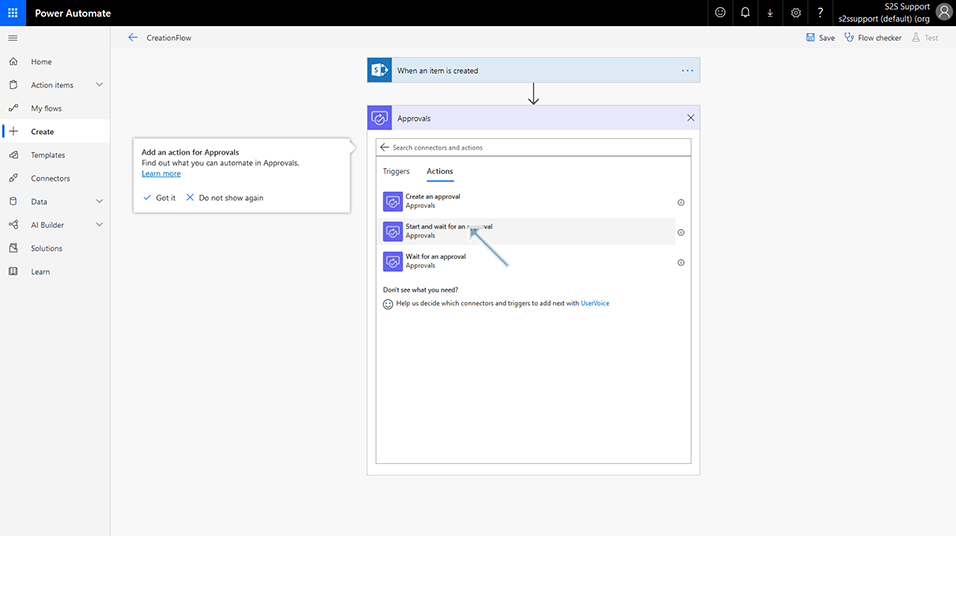
8. Select "Start and Wait for an approval" from "Actions" tab.
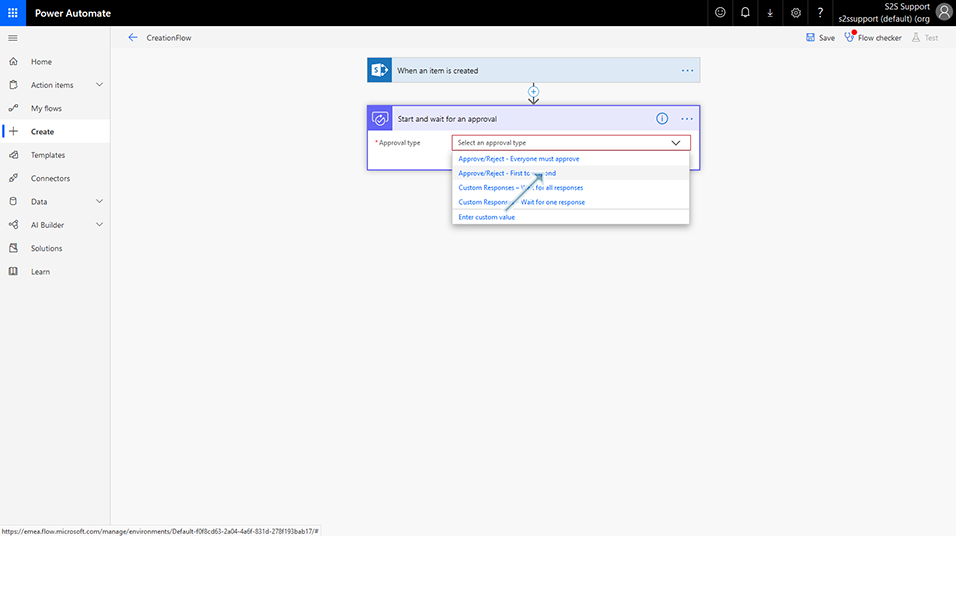
9. Select "Approve/Reject-First to respond" from "Approval Type" drop down.
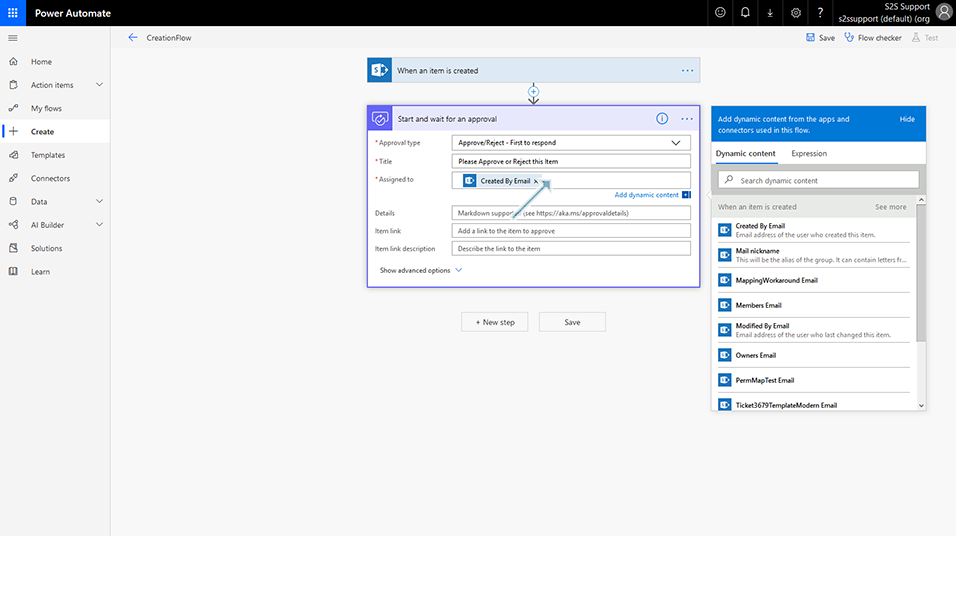
10. Enter "Title" as "Please Approve or Reject this Item: select "Title" from Dynamic content tab, and in "Assigned to" field, select "Created by Email" from Dynamic Content tab.
11. Click on New step and select "Control" and select "Condition" from Actions.
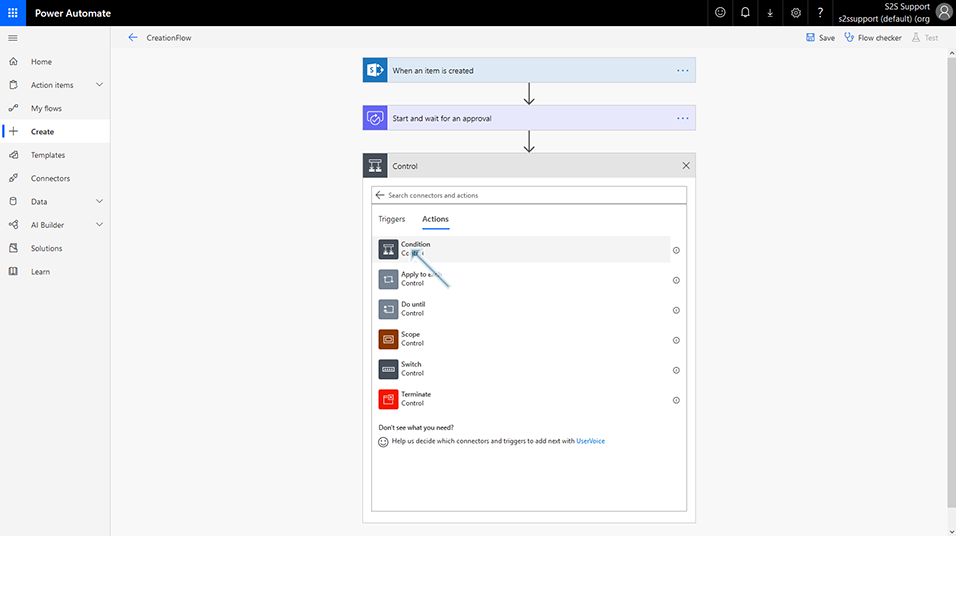
12. Select "Outcome" from Dynamic content, is equal to in 2nd text field, enter "Approve" in 3rd text field.
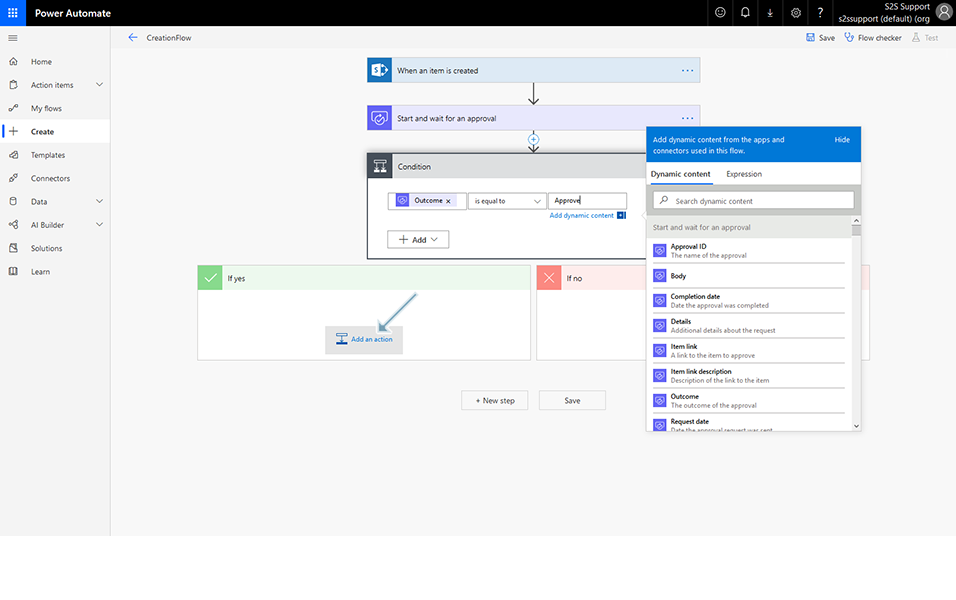
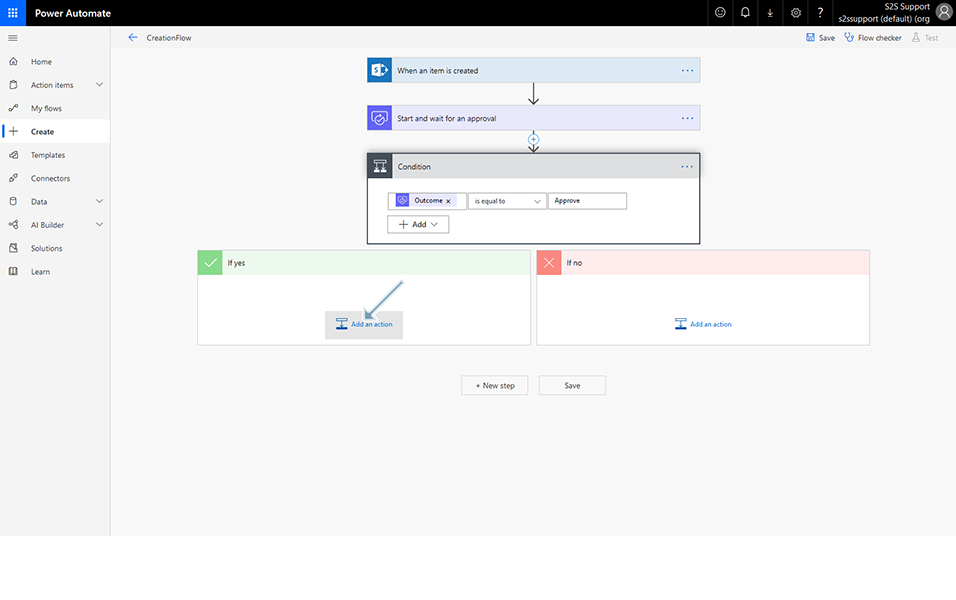
13. In "If Yes" panel, Click on "Add an action".
14. Select "Update Item"(SharePoint) , update the "Site Address" field and select "Workspace" from List Name drop down.
(e.g) https://example.sharepoint.com/sites/cm365
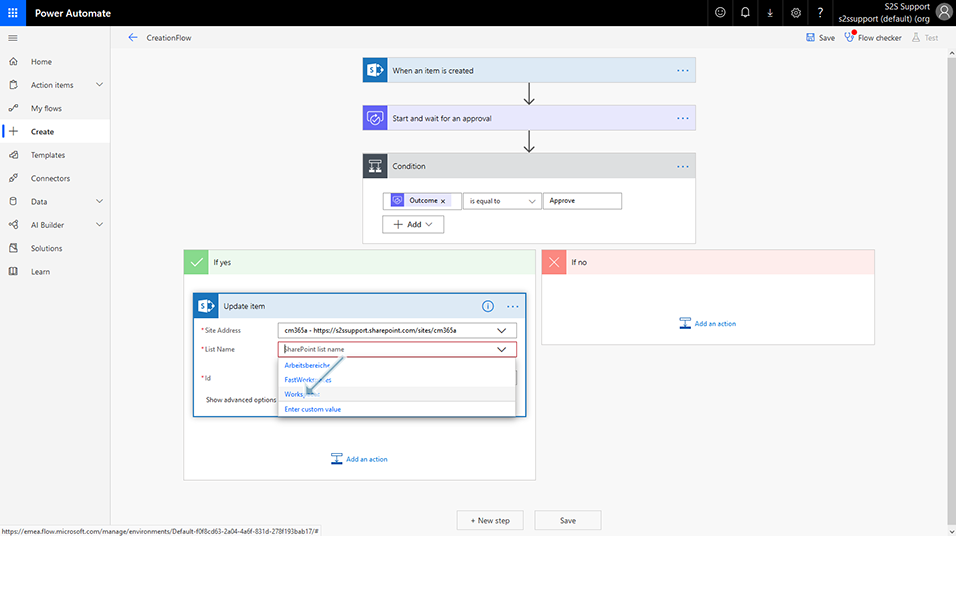
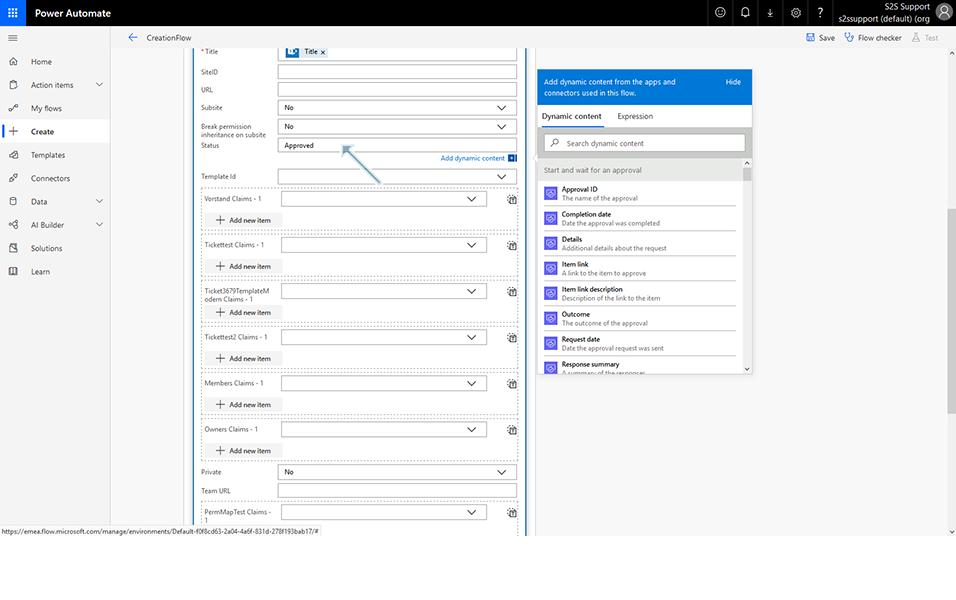
15. In ID field, Select "ID"(SharePoint) from Dynamic content tab, In Title field,select "Title"(SharePoint) from Dynamic content tab, in Status field, enter status as "Approved" and click on "Add an action" link from below panel.
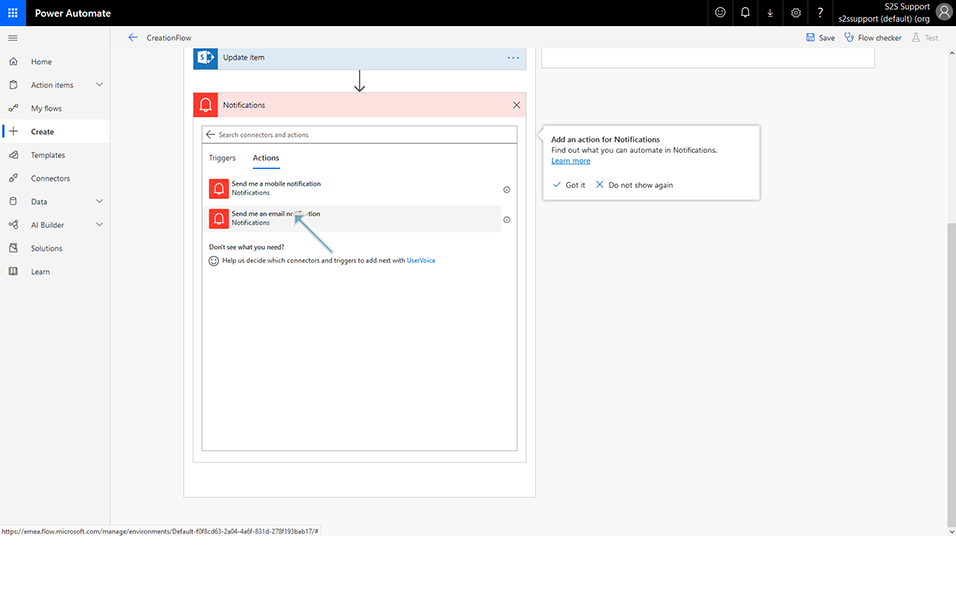
16. Click on Notifications and select "Send me an email notification".
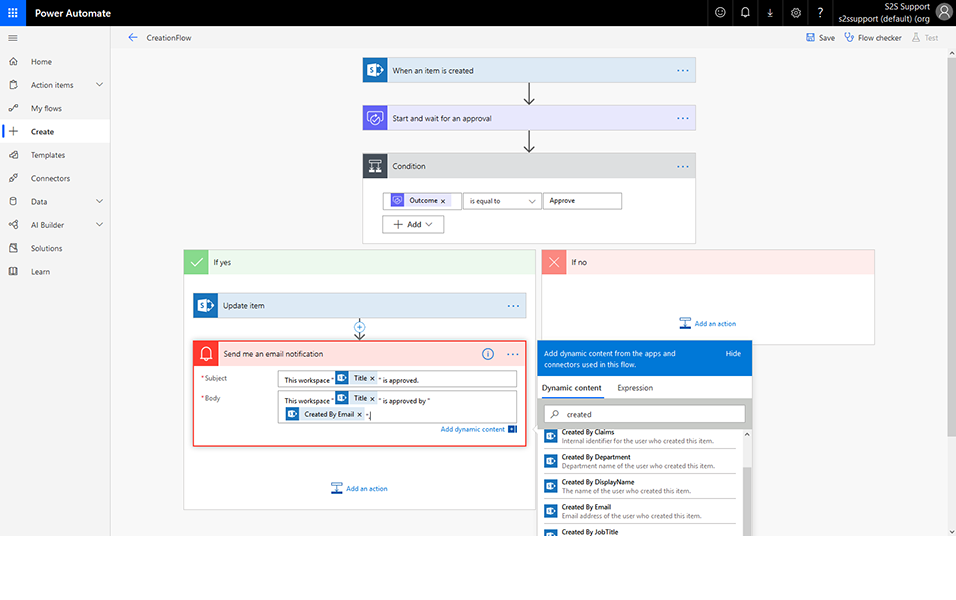
17. In Subject field, enter "This workspace "Title(sharepoint)" is approved".
Note: Select "ID(sharepoint) from Dynamic content tab.
18. In Body field, enter "This workspace "Title(sharepoint)" is approved by "Created by Email(sharepoint)" from Dynamic content tab.
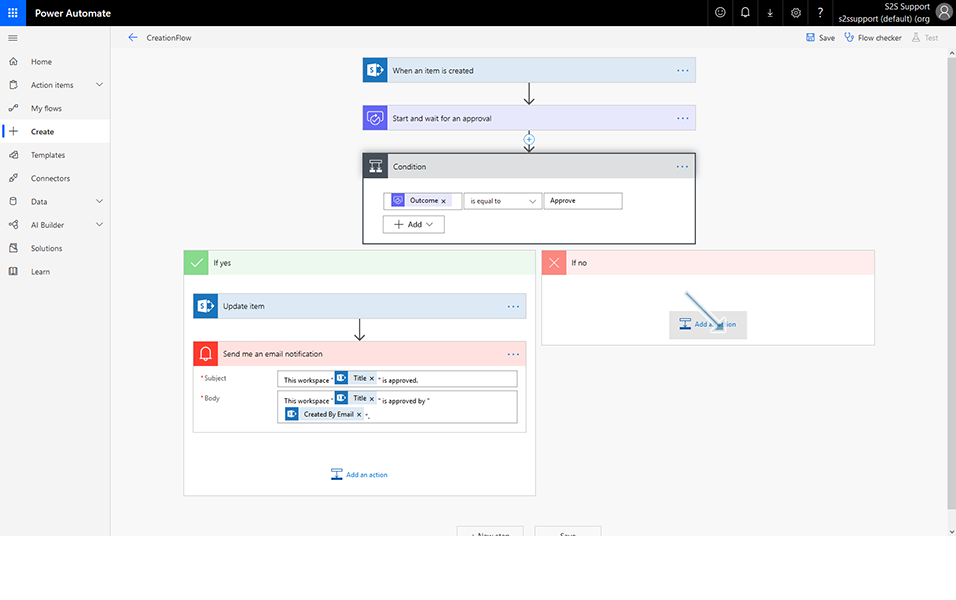
19. In "If NO" panel, click on "Add an action".
20. Select "Update Item"(SharePoint) , update the "Site Address" field and select "Workspace" from List Name drop down.
(e.g) https://example.sharepoint.com/sites/cm365
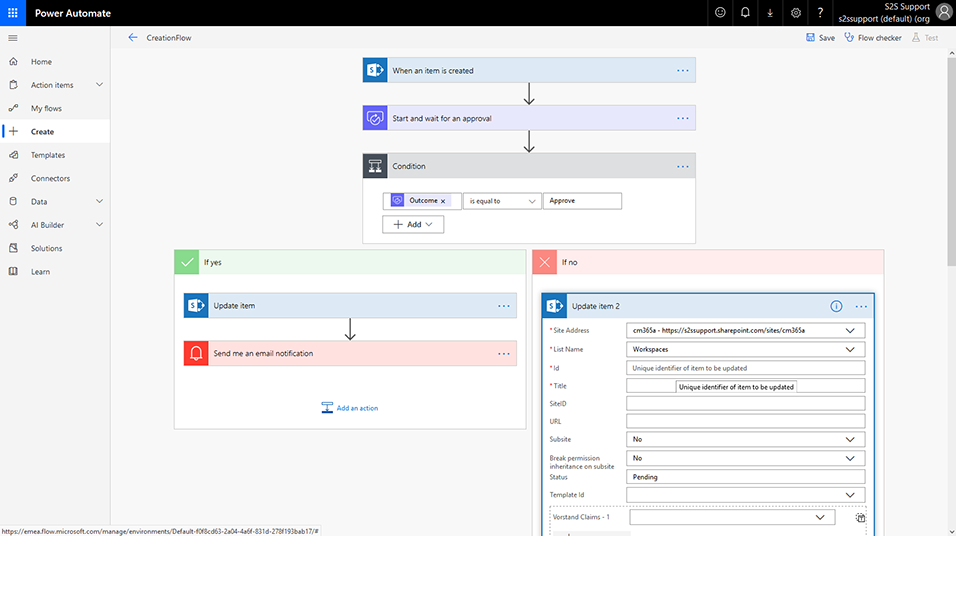
21. In ID field, Select "ID"(SharePoint) from Dynamic content tab, In Title field,select "Title"(SharePoint) from Dynamic content tab, in Status field, enter status as "Rejected" and click on "Add an action" link from below panel.

22. Click on Notifications and select "Send me an email notification".
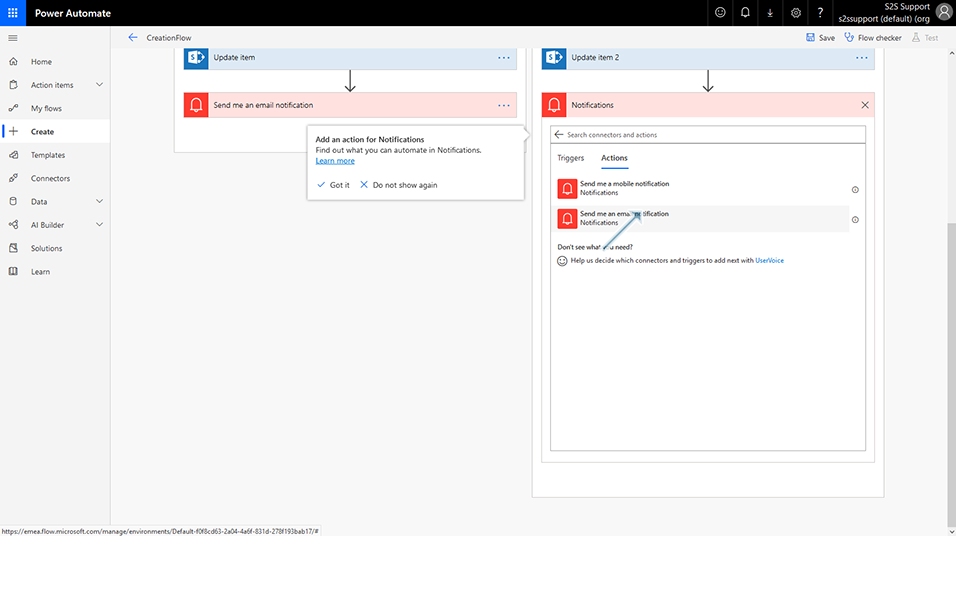
23. In Subject field, enter "This workspace "ID(sharepoint)" is rejected".
Note: Select "ID(sharepoint) from Dynamic content tab.

24. In Body field, enter "This workspace "ID(sharepoint)" is rejected by "Created by Email(sharepoint)" from Dynamic content tab.

25. Click on Save button.
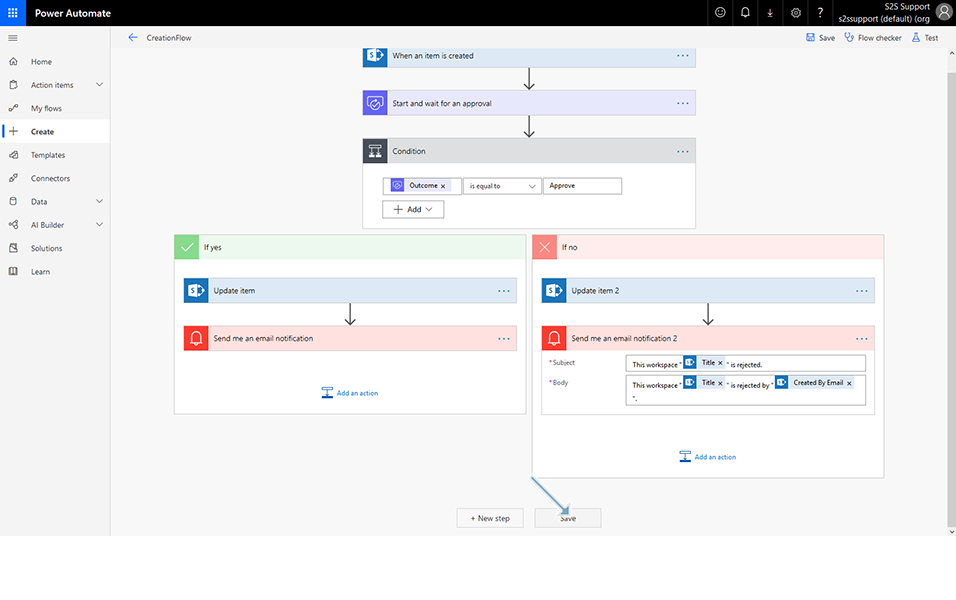
26. CreationFlow should be saved.

This completes the steps for Creation and Approval Flow.