Adding Workspace Wizard Webpart for Template type "Team Site(Classic)"
Adding Workspace Wizard Webpart for Template type "Team Site(Classic)
This section describes the steps for adding the Workspace Wizard Webpart for template type "Team Site(Classic)" in Collaboration Manager 365.
Workspace Wizard Webpart supports the user from creating the workspaces from Templates. User can configure the Workspace Wizard Webpart by editing the template of any template type.
Through this webpart, user can create new workspaces. User can then go the Workspaces page of Collaboration Manager 365 and the newly created workspaces will be displayed in the workspace list view. Any type of workspaces can be created from any type of templates, as there is a filter that is available in the "Template" field that is implemented.
The following steps describes the user to create the workspace of type "Item" through template type "Team Site(Classic)".
1. Go to Templates page of Collaboration Manager 365 and select the template "ClassicTemplate1.cm" from Templates list view as created in section "Create Template" and click on link "URL".

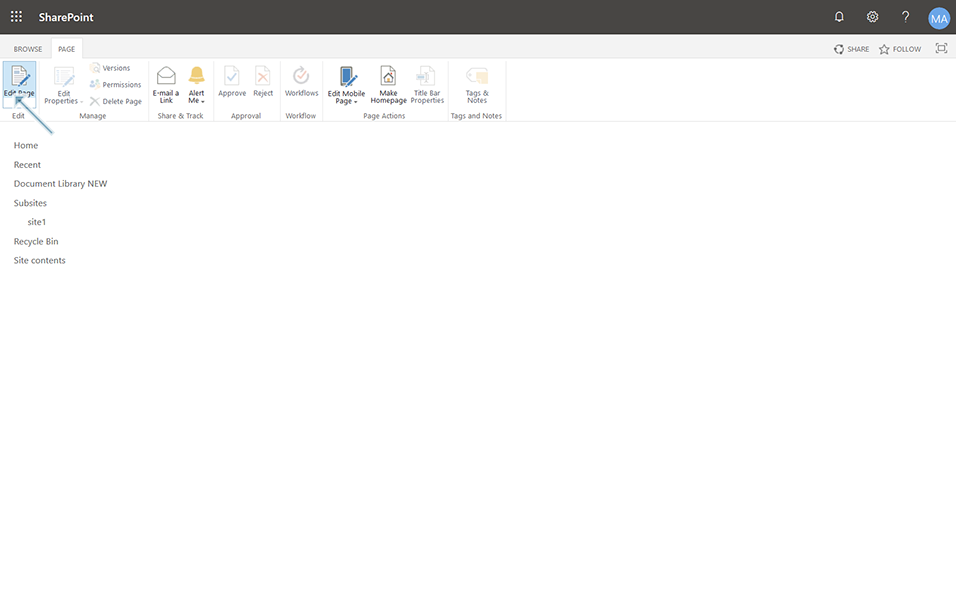
2. Click on "Page"->"Edit Page".
3. Click on link "Add a Web Part" on right panel.

4. Select "Solutions2Share" under "Categories", select "S2S WorkspaceWizard" and click on button "Add".
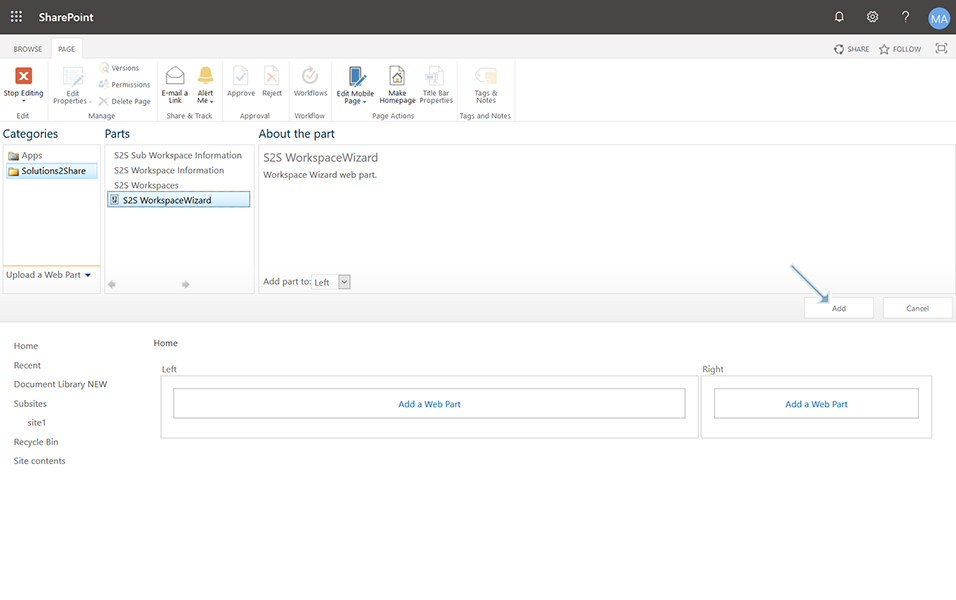
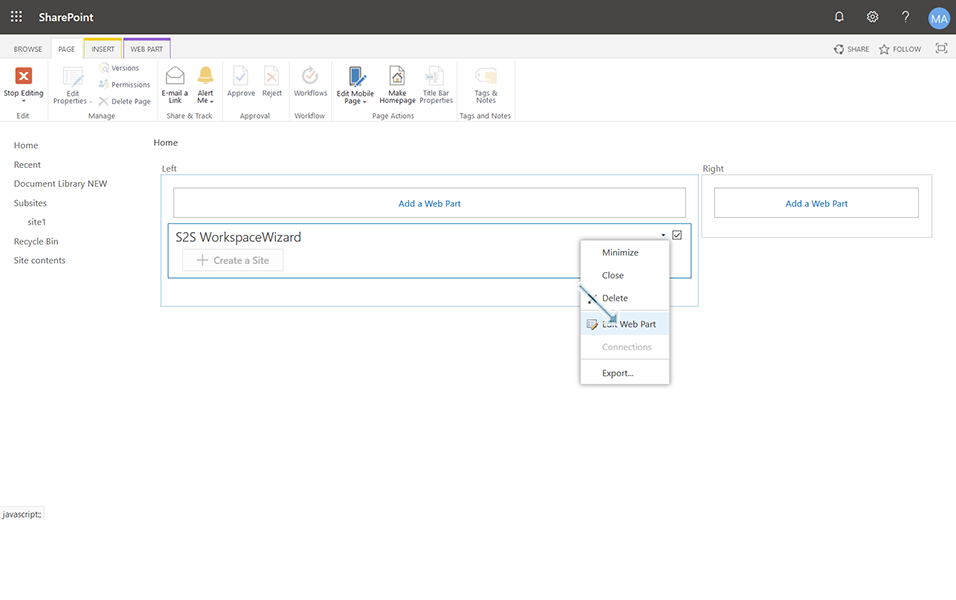
5. "S2S WorkspaceWizard" gets added and click on checkbox and select down arrow next to the checkbox.
6. Click on link "Edit Web Part".
7. Click on button "Configure" in right panel.
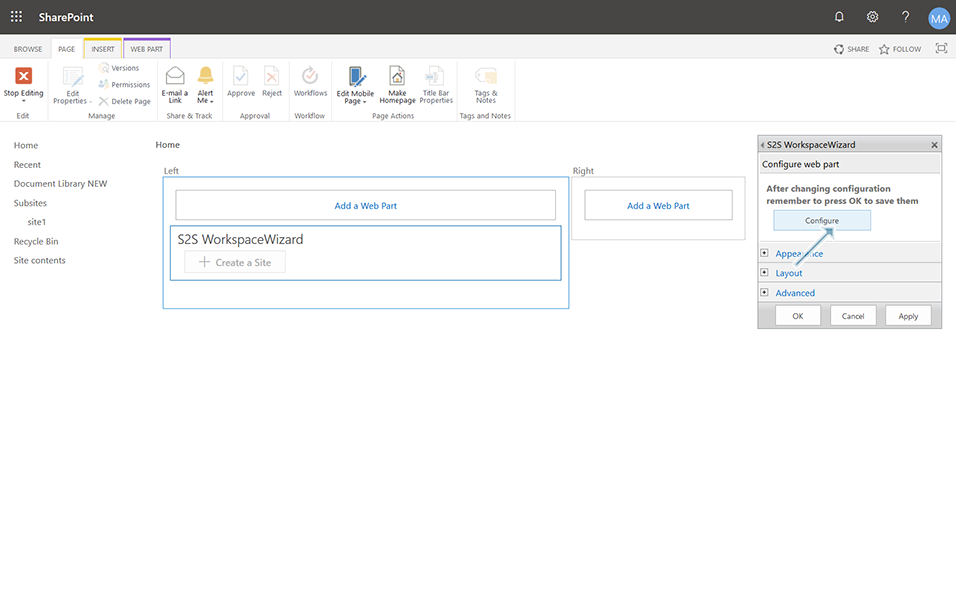
8. "S2S Workspace Wizard" Settings page is displayed in the right panel. Update the following details in the fields:
8.a. Field "Description Field": This is the text field and is by default updated with "WorkspaceWizard". User can edit the field and update any value.
8.b. Field: Collaboration Manager Root URL: This is the text field and should be updated with the root URL of the collaboration Manager 365. Only after update of the Collaboration Manager Root URL, the link "Create a Site" is activated in Workspace Wizard Webpart.
Enter the value as:
"https://example.sharepoint.com/sites/CM365"
8.c. Field "Label for the 'Create a Site' Button": This is a text field where user can update the label for the default "Create a Site Button". Enter the value as "Site Creation"
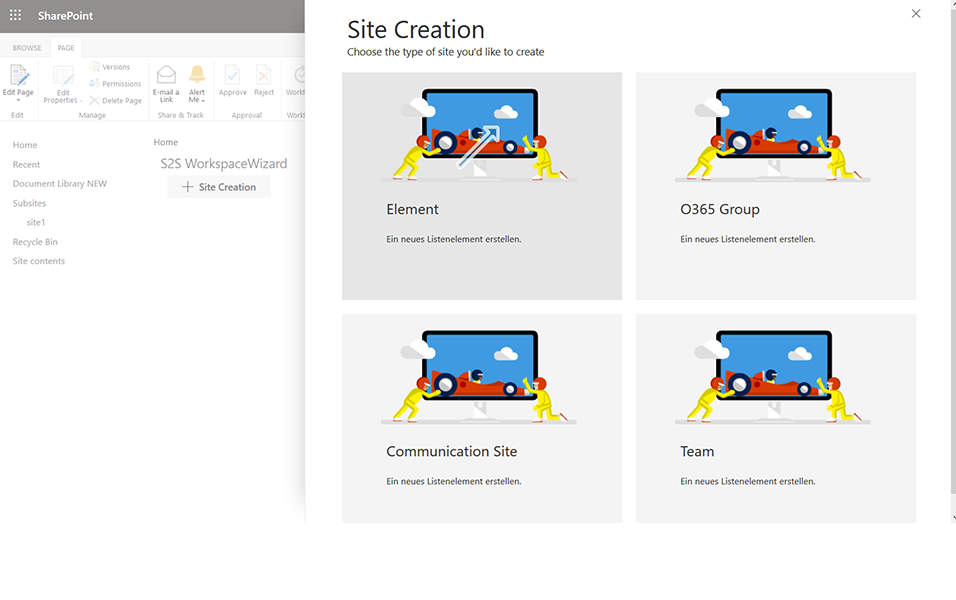
8.d. Drop down field "Choose the type of site you'd like to create: "This is a drop down field where user can select what type of site this Workspace Wizard webpart should be supported. Select "Element", "O365 Group", "Communication Site", "Team".
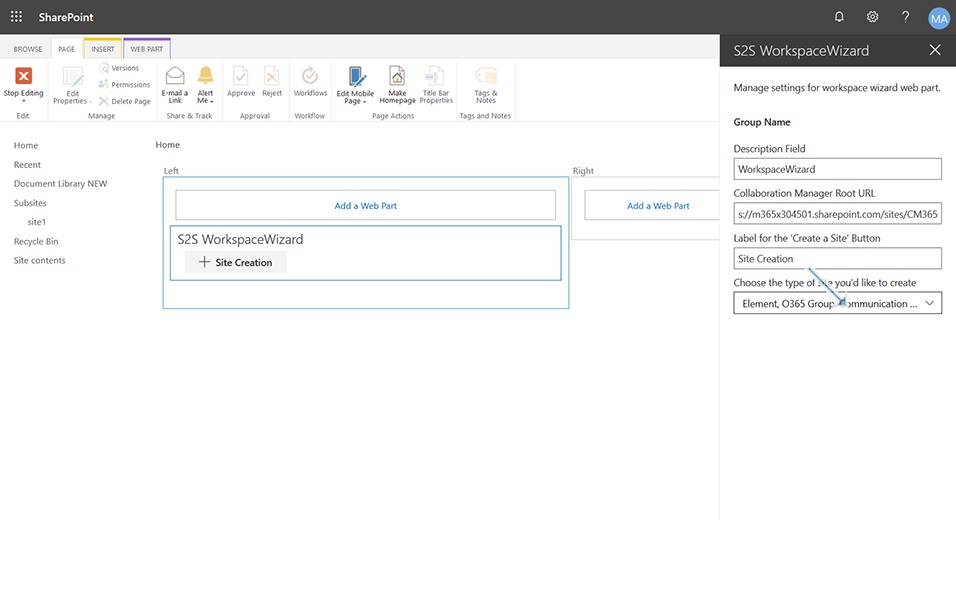
and click on button "X" in S2S WorkspaceWizard.
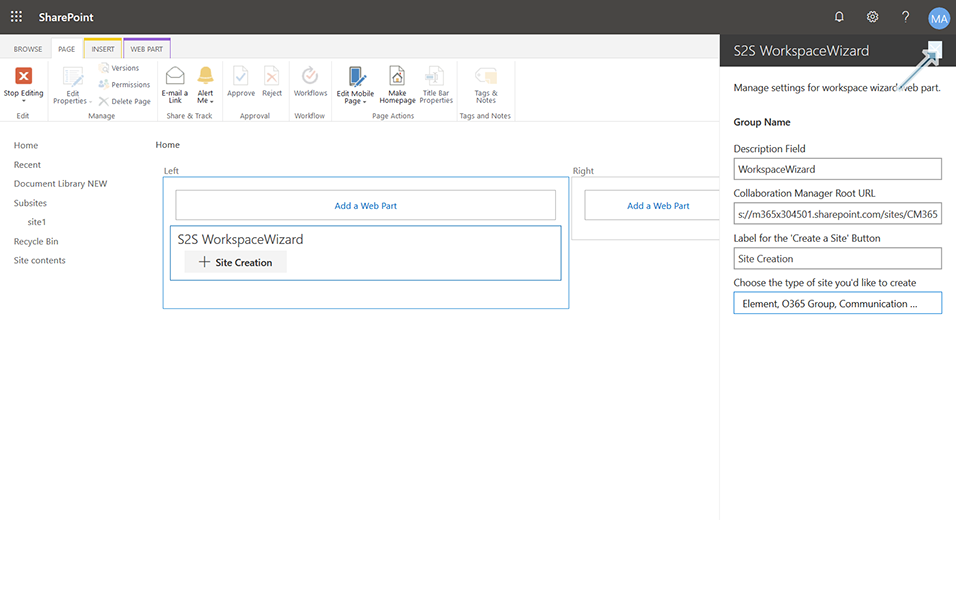
9. Click on button "Apply" and then on button "OK".

10. Click on button "Stop Editing" in the left corner.

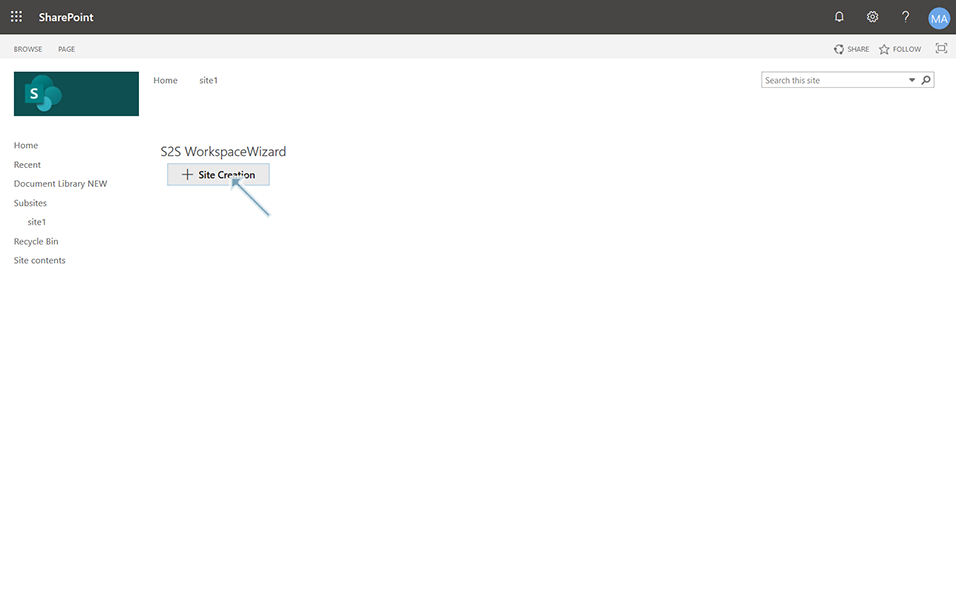
11. Click on link "Site Creation" and "Site Creation" page is displayed in the right panel.
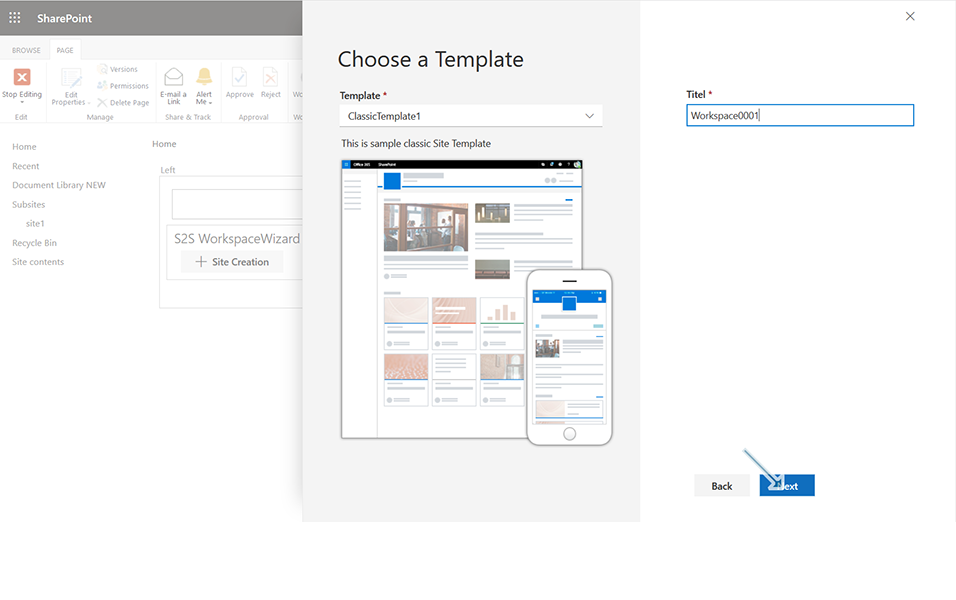
12. Click on link "Element" and "Choose a Template" page is displayed in the right panel.
13. Enter the following details and click on button "Next":
13.a. Template: Select the template as "ClassicTemplate1" from Template field.
Note: Depending on the type of template type created, values are filtered in Template field and displayed to the user. For eg. When "Element" is selected for the site to be created, only templates of type "Team Site(Classic)" is filtered and displayed to the user in field "Template".
13.b. Template Description: Template Description is updated automatically in the field below "This is sample Classic Site Template". This value is updated as in field "Template Description" as updated in section "Create Template".
13.c. Titel: Enter the value as "Workspace0001" in Titel field.
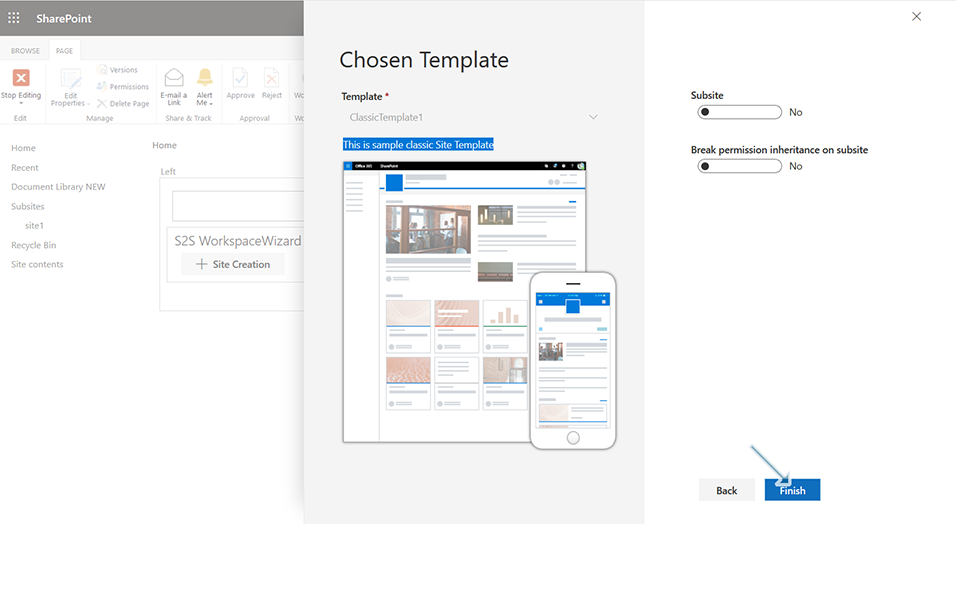
14. Update the following information in next page and click on button "Finish"
14.a. Subsite: Select the toggle field as "NO"
14.b. Break permission inheritance on subsite: Select the toggle field as "NO"
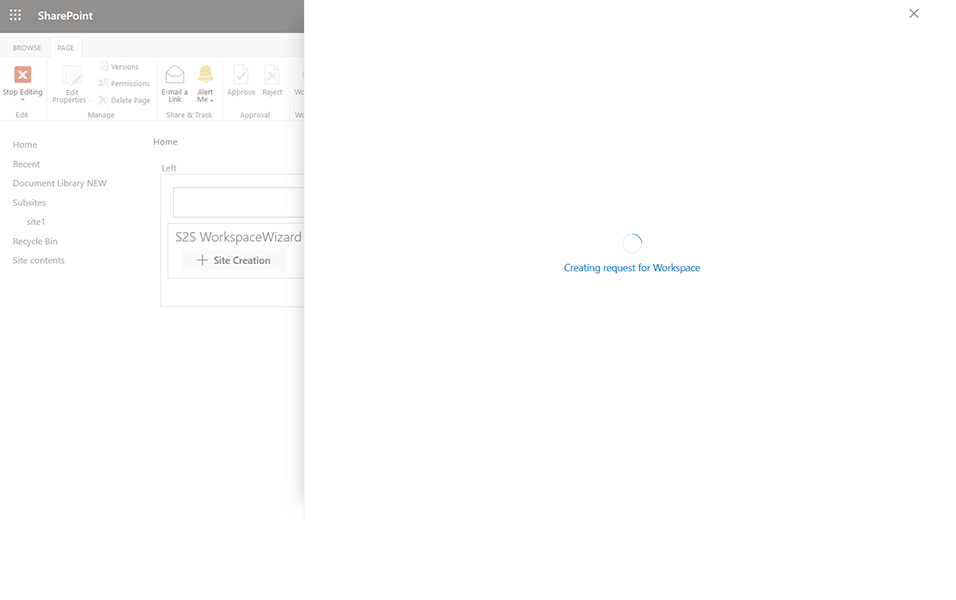
15. Confirmation message "Creating request for Workspace" is displayed to the user.
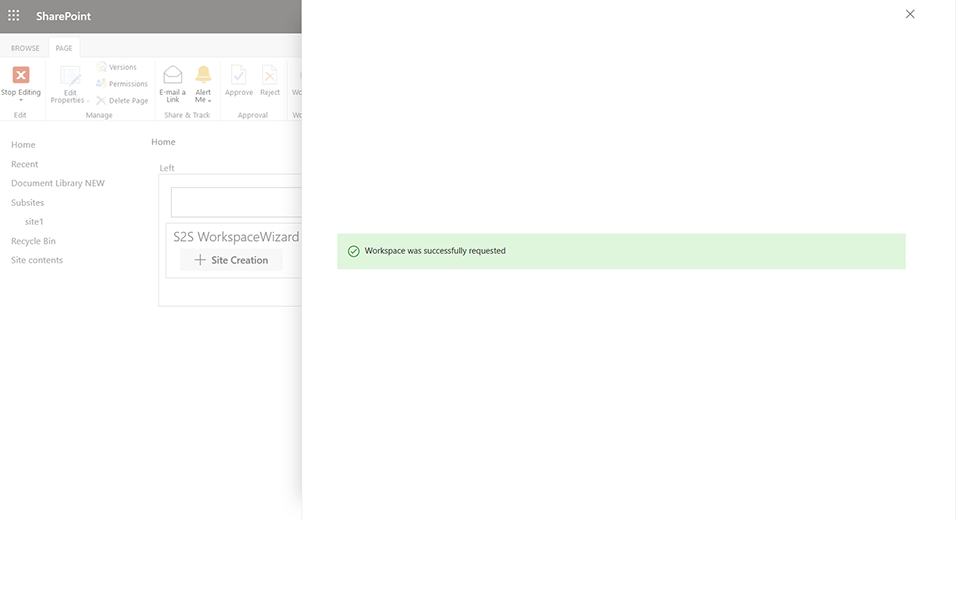
16. Confirmation message "Workspace was successfully requested" is displayed to the user once workspace is created successfully.
17. Go to Workspaces page of Collaboration Manager 365 and the newly created workspace "Workspace0001" is displayed in the Workspaces list view with all details and status as "Completed".
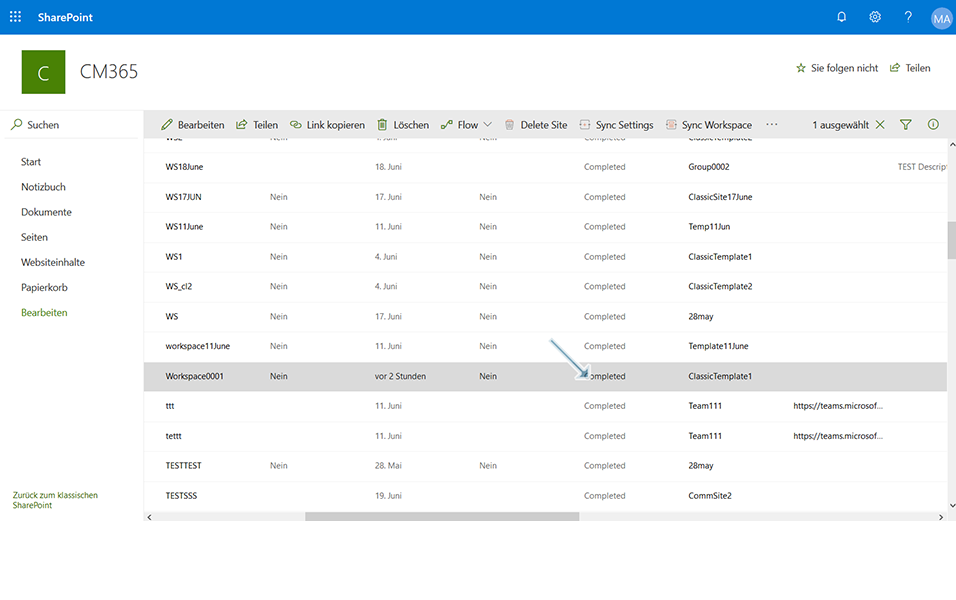
This completes the functionality of adding a workspace wizard webpart to the template type "Team Site(Classic)" and creation of workspace through "Team Site(Classic)".