Classifications
Classifications
This section details the Classifications feature in Teams Manager. This contains all the Classifications and the Sensitivity Labels which can be used while creating a Team.
Teams can be classified as "Confidential", "Restricted", "Internal Use", "Public" based on the selection made by the user while creating the Teams. These options are available in Classification drop down when Powershell script is executed in the script.
Following steps describes the steps for viewing the Classification.
Go to Teams Manager and Go to "Settings".
Click on link "Classifications" under "Governance".
By default, there are no classifications available for the user.
User has to connect and execute the powershell script for the classifications to be reflected in the system.
Install-Module AzureADPreview
Connect-AzureAD
Get-AzureADDirectorySettingTemplate
$Template = Get-AzureADDirectorySettingTemplate | ? {$_.Displayname -eq "Group.Unified"}
$TemplateSettings = $Template.CreateDirectorySetting()
$TemplateSettings["ClassificationList"] = "Confidential,Restricted,Internal Use,Public"
$TemplateSettings["ClassificationDescriptions"] = "Confidential:High business impact. Normally accessible only to specified members,Restricted:Normally accessible only to specified and/or relevant members,Internal Use:Normally accessible to all employees,Public:Accessible to all members of the public"
$TemplateSettings["DefaultClassification"] = "Internal Use"
New-AzureADDirectorySetting -DirectorySetting $TemplateSettings
Enter the user name and password of the Tenant, when it is asked for.
If the script fails, it is presumably because there already exists a script.
In this case, first execute the following script and then create the classifications according to the script above.
$Setting = Get-AzureADDirectorySetting | ? { $_.DisplayName -eq "Group.Unified"}
$Setting["ClassificationList"] = "Confidential,Restricted,Internal Use,Public"
$Setting["ClassificationDescriptions"] = "Confidential:High business impact. Normally accessible only to specified members,Restricted:Normally accessible only to specified and/or relevant members,Internal Use:Normally accessible to all employees,Public:Accessible to all members of the public"
$Setting["DefaultClassification"] = "Internal Use"
Set-AzureADDirectorySetting -Id $Setting.Id -DirectorySetting $Setting
After script is executed for Classification, following screen is displayed to the user.
Note: User can modify the script for any other values that is required to be displayed in Classifications.
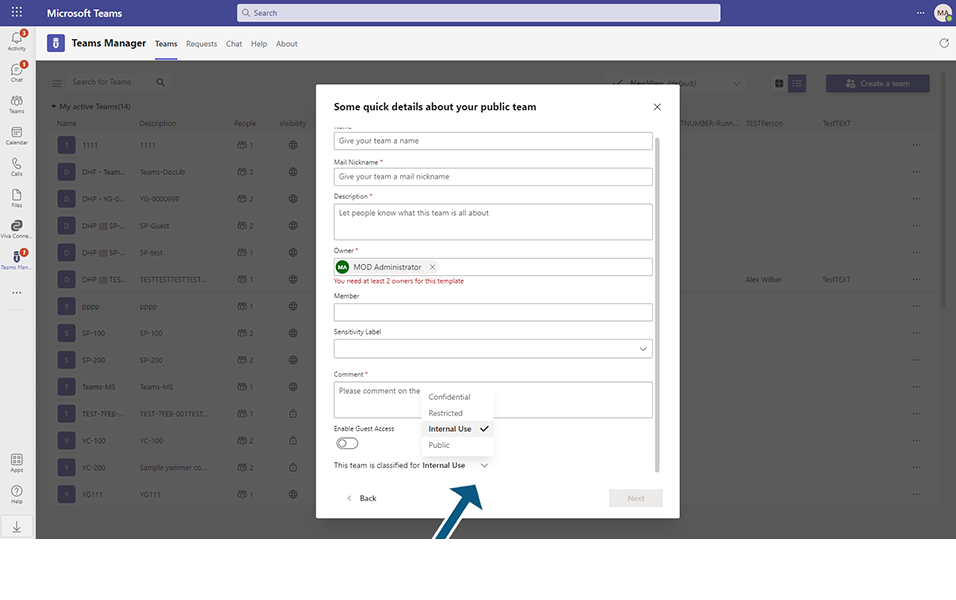
User can select the toggle field: Enable classifications in request form to YES to enable the display of Classification in Create Teams/Create Requests forms.
User will be able to select this, ONLY when there are NO sensitivity Labels available.
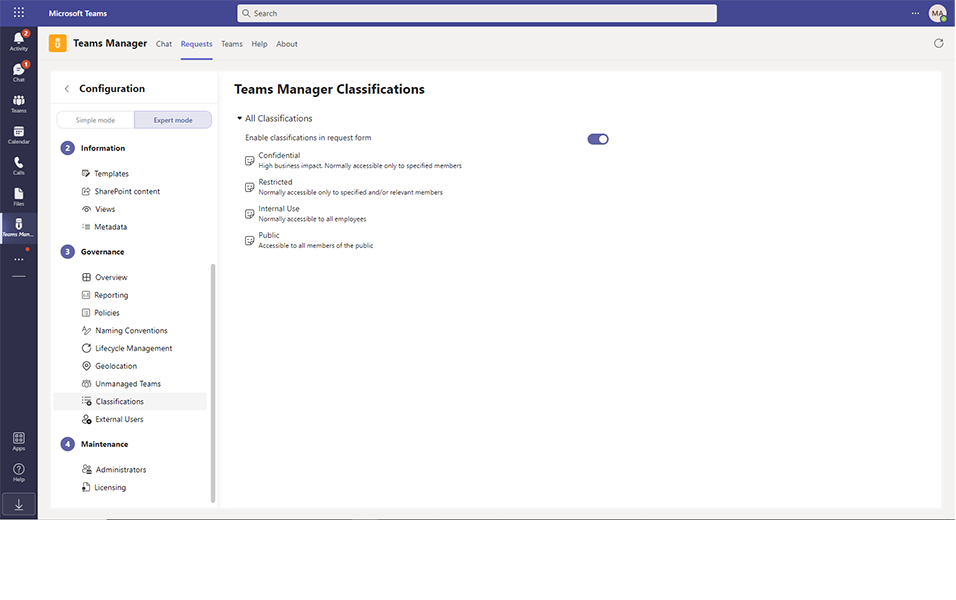
After the successful creation, the classifications can now be used when creating teams and are also available in the Teams Manager to automatically assign the correct labels to new teams.
Creation of Sensitivity Labels:
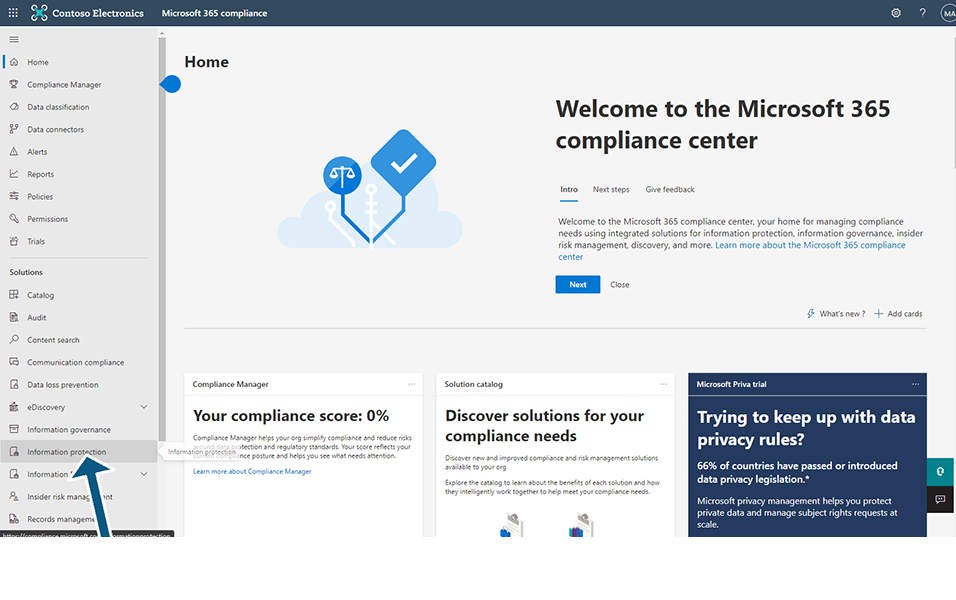
Go to Admin Center-Compliance.

Go to Information Protection-Labels and Create multiple Sensitivity Labels.
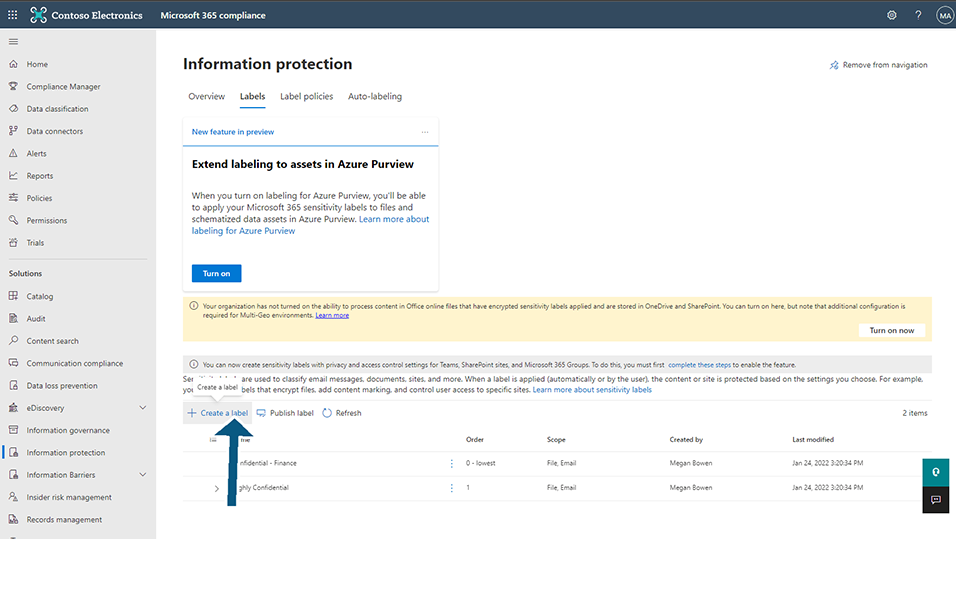
Sensitivity labels that belong to Unified groups will only be displayed in Teams Manager.
Publish the newly created labels.
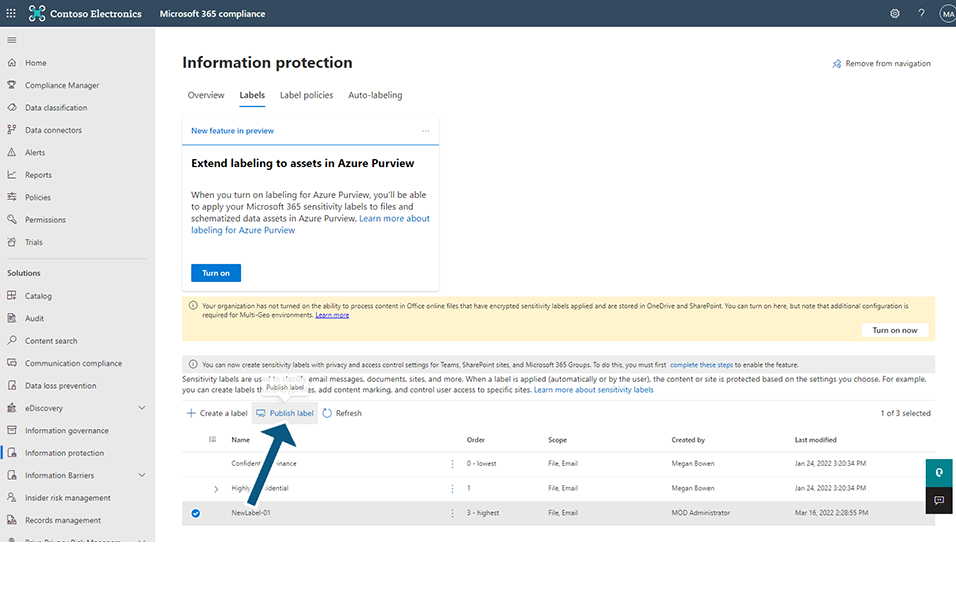
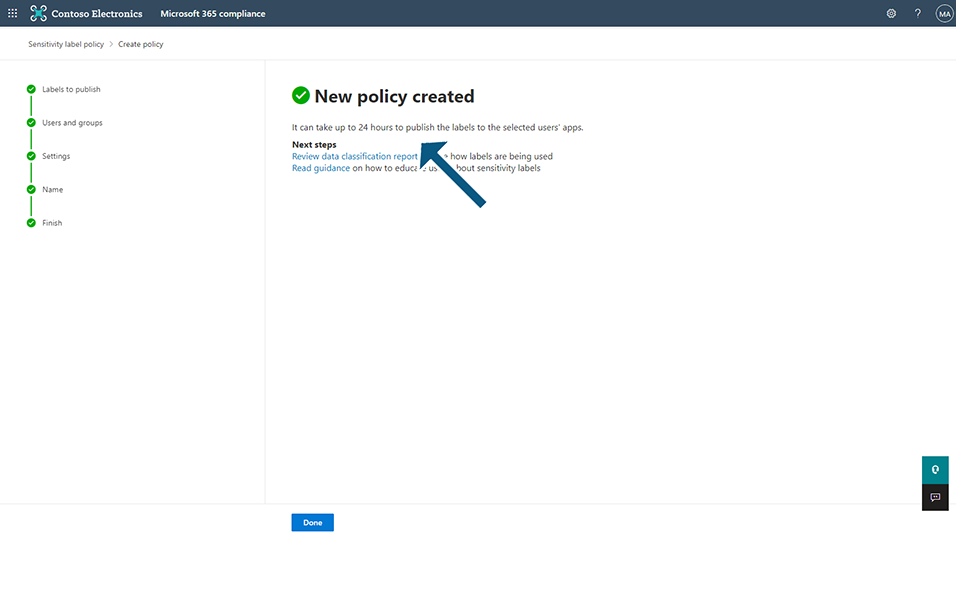
After 24 hours, published labels will be available in Classifications under Sensitivity Labels.
Go to Teams Manager and Go to "Settings".
Click on link "Classifications" under "Governance".
Set the toggle field 'Enable sensitivity labels in request form' to Yes.
When Classifications and Sensitivity labels are available, ONLY Sensitivity Labels will be available. Classifications will NOT be available.
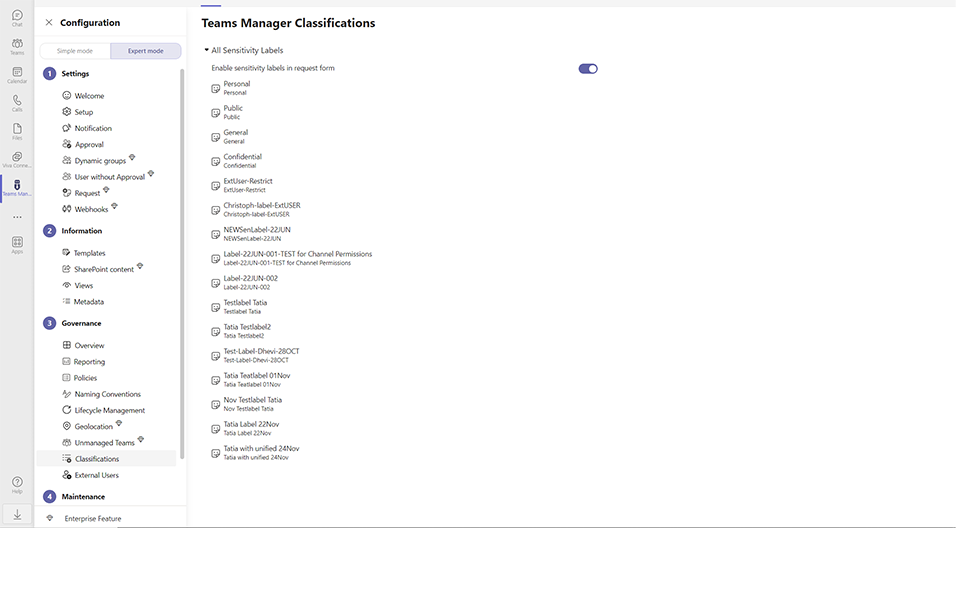
When this option is set to Yes, Sensitivity Label field will be available under Create Teams/Create Requests dialog.
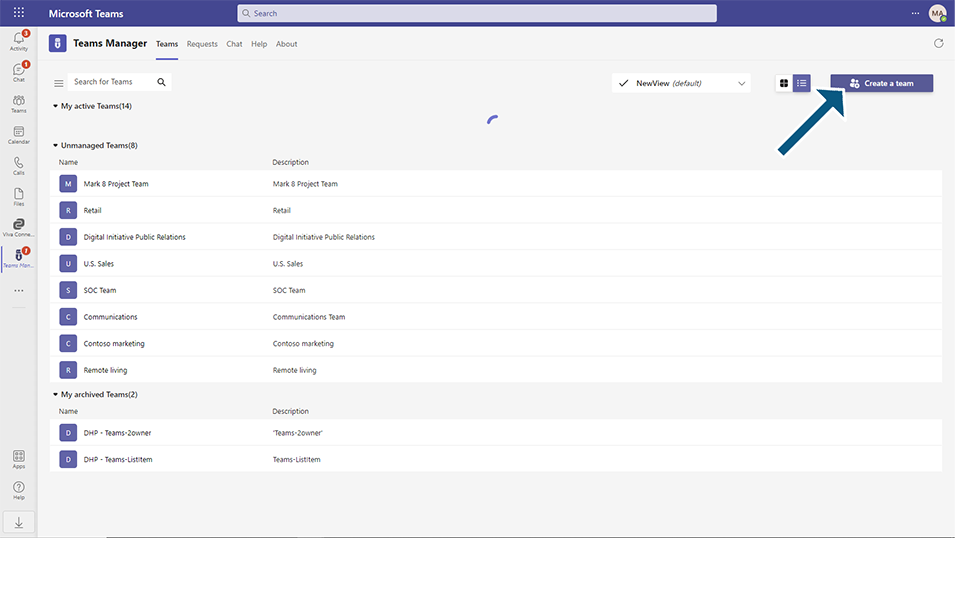
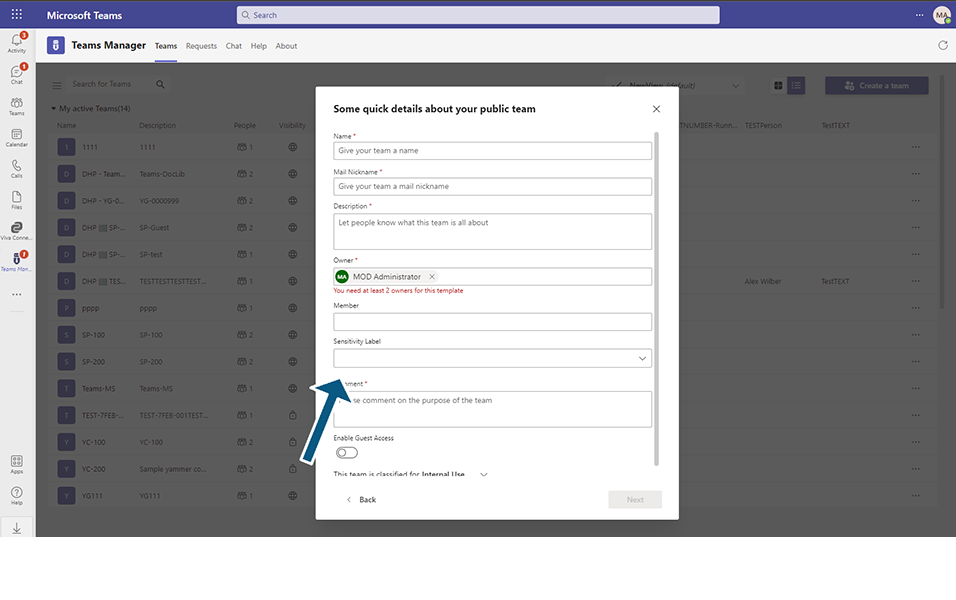
NOTE: Sensitivity Labels created requires a minimum of 24-48 hours to be updated as an option in Teams Manager.
This completes the functionality of Classifications in Settings screen.