Create Custom Content Type
Create Custom Content Type
This section describes the steps for creating Custom content type.
For this, user need to first add a new custom content type and group it to Collaboration Manager 365. Then user has to group this newly added custom content type to the workspace list. User can then associate the standard fields available to the custom content type.
Once the new custom content type is created, this will also be available when user creates a workspace through Workspace Wizard Webpart.
The following steps describes the user to create a new custom content type. Custom content type is created of type "Teams" in the following example:
1. Go to Collaboration Manager 365 and click on icon "Settings" in right corner.

2. Click on link "Site Information" and click on link "View all Site Settings".

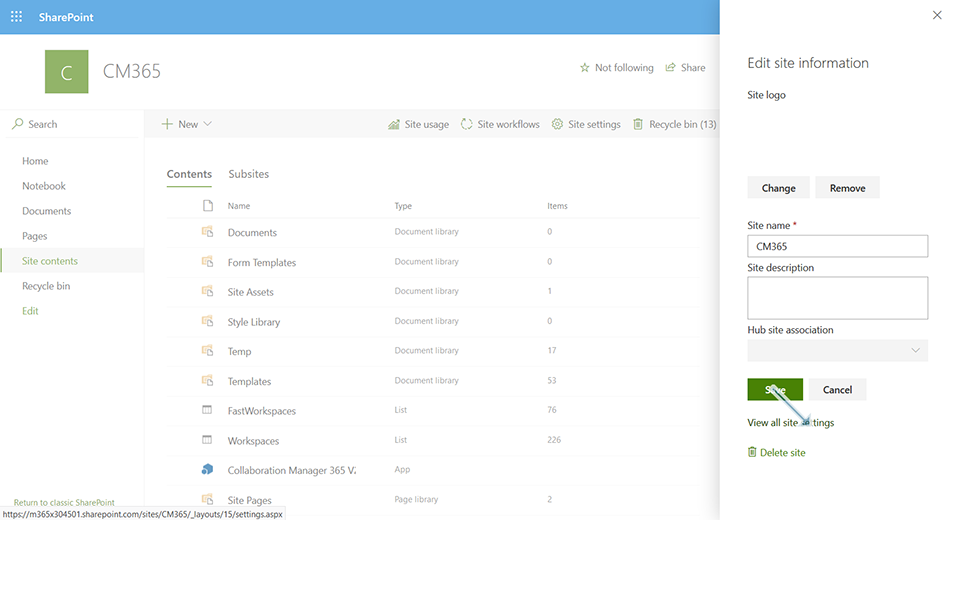
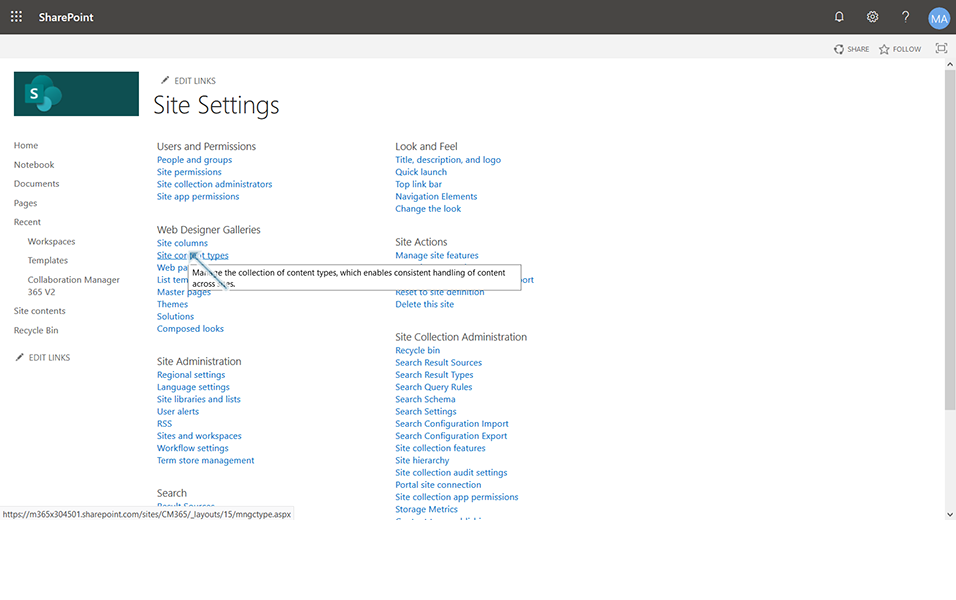
3. Click on link "Site Content Types" under Site Settings page.
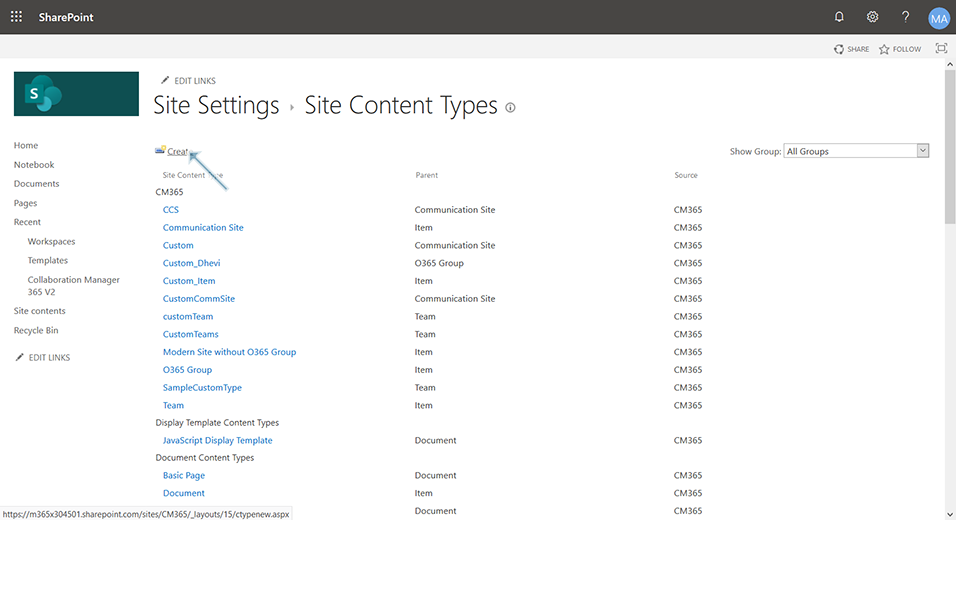
4. Click on link "Create".
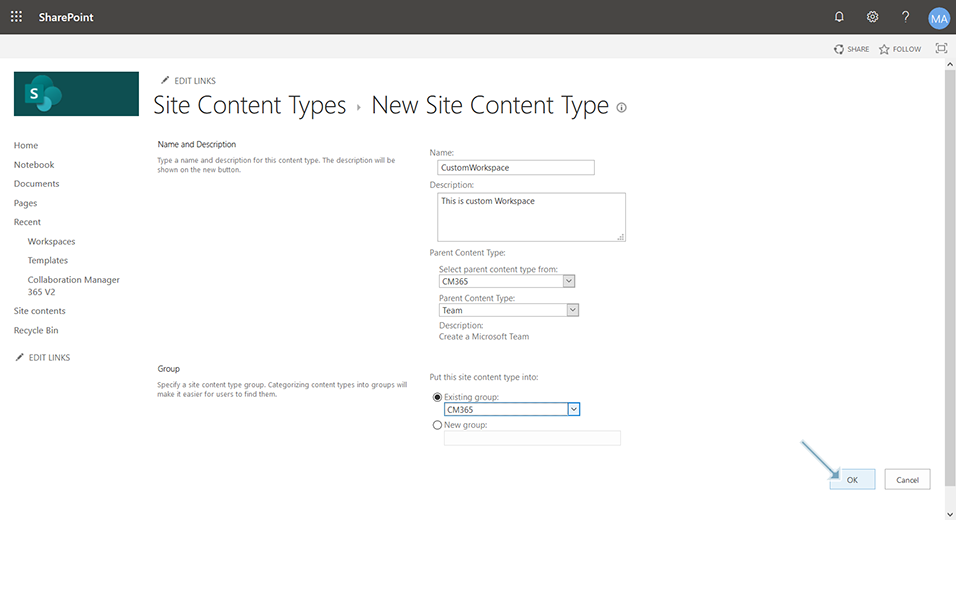
5. Enter the following details in the "Site Contents page" as below and click on OK button:
Under "Name and Description":
5.a. Name:
This is the text field wherein user can enter any name for the new custom content type. Enter value as "CustomWorkspace".
5.b. Description:
This is the text field wherein user can enter description for the new custom content type.
5.c. Parent Content type:
5.c.1. "Select Parent Content type from:"
This is the drop down field wherein user can select the Parent of the custom content type. Select the option "CM365".
5.c.2. Parent Content type:
This is the drop down field wherein user can select the type of content type to be associated to the custom content type. Select the option "Team".
Under "Group":
5.d. Put this site content type into:
5.d.1. Existing Group: This is radio button field and when user selects this radio button, drop down field gets enabled. User can then select any existing group. Select the option "CM365".
5.d.2. New Group: This is a radio button field and when user selects this radio button, text field gets enabled. User can create a new group and associate this newly added custom content type.
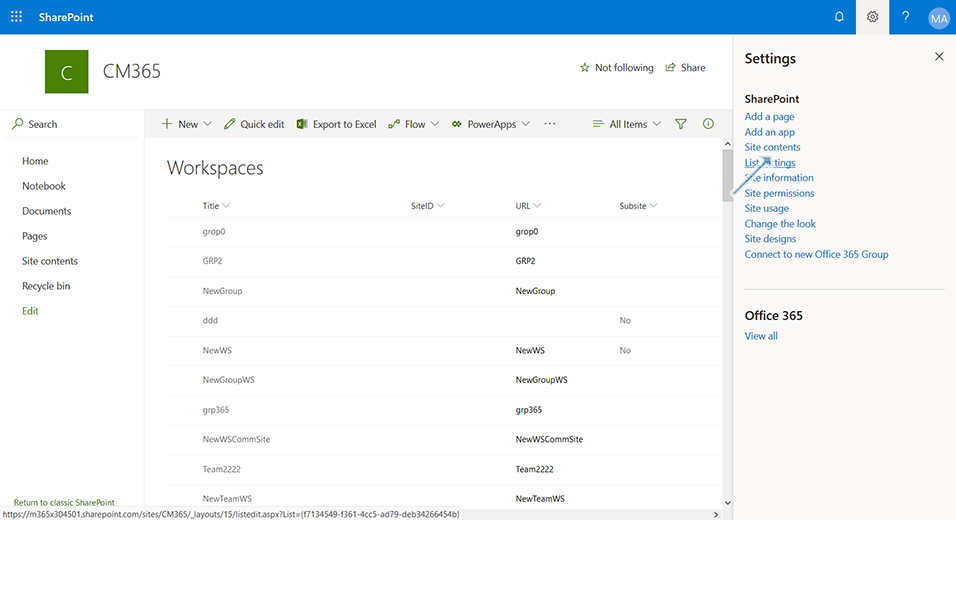
6. Go to Workspaces page and click on icon "Settings" and click on link "List Settings".
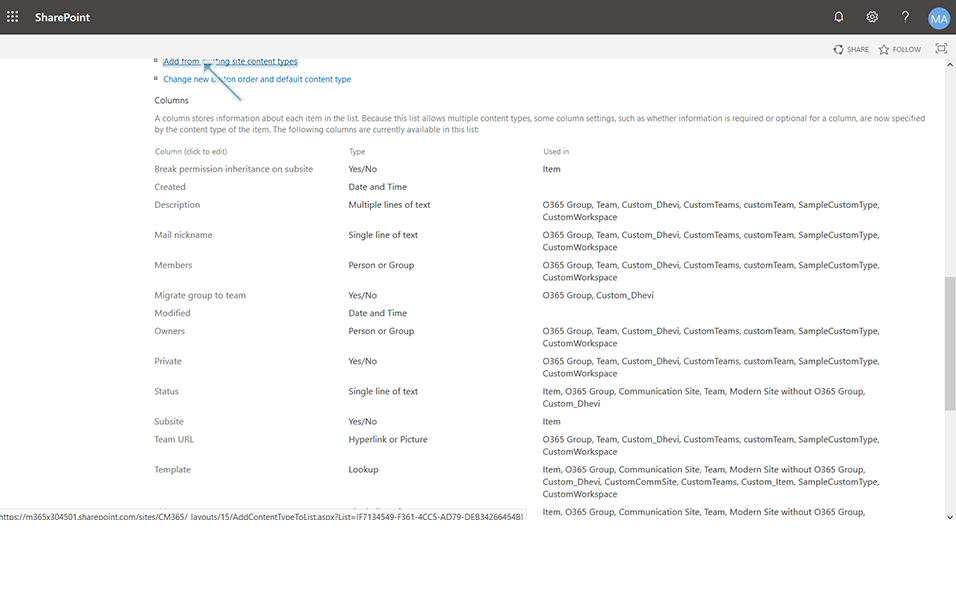
7. Scroll down the page and click on link "Add from existing site content types".
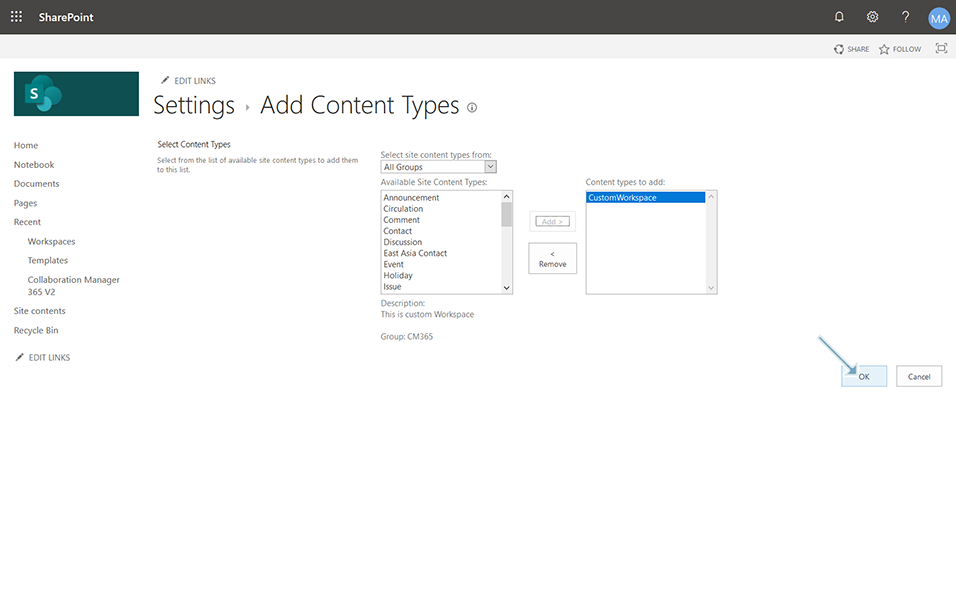
8. Select "Custom workspace" from section "Available Site Content Types" and click on button "Add". Newly created content type "Custom workspace" is moved to section "Content types to add" and click on button "OK".
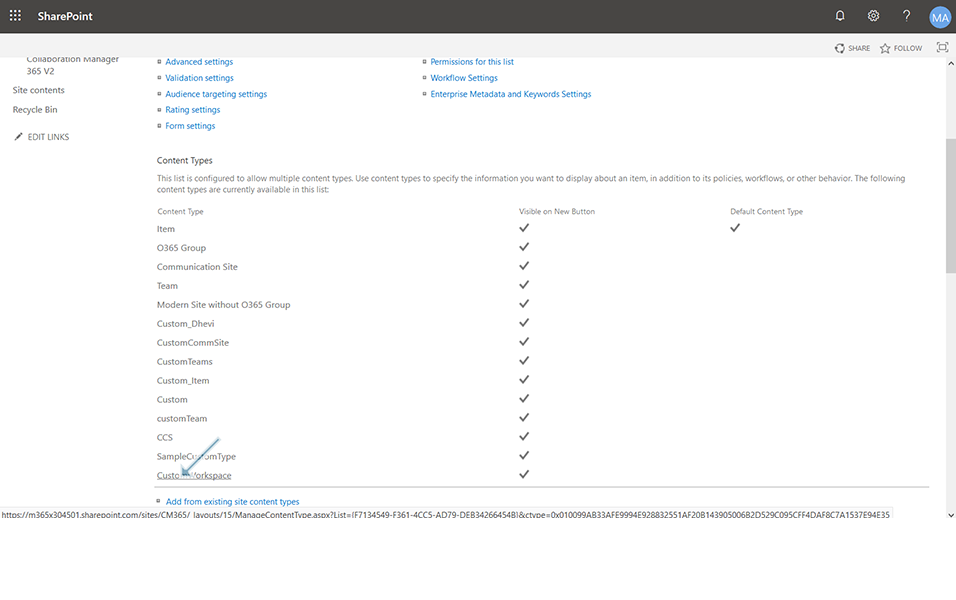
9. Newly added custom content type is displayed under panel "Content Types". Click on link "Custom Workspace".
10. Click on link "Add from existing site or list columns".
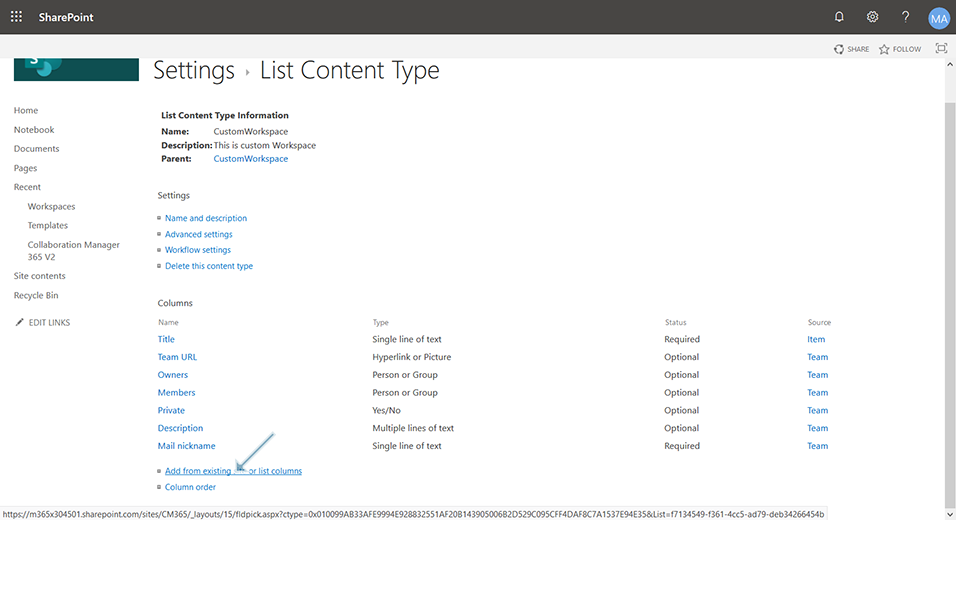
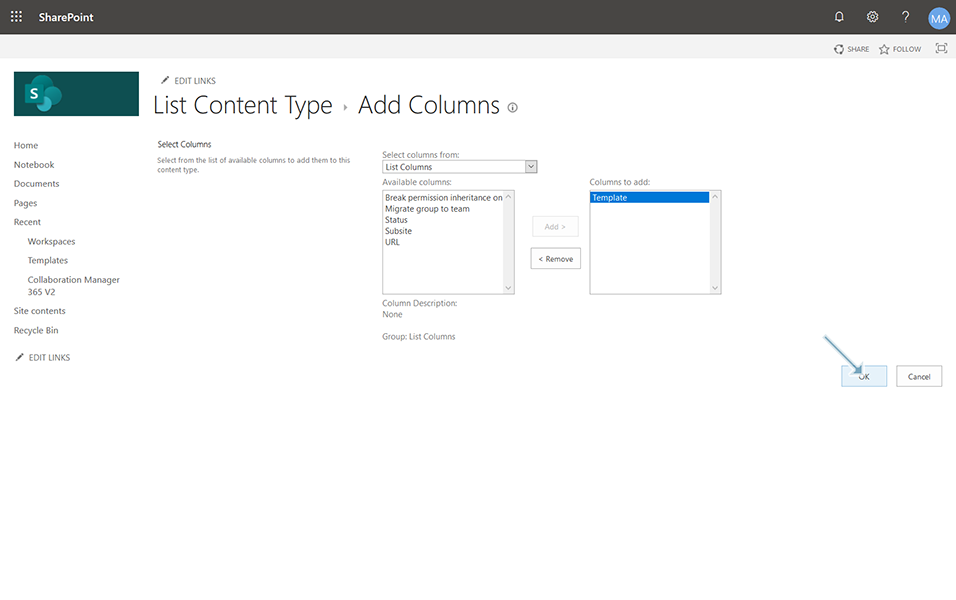
11. Select the option "Template" from Available columns and click on button "Add". Column "Template" is moved to section "Columns to add" and click on button "OK".
12. Column "Template" is added to the custom content type and is displayed along with other default columns.
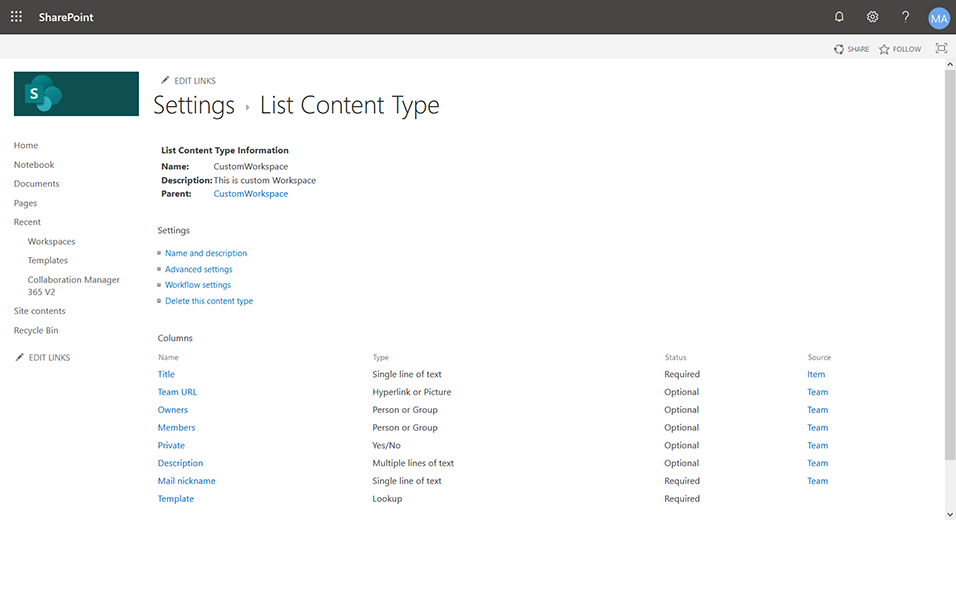
This completes the functionality of creating a new custom content type.