Standard License Permissions
Standard License Permissions
After the initial Teams Manager installation, when the user switches to Live data from Mockup data, permissions to access the Teams Manager should be provided in the Setup screen. For Standard license, following section describes the steps for providing the permissions in Teams Manager when switching to live data.
From Teams/Requests tab, click on Switch to Live data button in the red banner.
Note: Red banner is available in all the tabs of Teams Manager with switch to Live data button.
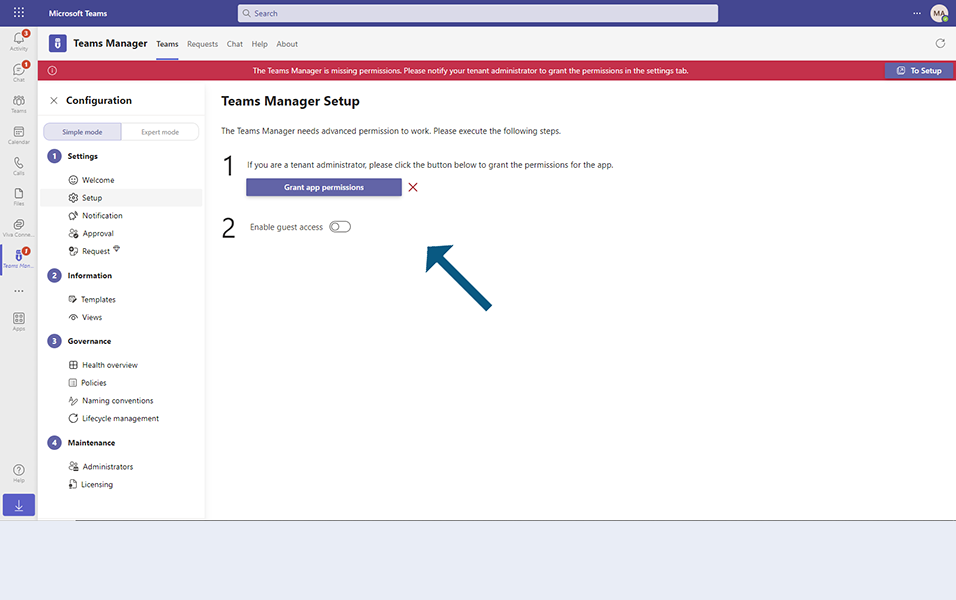
Displays a validation message that 'The Teams Manager is missing permissions. Please notify your tenant....".
Click on Go to Settings button in the red banner.
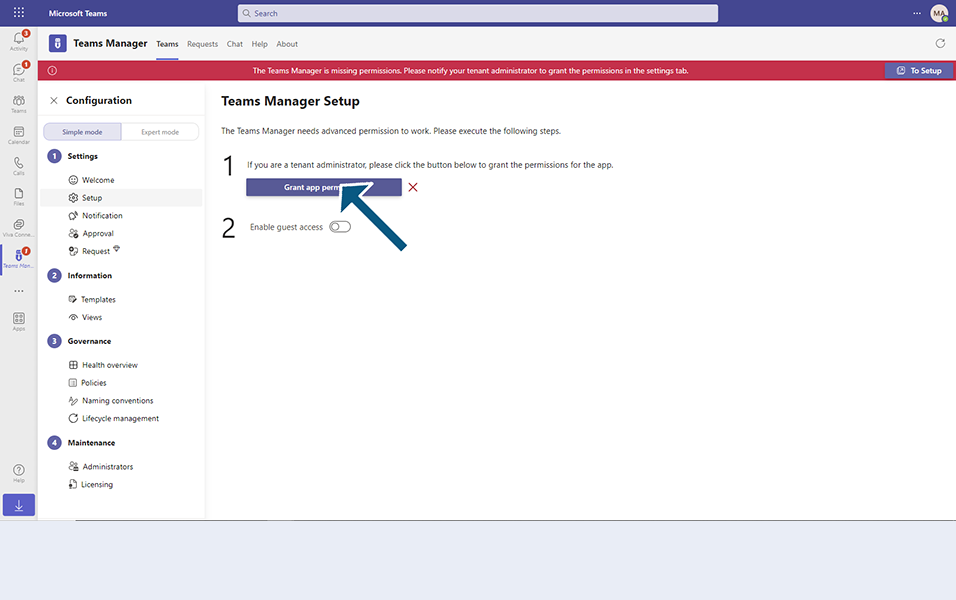
Click on button "Grant App Permissions". Selecting this button provides advanced permissions to work on Teams Manager and grants the permissions.
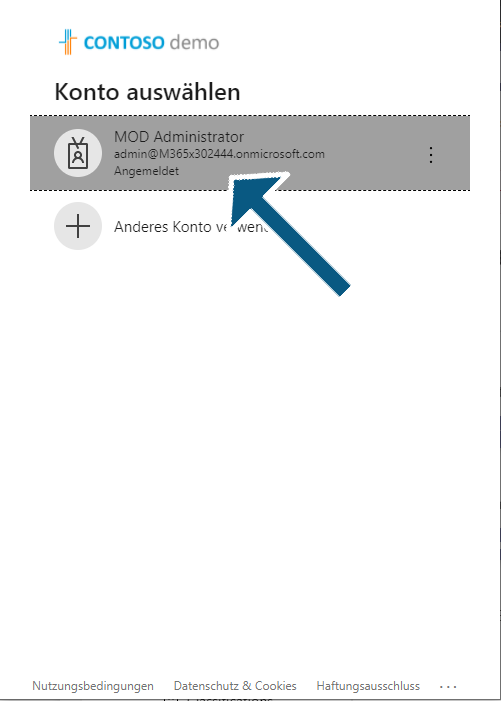
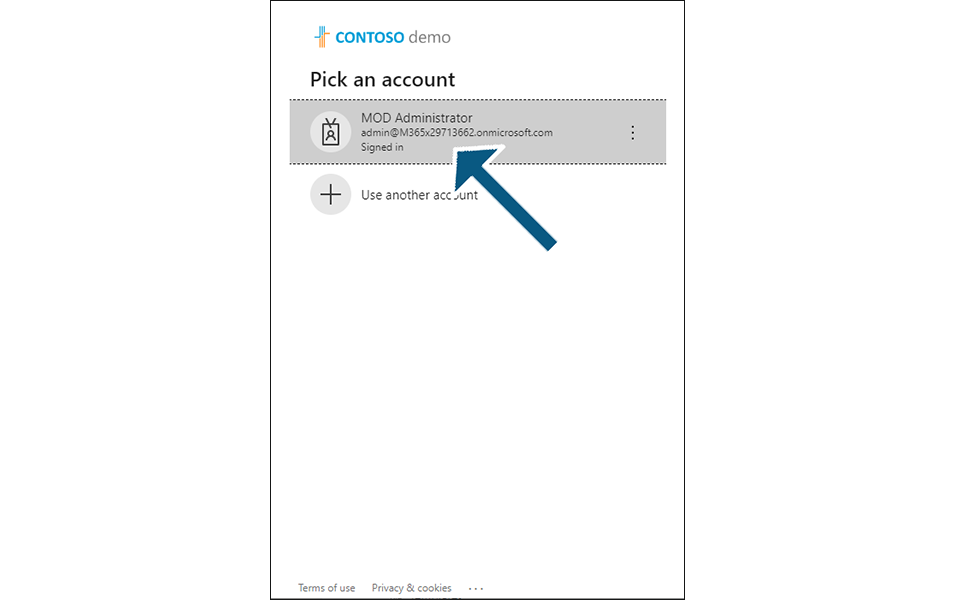
It displays a new window for the user to select the account which needs advanced permission.
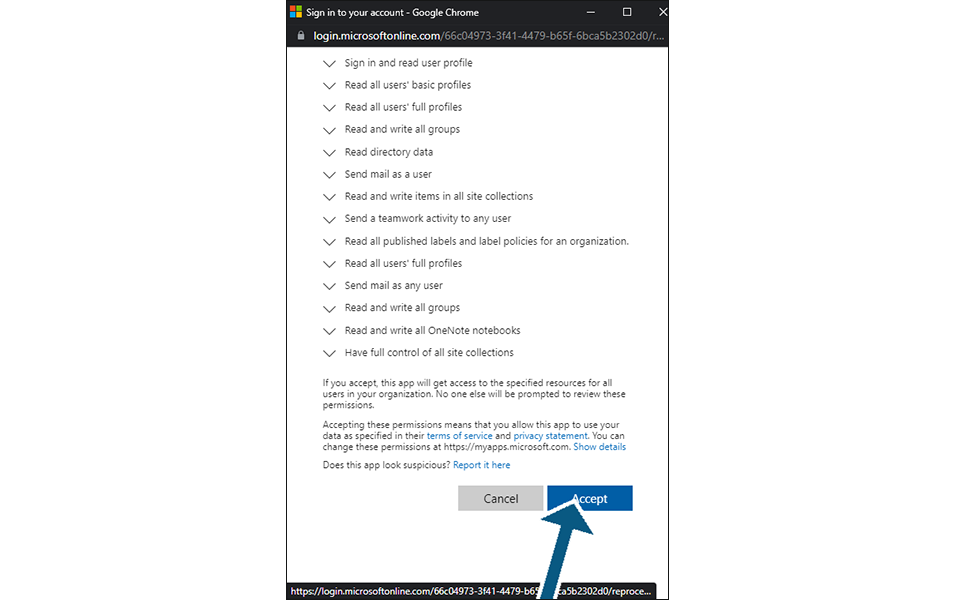
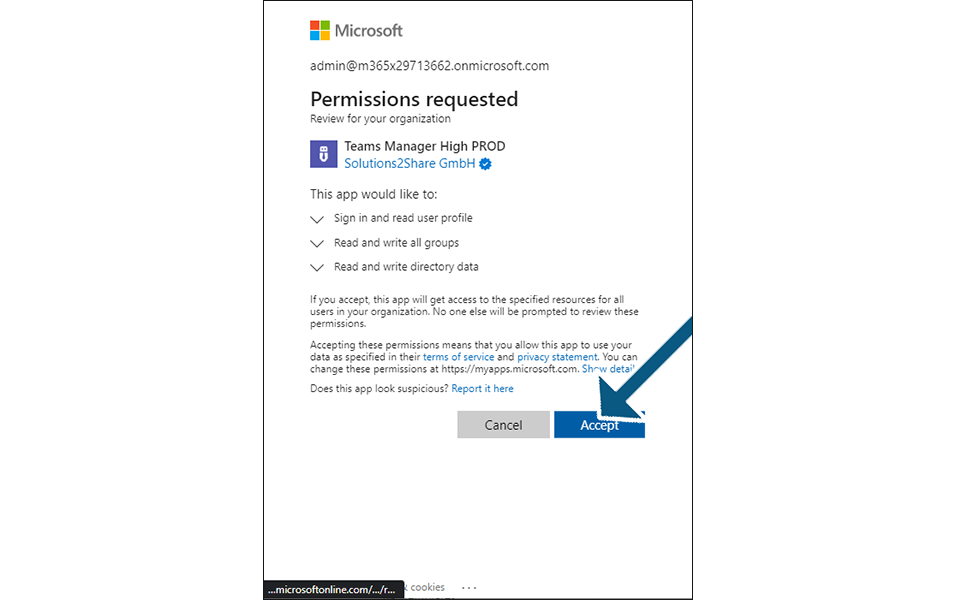
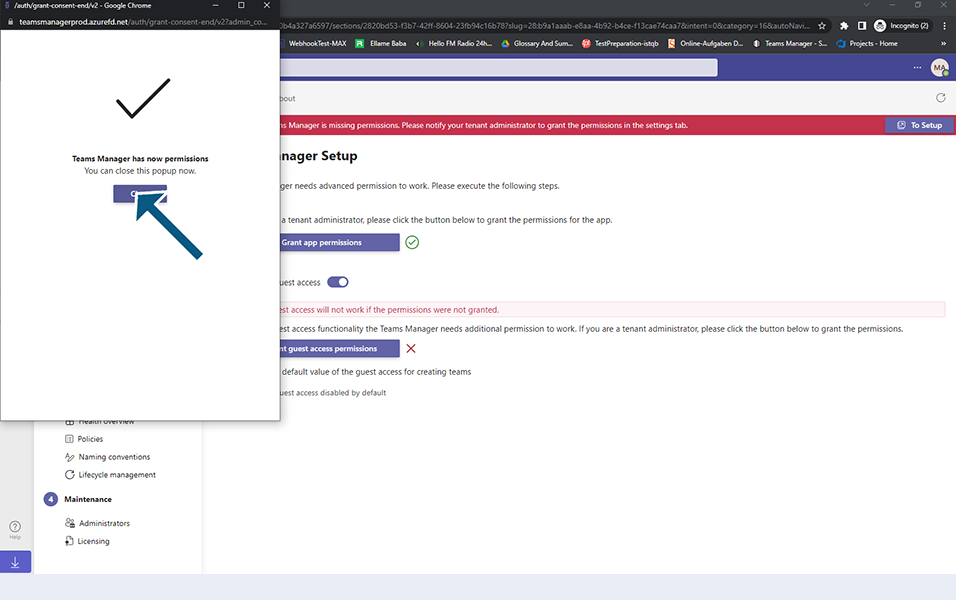
Select the account and Click on button "Accept" and displays a confirmation message that "Teams Manager has now Application Permissions" and user can close the dialog.
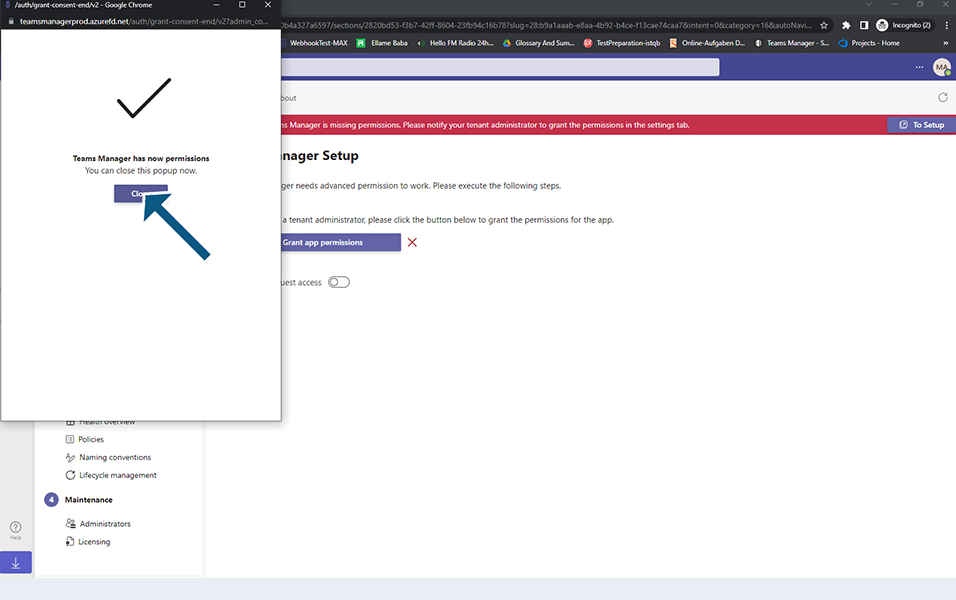
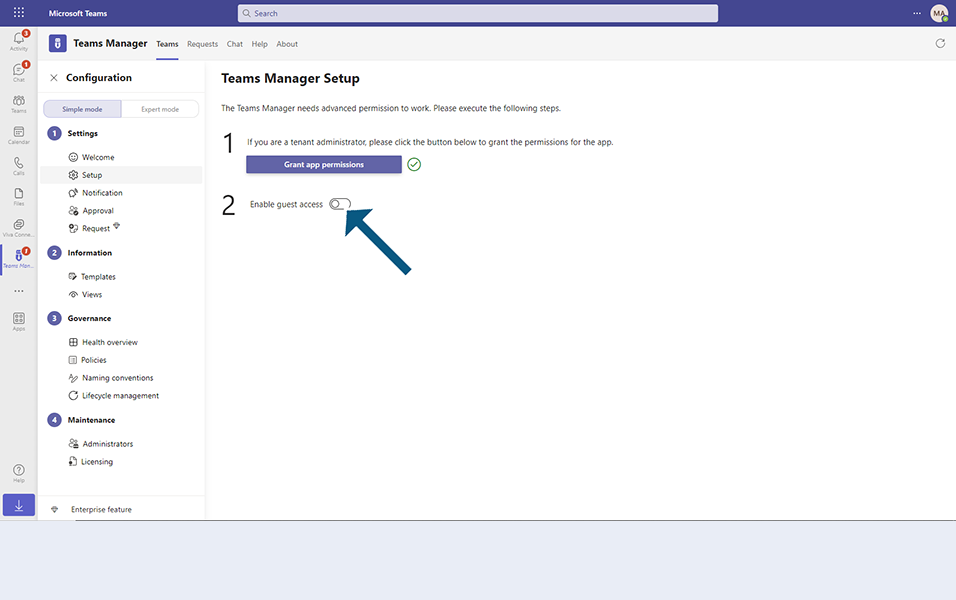
Enable Guest Access:
When user wants to provide guest access, set the toggle Enable Guest access to yes.
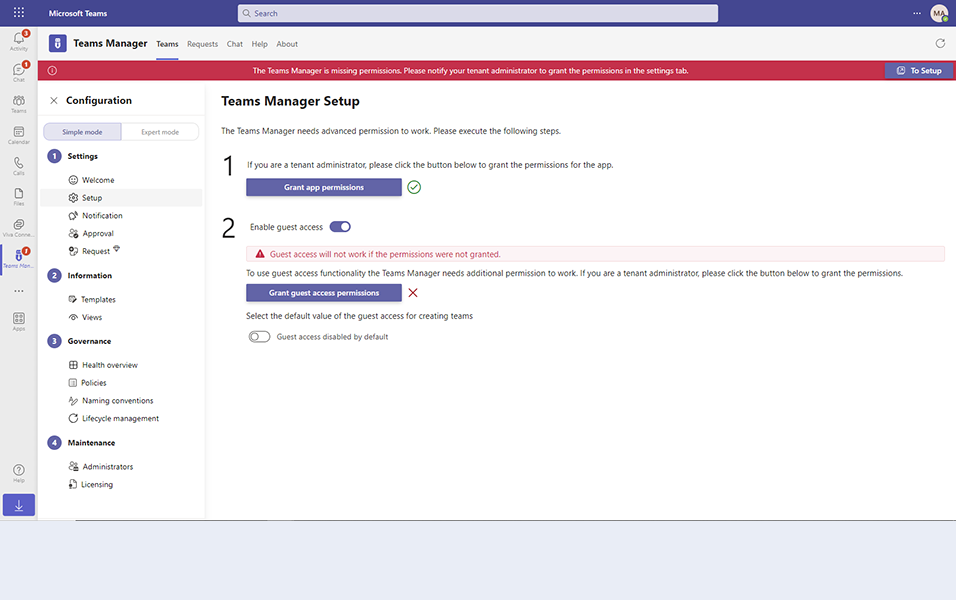
Displays red banner to provide permission.
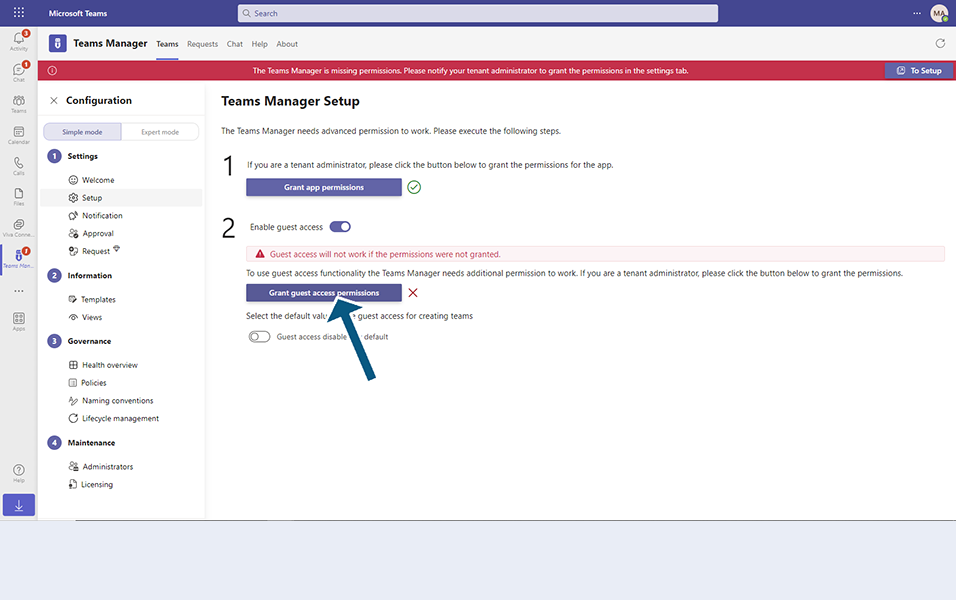
Click on Grant guest access permissions button. Select an account.
Click on Accept button.
Displays that permissions are granted.
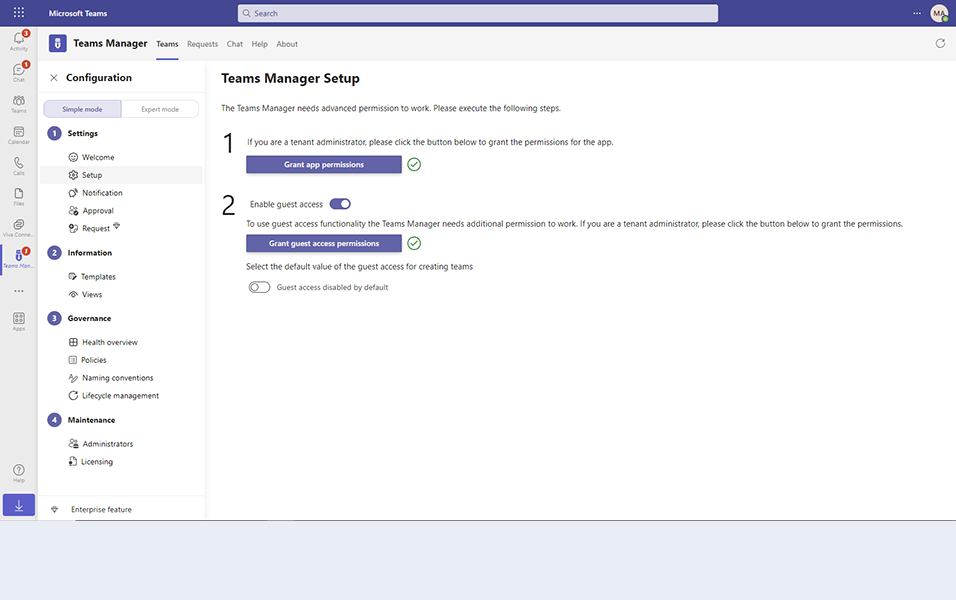
This completes the functionality of providing permissions in Teams Manager for Standard License and Teams Manager is ready to be used with Live data.