Create Private Team when Approval Process enabled
Create Private Teams when Approval Process enabled
Private Teams are created when Owner of the Team wants to have full control. Only Owner and the members that are included while creating the Private Teams will have access for the same.
None of the other user will have access to the Private Teams that are created. Basically Private Teams will not be displayed to users other than the Owners and the Members. Only the Owner whoever has created this Team will be able to invite members to join this Team.
Teams are created by selecting the Templates. All the information which a Template hold will be copied to Teams too.
Show thumbnails for templates is set to Yes, Display content type selection page when creating a request option is set to Yes in Settings-Request.
Mail Nickname is enabled, Description and comments are set as required in Settings-Request.
This section describes the steps for creation of Private Teams in Teams Manager.
These steps are to be executed when Approval Process is enabled. Enable the checkbox under Settings->Setup->Approval->Enable Team approval process.
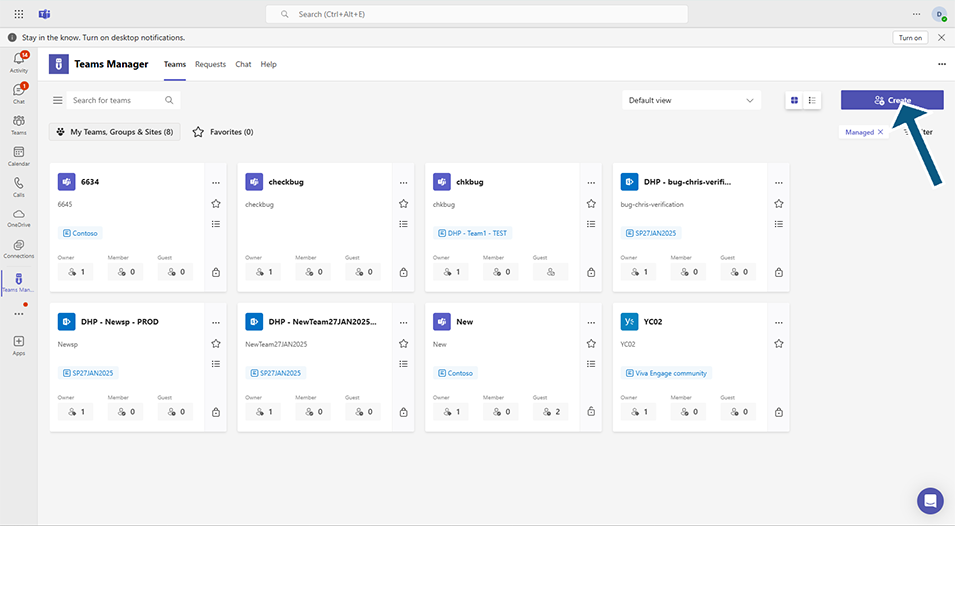
Go to Teams Manager and navigate to tab "Teams".
Click on button "Create".
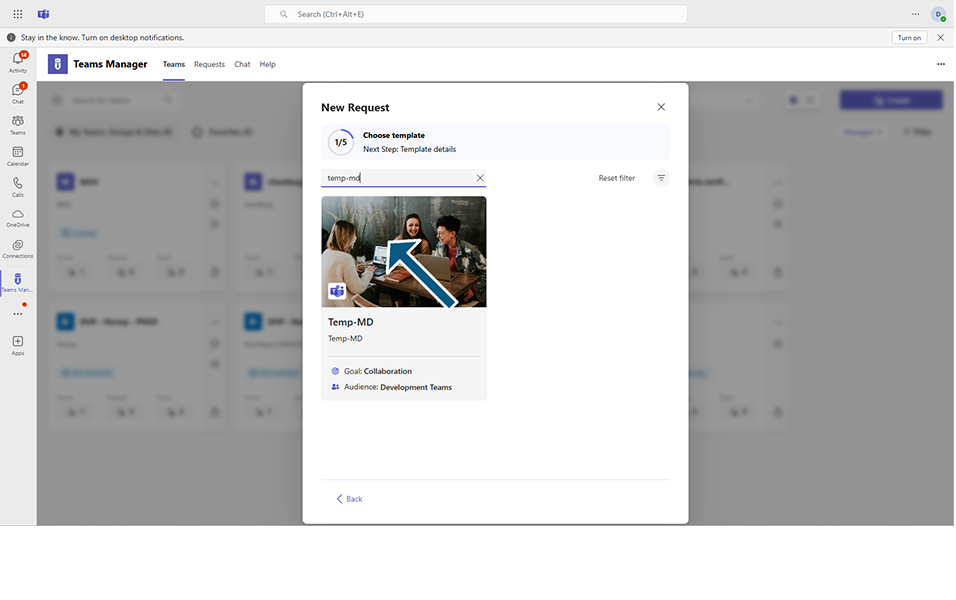
Select content type as Team in new request page.
Select "Temp-MD" from "Which Template do you want to use?" dialog box and click on button "Continue".
NOTE: Template "Temp-MD" is already created using section "Create Template" and is available in Teams Manager. Metadata fields are added to this template.
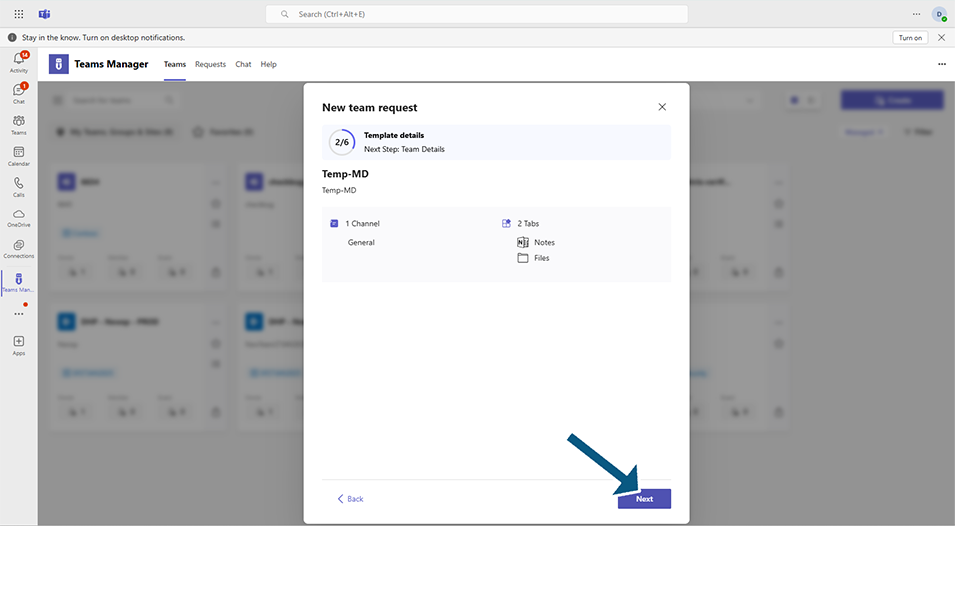
Displays channels, tabs, and apps associated.
Click on Next button.
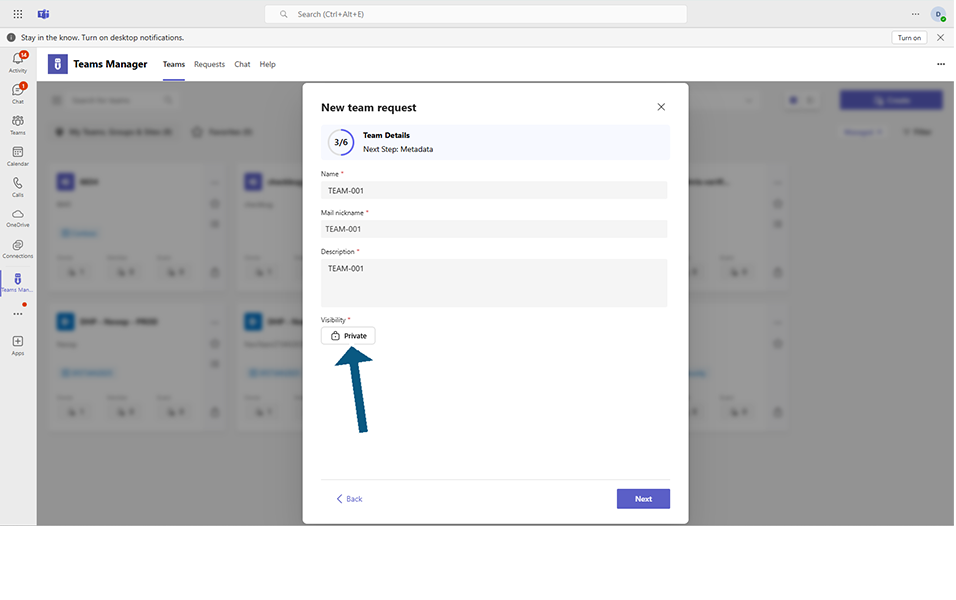
Enter the details related to the Teams in the following fields:
Team Name: This is a text field which accepts alphanumeric characters and special characters between 3 and 100. This is a mandatory field. Enter Team name as "TEAM-001".
Mail Nickename: This is a text field which accepts alphanumeric characters and special characters between 3 and 100. This is a mandatory field. Enter Team name as "TEAM001".
Description: This is a text box which accepts alphanumeric characters and special characters. This accepts around 100 characters and this is not a mandatory field.
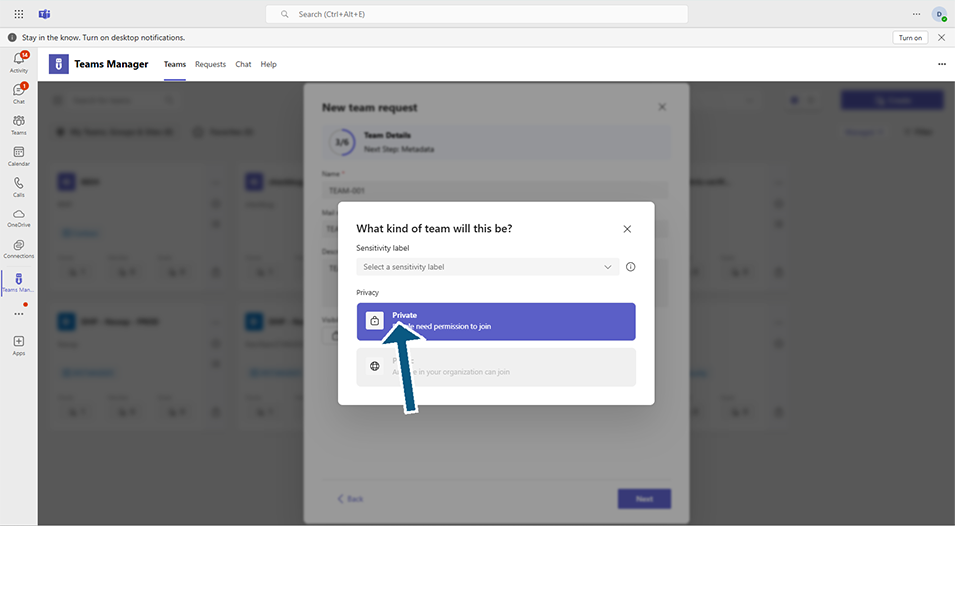
Visibility: Select "Private" or "Public" from Visibility field.
Comment: This is a text box which accepts alphanumeric characters and special characters. This accepts around 100 characters and this is not a mandatory field.
Click on Next button.

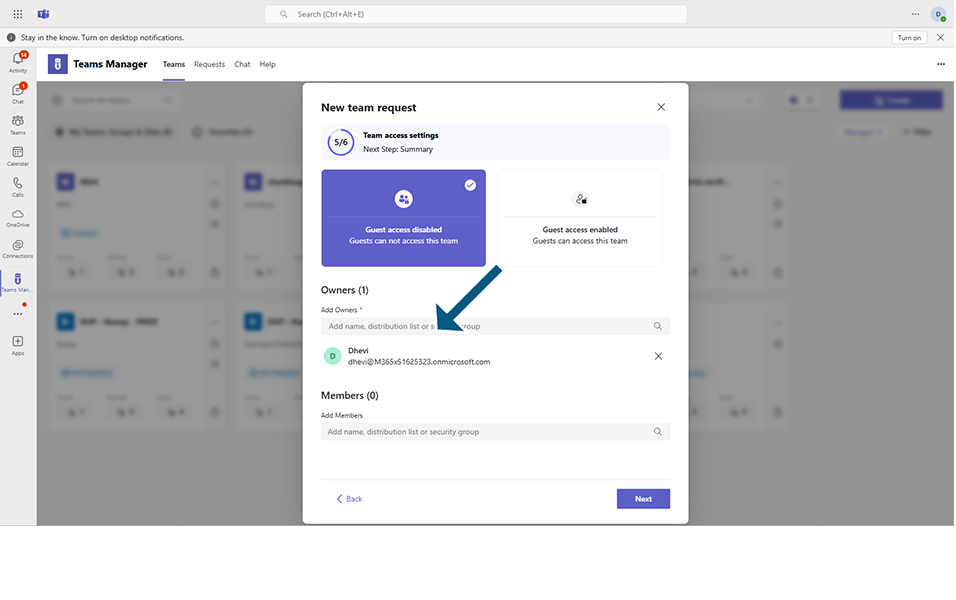
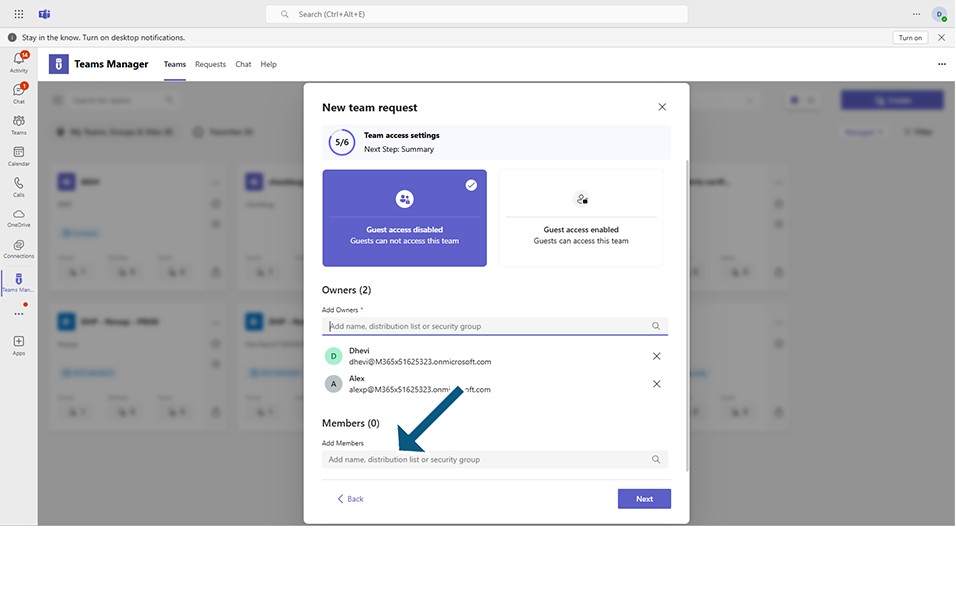
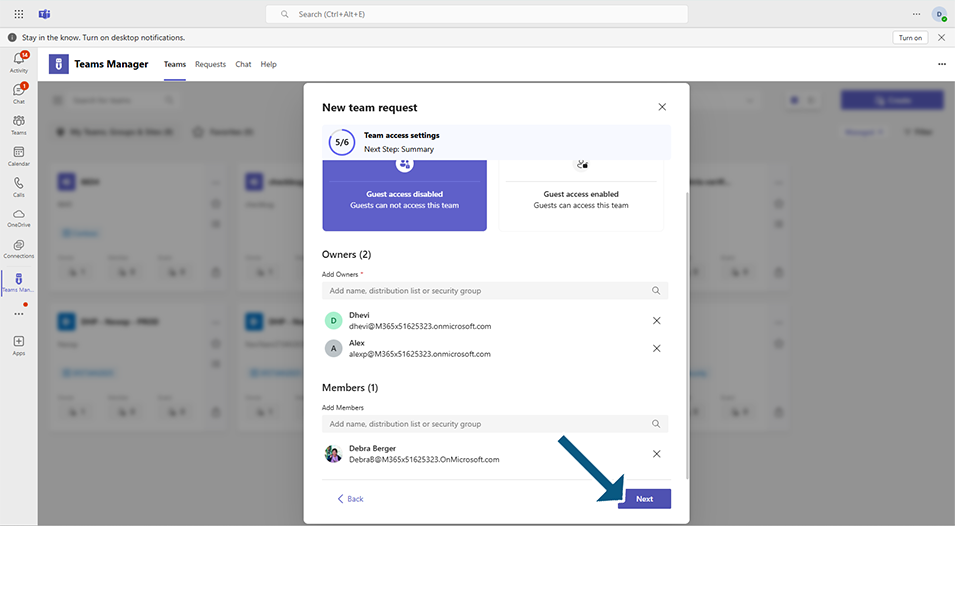
Owner: This is a text field and this field is by default updated with the user currently logged in. This will be the Owner of the Teams. One Owner is mandatory for the Teams, but there are possibilities to add more than one owner for the Teams. This is a mandatory field. By default this field is updated with logged in user.
Member: This is a text field and this field can hold more than one members. This is not a mandatory field. Enter "Alex Wilber" as member.
Note: "Alex Wilber" should be available in active users in Office 365.
Based on settings, user can enable guest or disable guest by selecting the option.
Click on button Next.
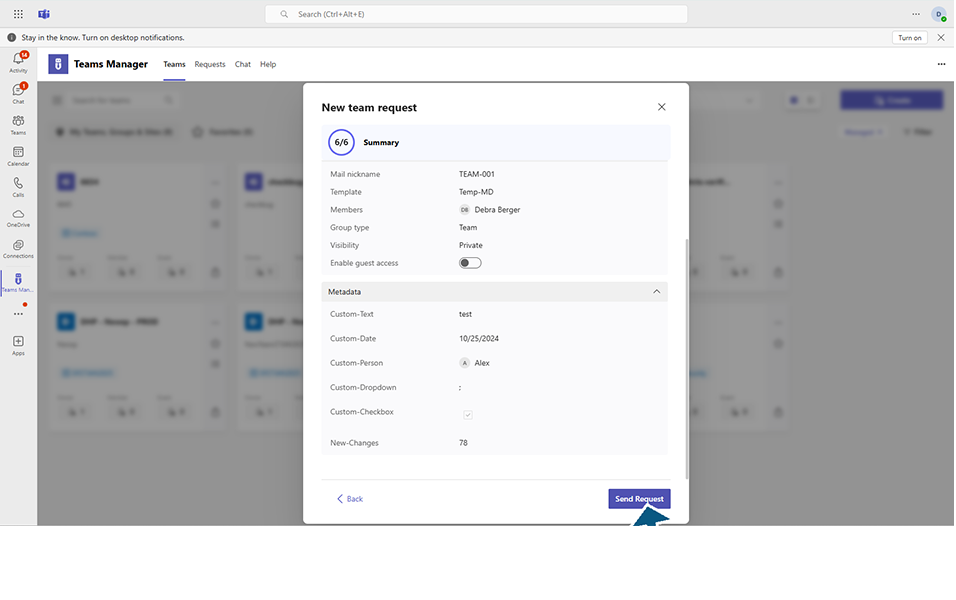
Displays the Teams Summary page with details of Basic Info, Metadata and Policy.
Click on button "Send Request".
Displays "Nice work" in dialog box and displays confirmation message "Successfully created request TEAM-001".".
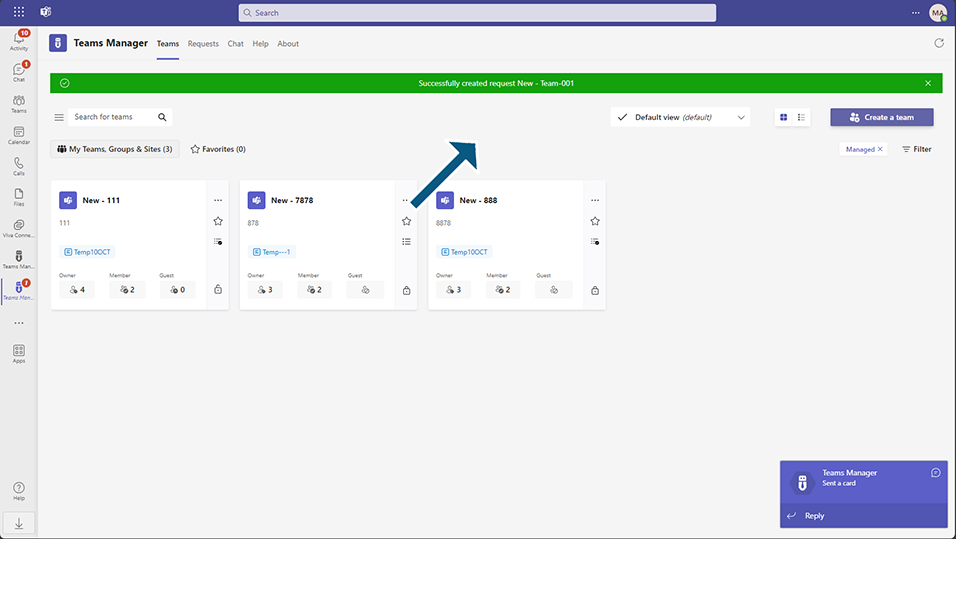
After successful creation of the Private Team, it displays Team under "My Open Requests" section in "Requests" tab.
Click on the tick mark " " in right corner to record "TEAM-001".".
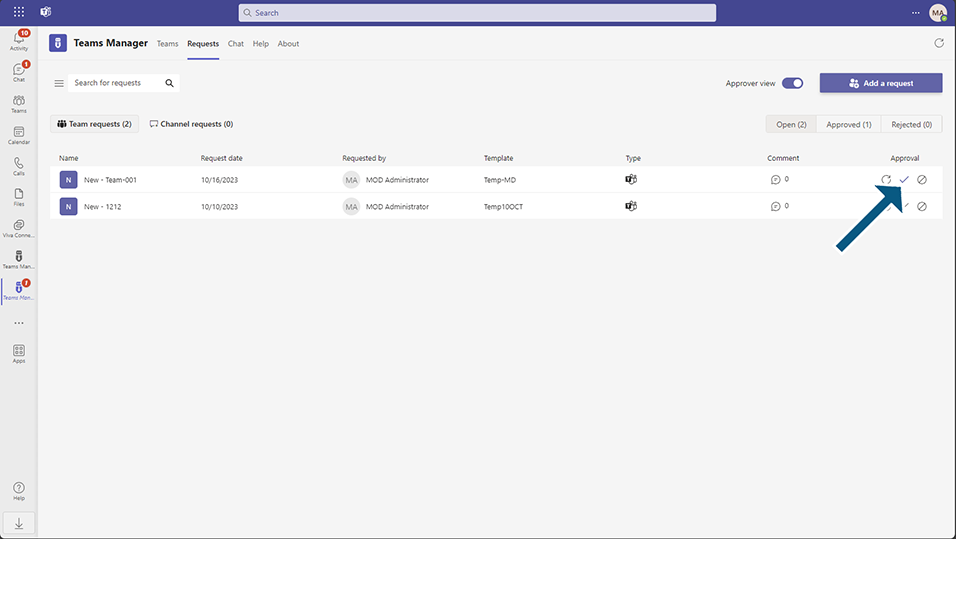
Approve the Request.
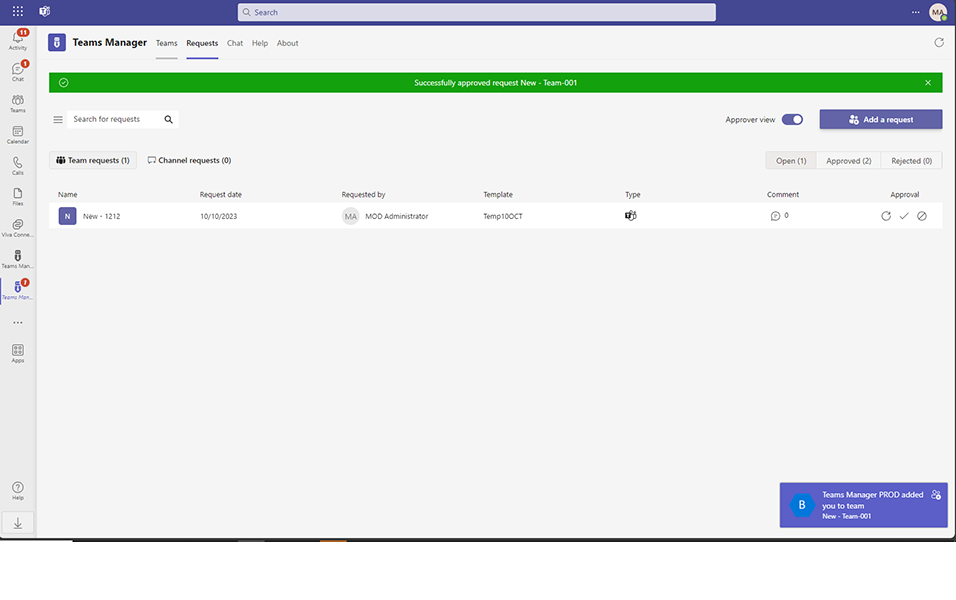
Once the Team is approved, it goes to "Approved Requests" and the Team is also displayed under "My Teams" in Teams tab with following details in tabular form:
Note: It takes up a minute for the Approved Requests to be displayed under My Teams in "Teams" tab.
List View:
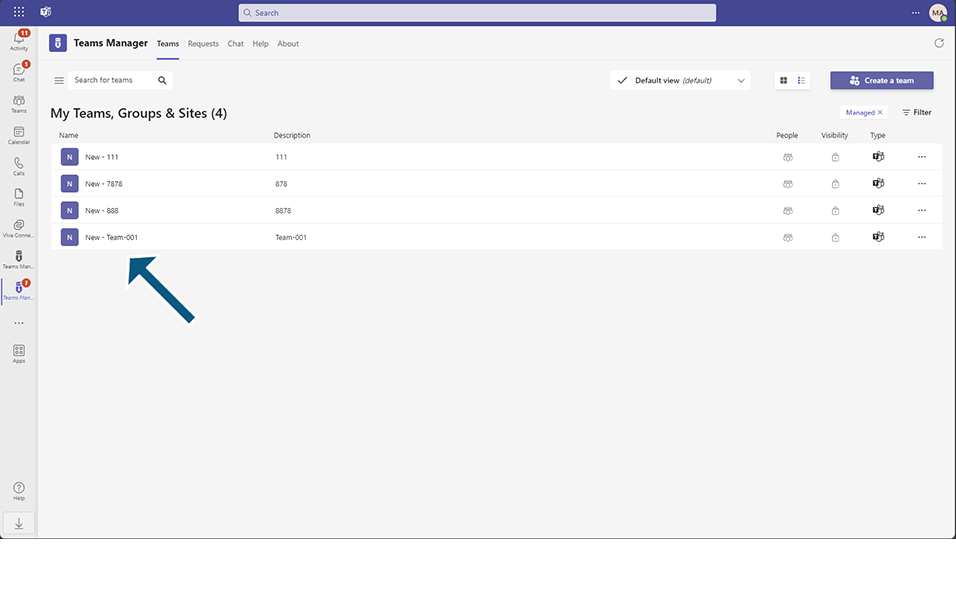
Thus Private Team is created successfully and is displayed under "My Teams".
This completes the functionality on creation of Private Teams in Teams Manager when Approval Process is enabled.