Adding Workspace webpart for workspace type "O365 Group"
Adding Workspace Webpart for Workspace type "O365Group"
This Webpart gives information of the workspace that are associated to the templates. This webpart can be added in Templates and also in workspace.
This section describes the steps for adding the Workspace Webpart for workspace of type "Groups" in Collaboration Manager 365.
1. Go to Workspace page of Collaboration Manager 365 and select the workspace "Workspace555" from Workspace list view and click on link "URL".
Note: Workspace "Workspace555" should be already available in the Workspace list in Collaboration Manager 365.

2. Click on link "Edit" in the right corner.

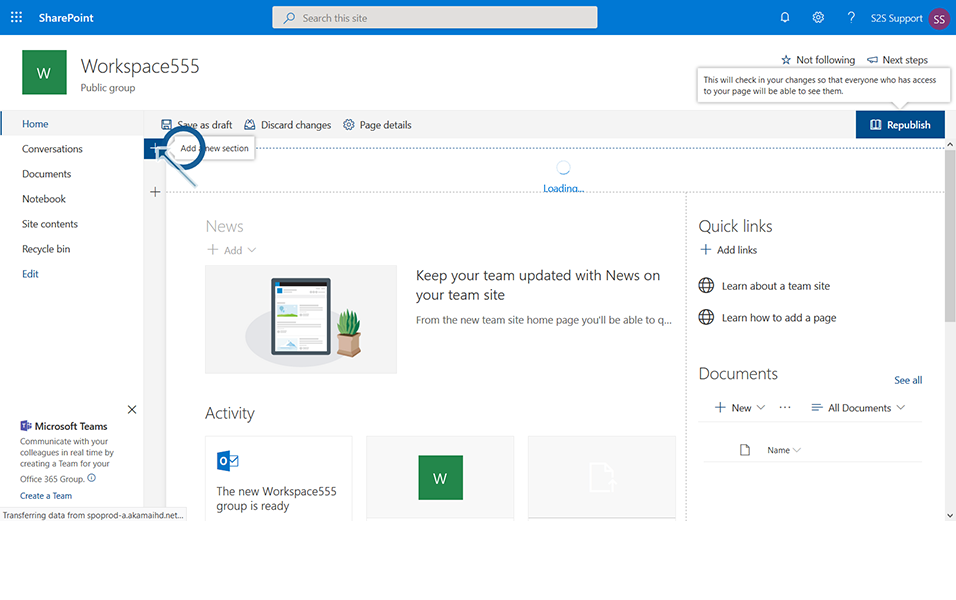
3. Click on icon "+" in left side of the page.
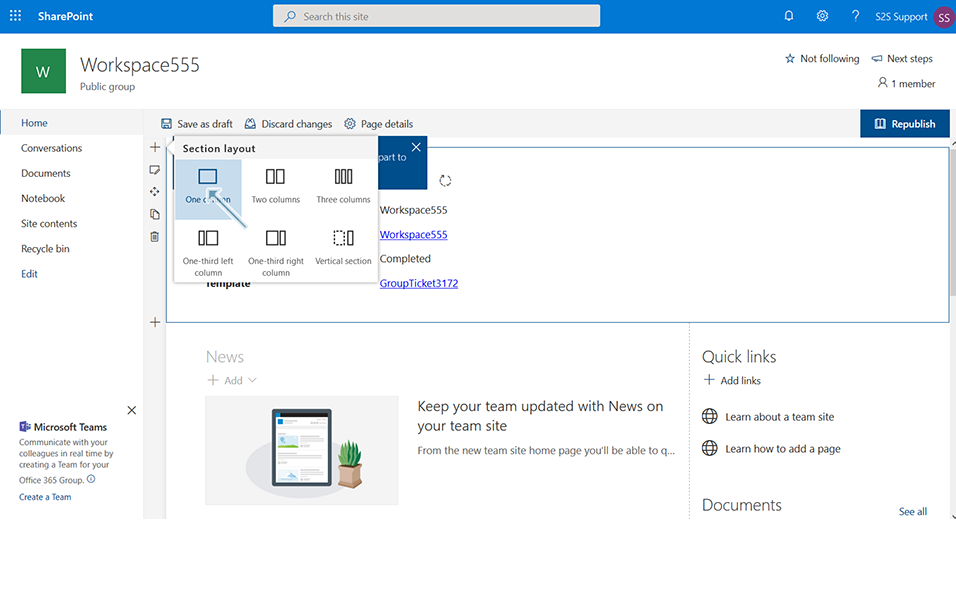
4. Select the option "One Column" from section layout.
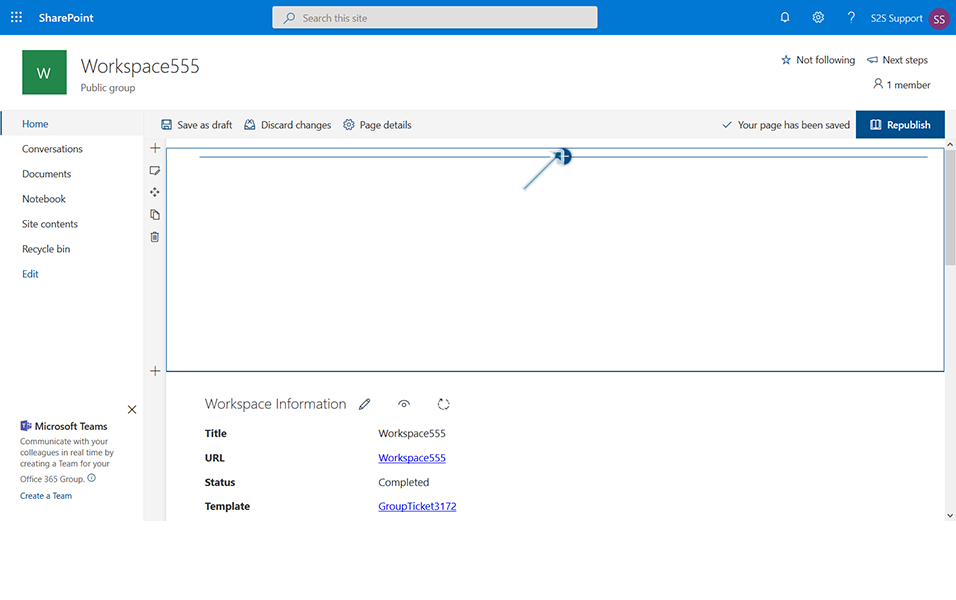
5. Click on icon "+" displayed in the center of the page that denotes "Add a new web part in column one".
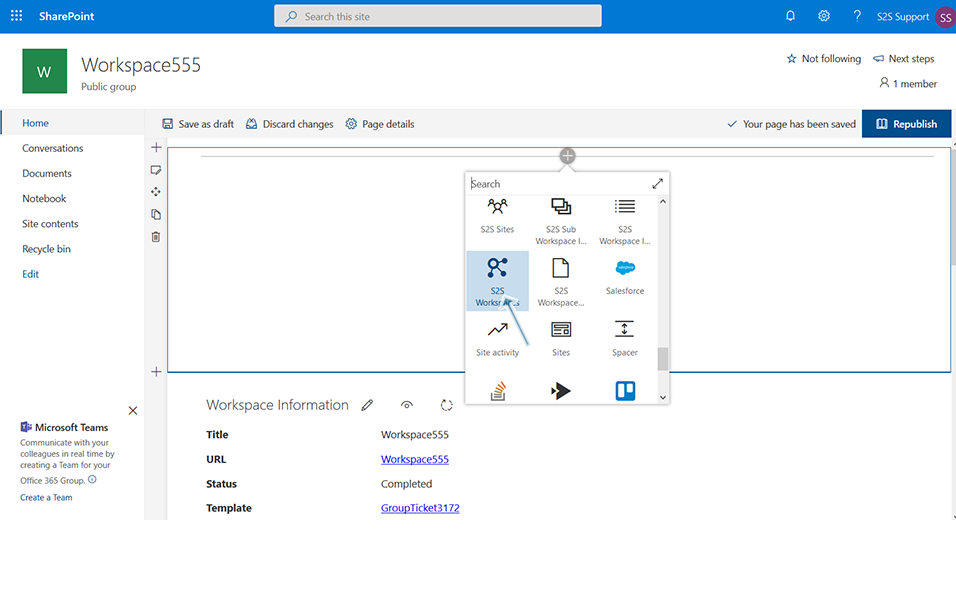
6. Enter "S2S" in search field and click on link "S2S Workspaces".
7. Click on pencil icon and click on link "Edit Web part".
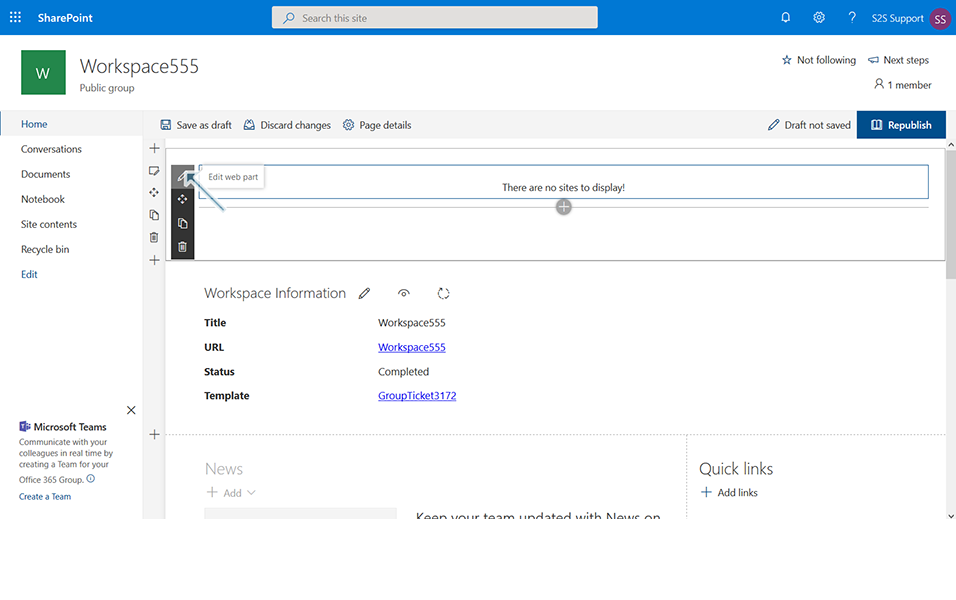
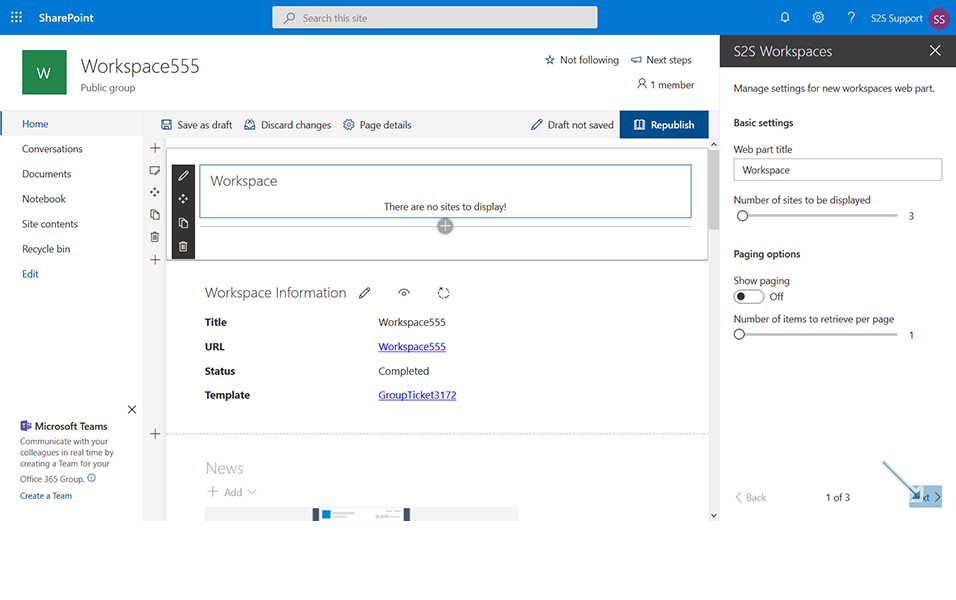
8. Enter the following details in the "S2S Workspace" displayed in the right panel of the screen.
Basic Settings:
8.a. Field "Web part Title": This is the text field and user can enter any value. Enter "Workspace".
8.b. Field: Number of sites to be displayed: This is the slider wherein user can select the number of sites to be displayed which can vary from 1 till 100. Update the value as "3" by sliding to the right.
8.c. Field: "Show Paging": This is a toggle field wherein user can set the paging option to Yes or No.
If user sets the paging option to Yes, records are shown in separate page based on setting updated in field "Number of items to retrieve per page". For example, if paging option is set to yes and the "Number of items to retrieve per page" is set to 5,5 records are updated in each page.
If the paging option is set to No, all records are displayed in same page.
Set the paging option to "NO"
8.d. Field "Number of Items to retrieve per page": This is the slider wherein user can select the number of items to be displayed per page. Fields "Show Paging" and " Number of items to retrieve per page" is inter-dependent on each other.
Update the value as "1" by sliding to the right.
Click on link "Next" and it displays the next page.
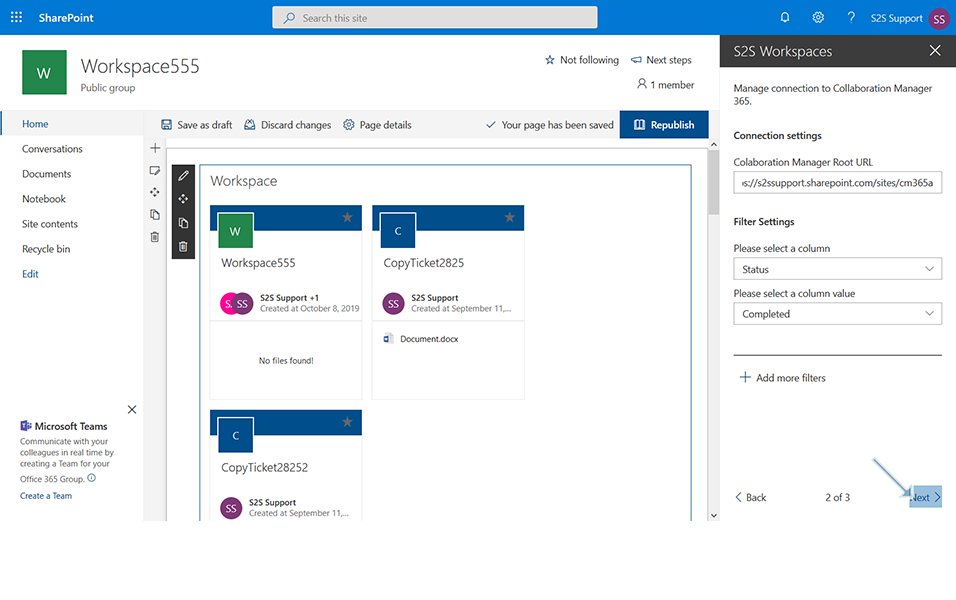
9. Enter the following details in the "Connection Settings" displayed in the right panel of the screen.
Connection Settings:
9.a. "Collaboration Manager Root URL": This is the text field and should be updated with the root URL of the collaboration Manager 365. Only after update of the Collaboration Manager Root URL, the field "Filter Settings" is activated.
Enter the value as:
"https://example.sharepoint.com/sites/CM365"
9.b. Field "Please Select a Column": This is a drop down field where user can filter the columns from the Workspace. For example if user selects the column as "Template" and selects the value as for example "Template001" from "Please select a column value", all the workspace that have been associated to the template "Template001" is displayed in the Workspace Webpart.
Select the value from the drop down as "Status".
Note: User can select any column available from the drop down.
9.c. Field "Please Select a Column value" : This is a drop down field where user can select the value of the selected column.
Select the value from the "Please Select a column Value" as "Completed".
User can click on "Add more filters" ![]() and can further filter on the workspace columns.
and can further filter on the workspace columns.
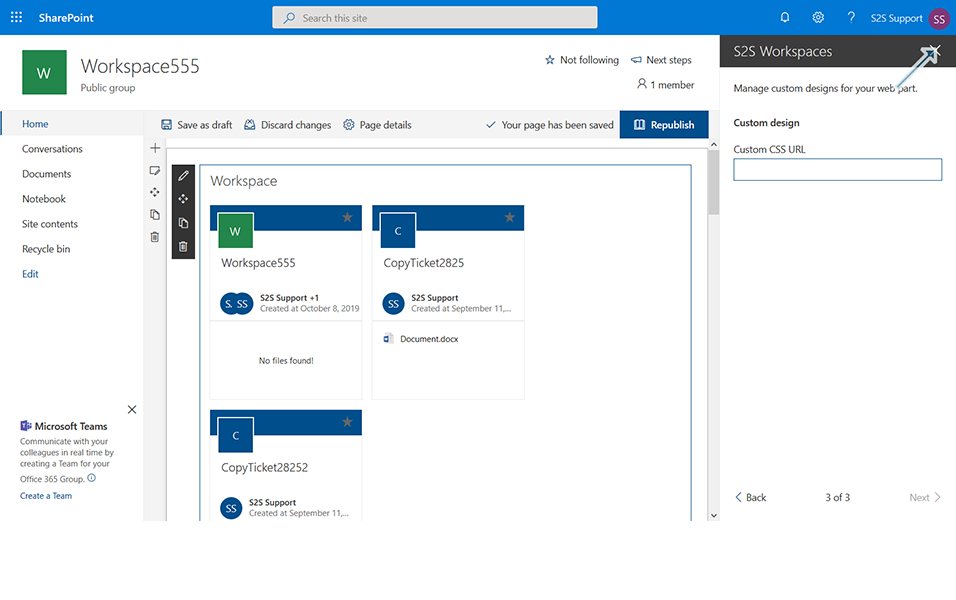
10. Click on link "Next" and user is allowed to configure "Custom Design" for the webpart.
Note: This can be skipped.
11. Click on icon "X" in S2S Workspaces to close the settings.
12. Click on button "Republish" and confirmation message "Republished" is displayed to the user.
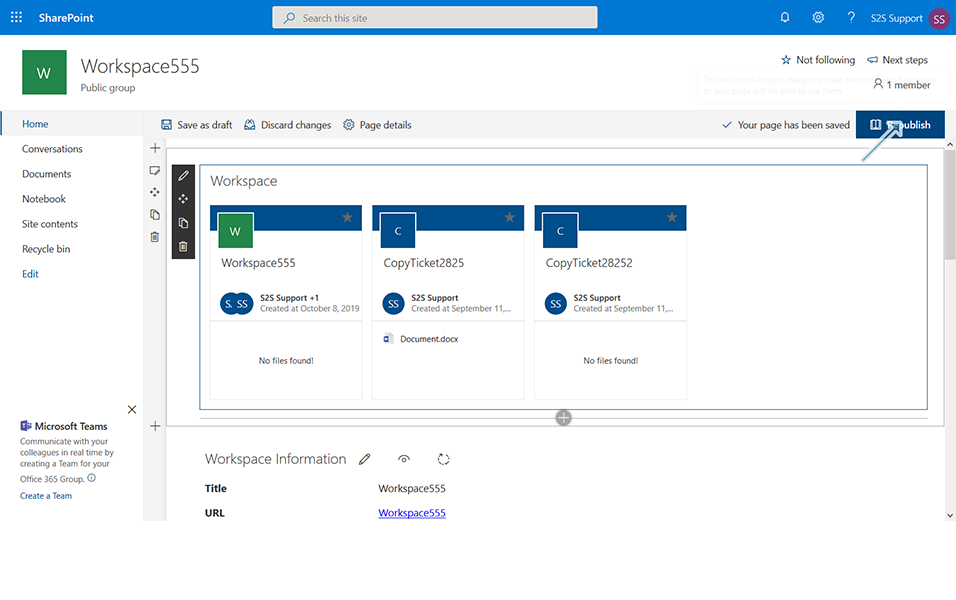
13. Workspace webpart section is displayed in the Homepage with the workspaces that has the status as "Completed".
Note: It displays the total of 3 records because of the field "Number of sites to be displayed" is updated as 3 while configuring the webpart.
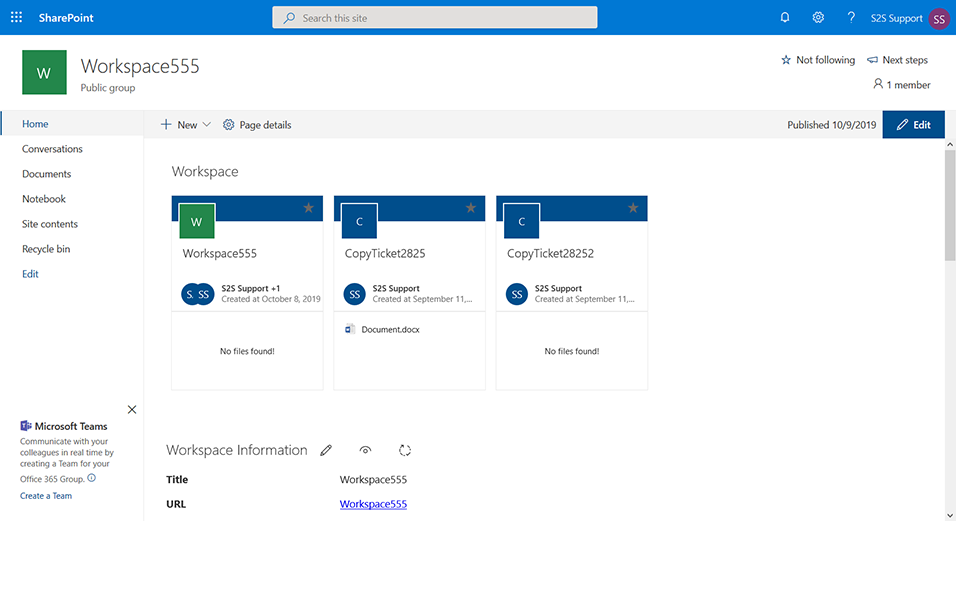
This completes the functionality of adding the Workspace Webpart for Workspace "O365Groups". Steps for adding the Workspaces Webpart to the Templates remain same other than selecting the Template URL from Templates list view other than Workspaces URL from workspaces list view.