Documentation
1.Short Description
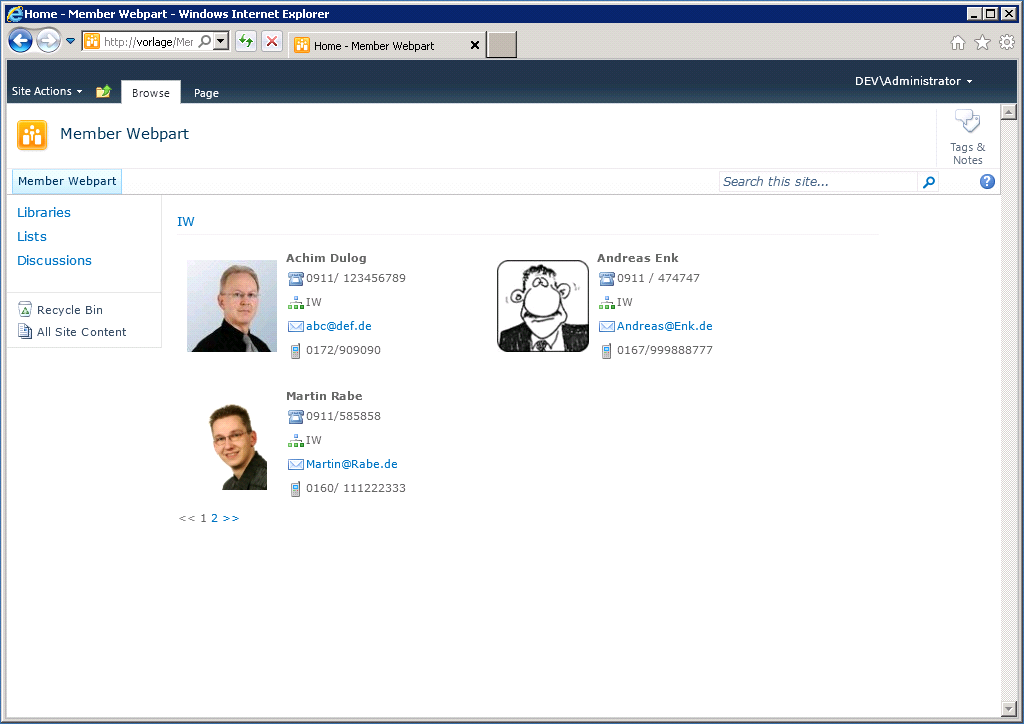
The MemberWebpart allows you to display user information from SharePoint groups centrally onto one page.
This allows you a simplified cooperationsince you have all the necessary information continuous present.
It standartly displayes an image,a telephone number,and email address of the user. However, the MemberWebpart can be adapted to each request in the web part settings.
Basically the data for User Profile service are used.
The MemberWebpart can be used, among other things, to map project members in a project room, to display the workspace manager on the home page of a workspace or to list SharePoint managers on the home page.
2.Configuration
The basis for a correct implementation is a functioning User Profiles Service. This will be discussed further in the installation part.
If the MemberWebpart has been correctly installed and licensed, the Solution2Share -Webpart must be activated on site collection level ![]()
The MemberWebpart is now active and can be placed on any SharePoint page now.
In the edit mode of the page, the Web Part can be found as a "Member" under the Main Point "Solution2Share".
Once you have placed the Web Part all users should appear on the website inside the Web Part.
3.Member Settings
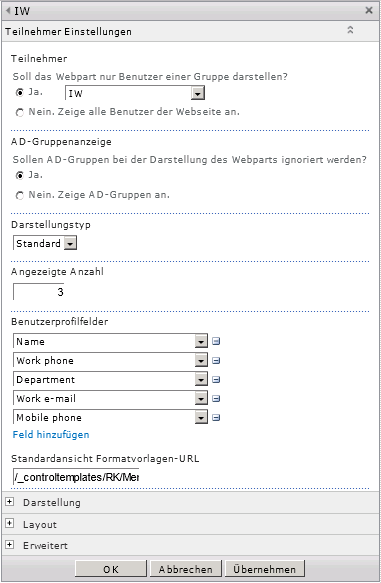
In the MemberWebpart Settings you can make some adjustments so it fits the requirements.
Participants: With this attribute you can establish SharePoint groups, to be displayed in the Web Part. If all users are mapped to the page, select "No. View all users on the website. "
AD - group indication:The MemberWebpart also allows you to display AD groups. Therefor select "No. Showing AD groups. ". Do you want to suppress the display of the AD groups, select "Yes.".
representation type: The MemberWebpart offers you in addition to the fine art output a list view. For the list view, select "list", otherwise you leave this field to "Standard".
display number: Here you can specify how many users appear on one side of the web part.
User profile fields: With this option you can specify which properties of the user should be displayed in the Web Part.You can remove fields using the "-" button or add fields to the "Add Field" button.The selection here refers to the fields available in the User Profile Service. With the drop down menu you can select the desired attribute.If you like to add an attribute that is not listed, then the User Profile Service for the respective fields must be edited. Standard view format template URL: Would you like to replace an existing Template for a custom template, you can incorporate an own CSS file with the help of the text field; more in chapter styles.
4.Functioning
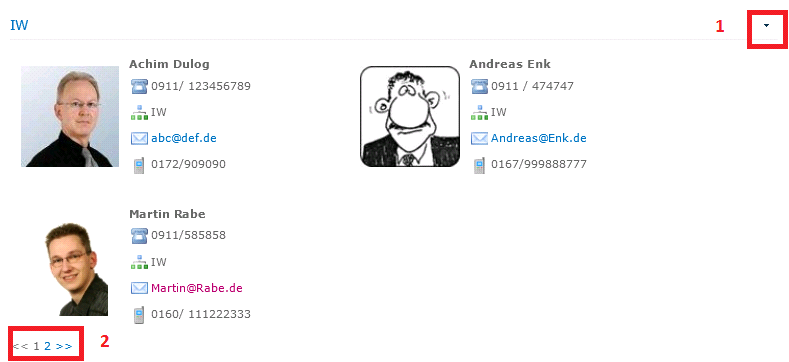
1: If you have the appropriate authorization you can adjust the WebPart according to your wishes, with the help of the dropdown menu.
2: The pager allows you to change sites "<<" and ">>" or to jump to the corresponding page number (here: Skip to the page by clicking on "2").
The display of the user attributes can be adapted dynamically.
Furthermore, the display is available in a list view.
5.Format Tamplates
As described in the previous chapter the MemberWebpart includes the opportunity to make your own adjustments to the underlying sheet style.
However, this is only recommended for advanced SharePoint administrators. Should you have any questions in this regard, you can call the Solution2Share team.
Create CSS blocks for the specified fields according to this scheme.
Save your custom CSS within sharepoint and then reference it in the member settings under standard view format template URL the location of the CSS.